
Keeping your dog’s teeth clean can feel like a daily challenge.
I’ve tried brushing, dental chews, and even some store-bought treats—but nothing compares to making something fresh, natural, and effective at home.
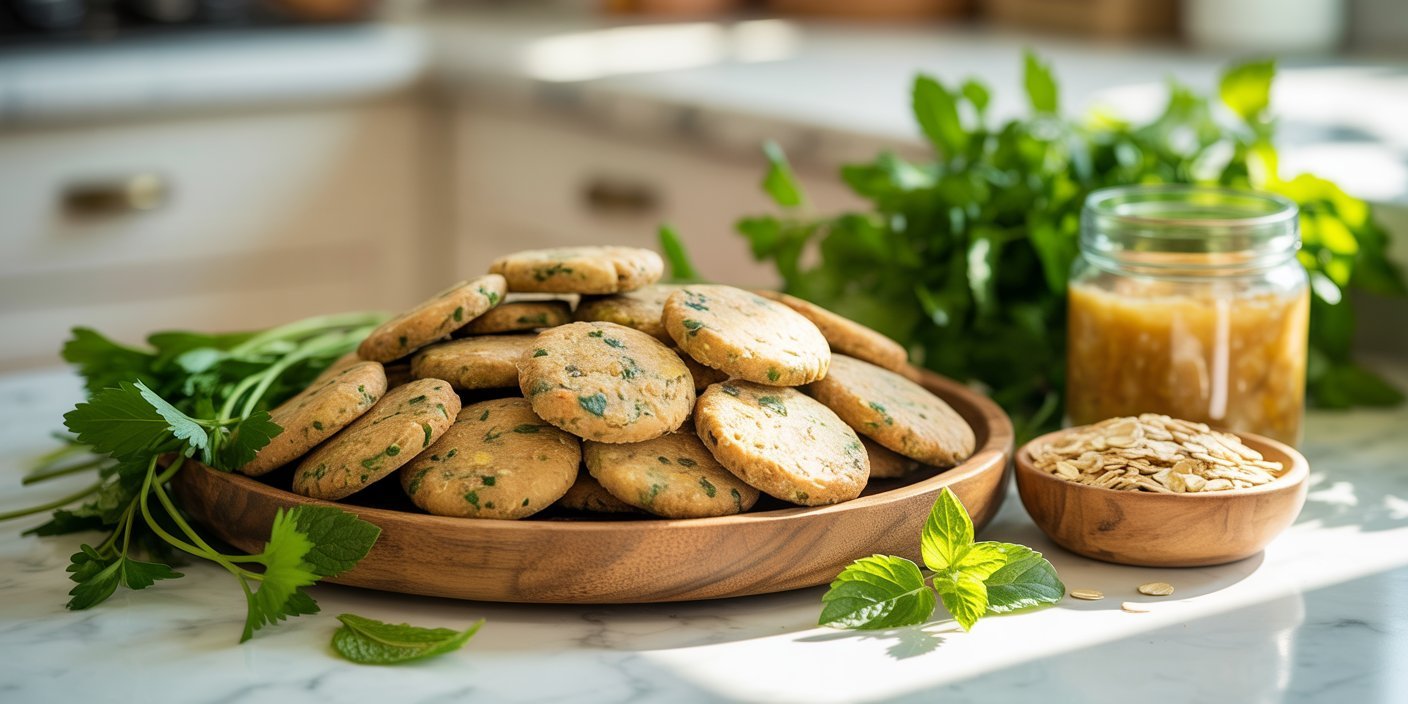
That’s why I fell in love with these parsley and mint teeth-cleaner dog treats.
Not only do they help freshen breath, but they also support healthy gums and are made with ingredients you can trust.

I love whipping up a batch in the kitchen while my dog watches, tail wagging, knowing I’m giving them a treat that’s both delicious and good for their dental health.
In this post, I’ll share my exact recipe, step-by-step instructions, and tips to make these treats easy, safe, and fun—so you can skip the chemical-laden dental chews and make something your dog actually loves.
Affiliate Disclaimer: Some links in this post are affiliate links. I may earn a small commission at no extra cost to you.
AMAZON SHOPPING LIST (HOMEMADE DOG DENTAL TREAT ESSENTIALS)
- Mini Food Processor / Chopper
Finely chops parsley and mint for smooth, evenly mixed treats
BUY NOW ON AMAZON - Silicone Baking Mat
Prevents sticking and helps treats bake evenly
BUY NOW ON AMAZON - Mixing Bowl Set
Perfect for combining healthy ingredients quickly
BUY NOW ON AMAZON - Dog Bone Cookie Cutter Set
Shape treats into fun, bite-size dental chews
BUY NOW ON AMAZON - Airtight Treat Storage Container
Keeps homemade dog treats fresh and crunchy longer
BUY NOW ON AMAZON
Why Your Dog Will Love These Treats
When I first started looking for ways to keep my dog’s teeth healthy, I realized most commercial dental chews were either loaded with unnecessary fillers or artificial flavors.
That’s when I decided to create something natural, effective, and tasty—and these parsley and mint teeth-cleaner treats hit the sweet spot. Here’s why they’ve become a favorite in my kitchen:
- Freshens Breath Naturally: The combination of parsley and mint isn’t just for humans! Parsley helps neutralize bad odors, while mint adds a refreshing touch, leaving your dog’s breath noticeably fresher after just a few treats.
- Supports Healthy Teeth and Gums: Parsley contains natural antioxidants, and both herbs have properties that can help reduce plaque buildup. While they’re not a replacement for brushing, I feel confident giving my dog a treat that contributes to better oral hygiene.
- Safe, Wholesome Ingredients: Unlike many store-bought options that contain sugar, artificial flavoring, or preservatives, these treats are made from simple, dog-safe ingredients. I can see exactly what’s going into them, and that peace of mind makes every bite worth it.
- Quick and Easy to Make: From start to finish, I can whip up a batch in under 20 minutes, no baking required. This is perfect for busy days or last-minute rewards for training or good behavior.
- Customizable for Your Dog: I like experimenting with a few extras depending on what I have on hand. Sometimes I add a small sprinkle of coconut flour for texture, or a touch of unsweetened applesauce to make the dough easier to shape. My dog seems to love every variation!
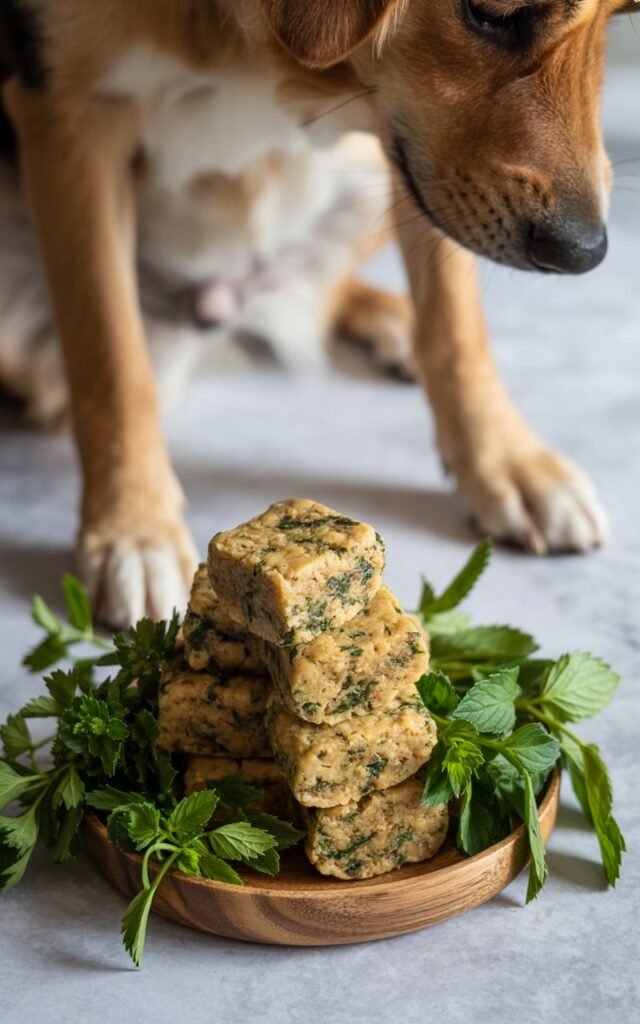
- Bonding Experience: Honestly, one of my favorite parts of making these treats is the bonding time it creates. Watching my dog eagerly sniff the herbs, follow me around the kitchen, and finally enjoy a treat I made just for them is incredibly rewarding.
These parsley and mint teeth-cleaner treats aren’t just snacks—they’re a fun, healthy, and effective way to care for your dog.
For me, it’s satisfying knowing that every treat is supporting dental health, freshening breath, and making my dog happy at the same time.
Ingredients You’ll Need
I’ve learned that keeping the ingredient list simple, safe, and effective is key for teeth-cleaner treats.
Here’s what I use for a small batch (about 20–25 treats):
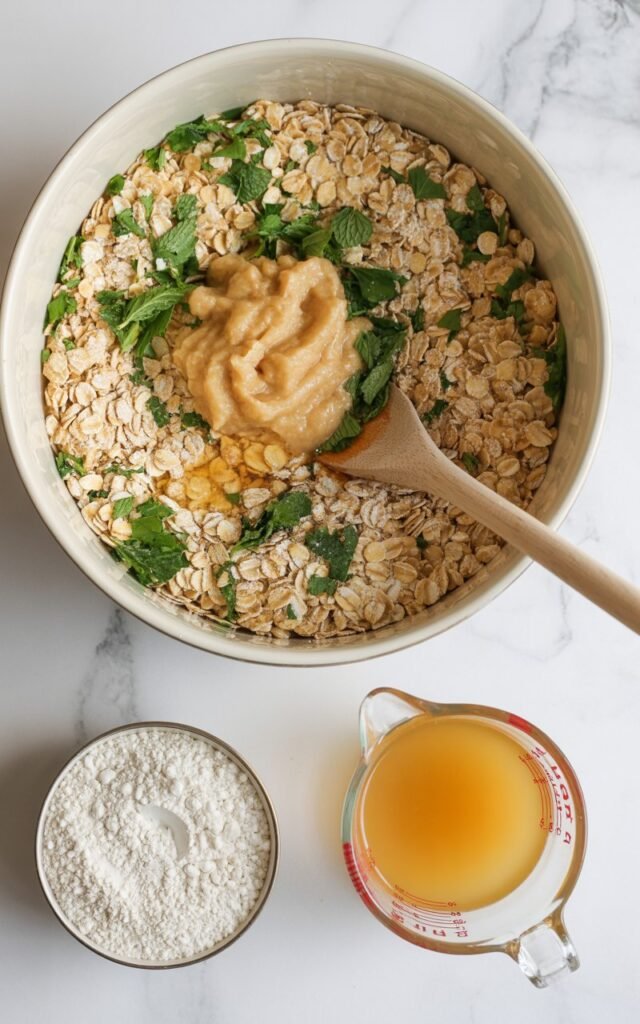
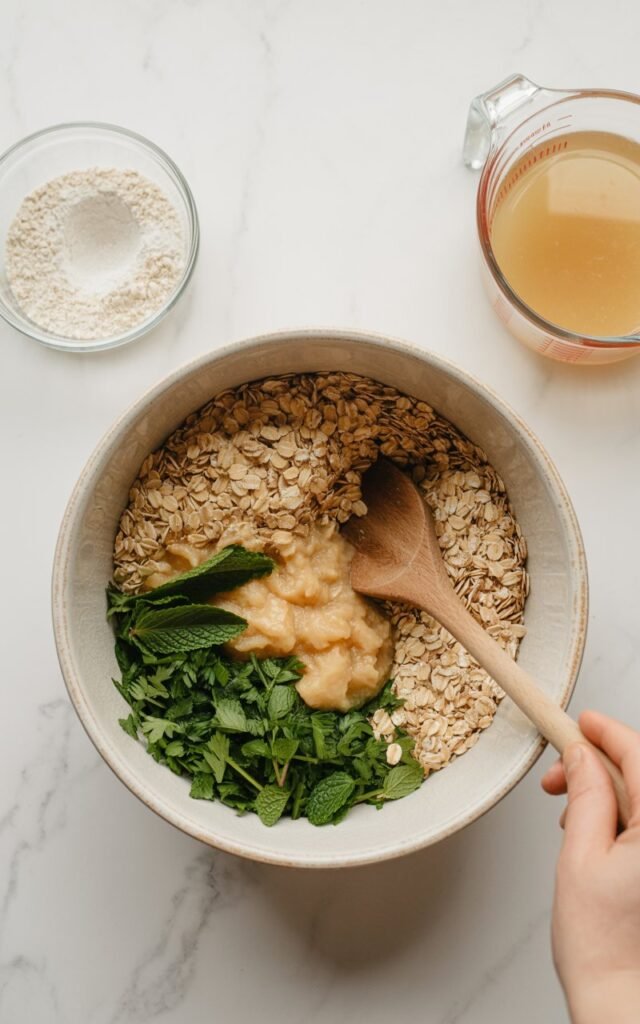
- 1 cup rolled oats – Provides a firm base and gentle texture that helps scrape the teeth slightly as your dog chews.
- ½ cup fresh parsley leaves – Naturally freshens breath and contains antioxidants that support oral health.
- ½ cup fresh mint leaves – Adds a pleasant, breath-freshening flavor dogs tend to love.
- ¼ cup unsweetened applesauce or mashed banana – Helps bind the dough while adding a touch of natural sweetness.
- 1 tablespoon coconut flour (optional) – Gives structure if the mixture feels too sticky.
- 1–2 tablespoons water or low-sodium chicken broth – Helps adjust consistency if needed.
Tip: Always use fresh herbs. Dried parsley and mint work in a pinch, but the flavor and freshness won’t be as strong. I also make sure no toxic herbs or additives are included—safety first!
Step-by-Step Instructions
I like making these treats hands-on and fun, turning the process into a mini kitchen activity with my dog excitedly watching.
- Prepare the Herbs
Wash the parsley and mint thoroughly, removing any stems. Chop them finely or pulse briefly in a food processor for even distribution. I like doing this step while my dog sniffs around—it’s part of the fun! - Mix Dry Ingredients
In a large bowl, combine the rolled oats and optional coconut flour. Stir until evenly mixed. - Add Wet Ingredients
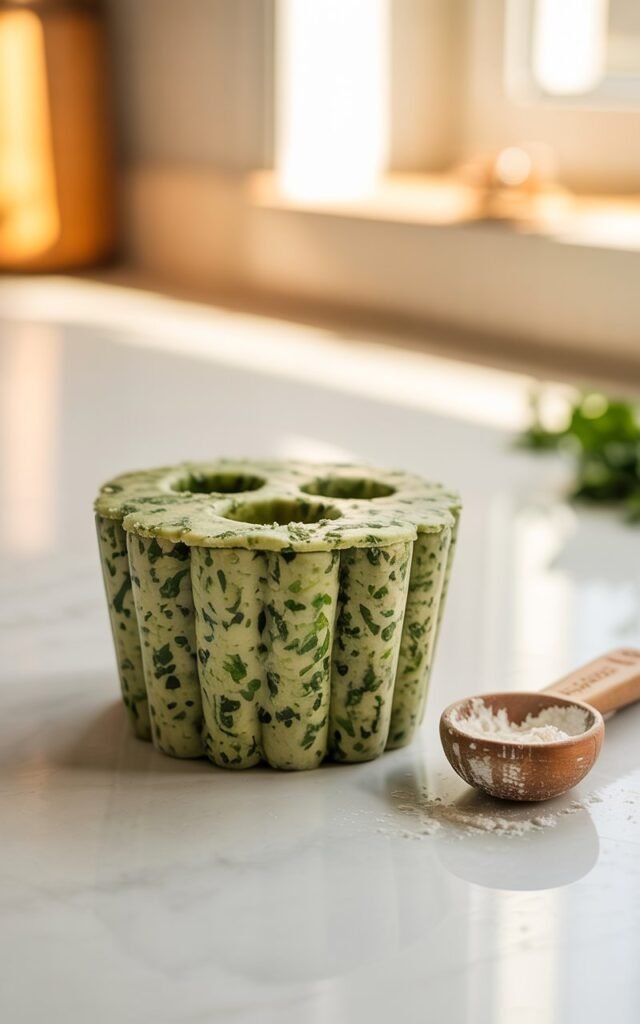
Add the finely chopped parsley, mint, and applesauce or mashed banana. Mix thoroughly using a spoon or your hands. The goal is a sticky, pliable dough. If it feels too dry, gradually add water or low-sodium chicken broth until it holds together. - Shape the Treats
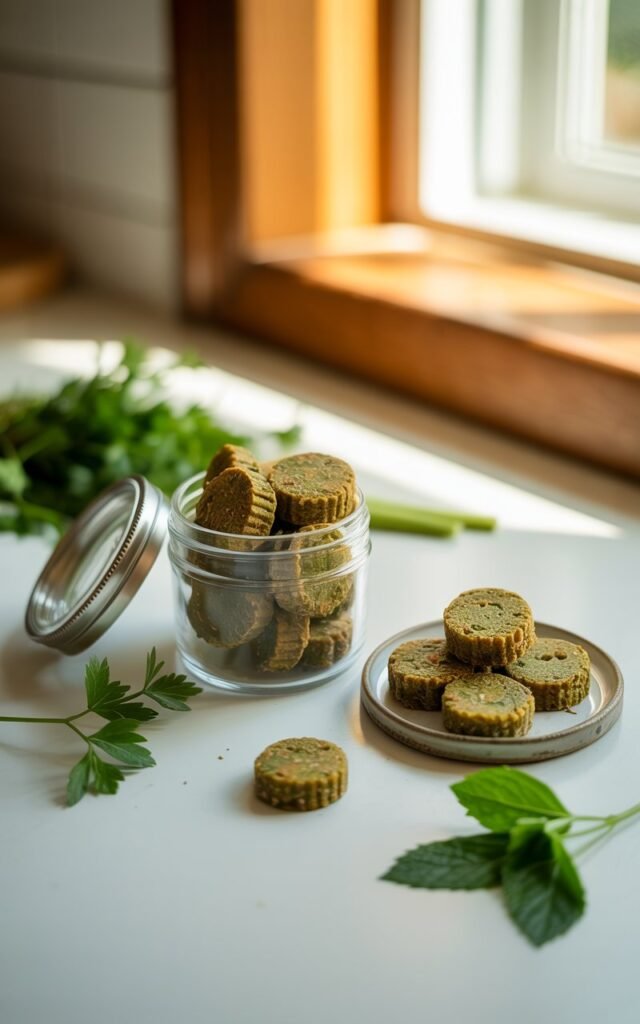
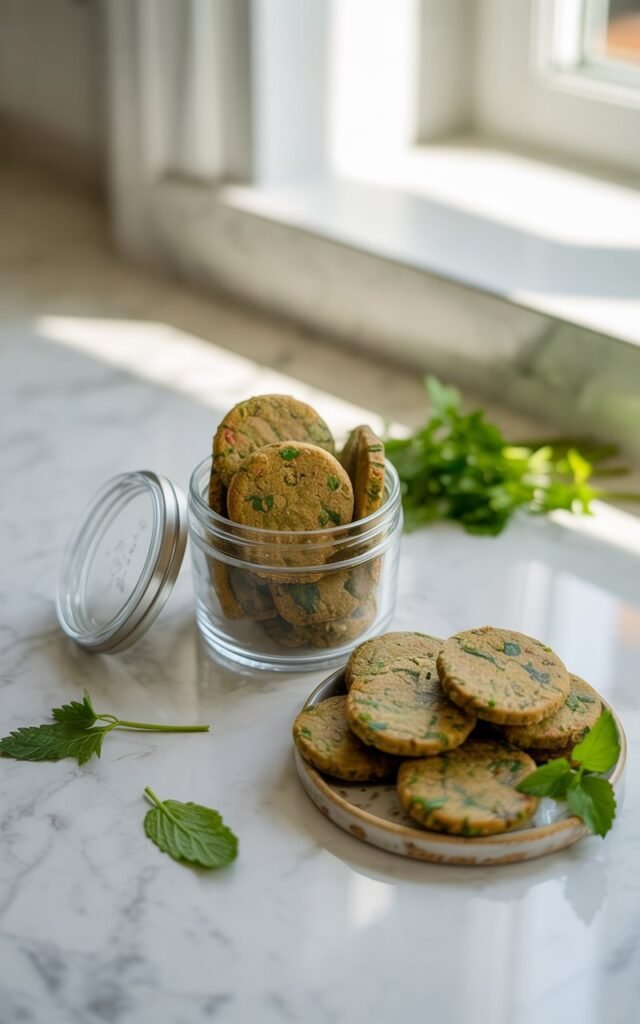
Roll small portions into bite-sized balls or press the mixture into silicone molds. I prefer bite-sized balls for training and larger shapes for snacks. My dog is always nearby, wagging their tail, waiting for a taste test. - Chill to Set
Place the treats on a parchment-lined tray and refrigerate for 1–2 hours until firm. These treats can also be frozen for up to 2 months if I make a bigger batch. - Serve & Enjoy
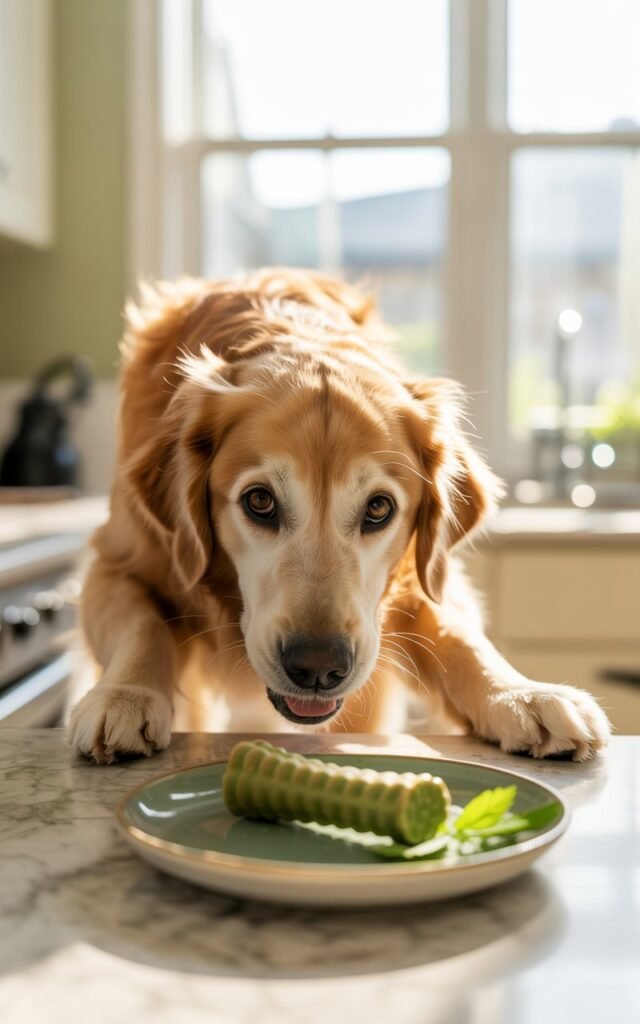
Once firm, the treats are ready to go. I love giving one after brushing or during a short play session—it’s a fun, rewarding treat that helps with oral health.
Tips for Newbies
Making these treats for the first time can feel a little intimidating, but I promise it’s much easier than it looks. Here are some practical tips I’ve learned from experience:
- Start Small: Begin with a single batch to see how your dog reacts to the herbs. Parsley and mint are safe in moderation, but it’s always good to test gradually.
- Chop Finely: Finely chopping or pulsing the herbs in a food processor ensures they mix evenly into the dough, so every treat gets that fresh, clean taste.
- Size Matters: Bite-sized treats are perfect for training sessions, while larger shapes work for snack time. I always adjust based on my dog’s size and chewing habits.
- Adjust Consistency: If the dough is sticky, add a bit of coconut flour; if it’s too dry, a splash of water or chicken broth works perfectly. I learned that a little adjustment makes shaping much easier.
- Storage Tips: Refrigerate treats for up to a week, or freeze for 1–2 months. I like keeping a small batch ready in the fridge for quick rewards during training.
- Have Fun Together: My dog loves watching me mix the dough and smell the herbs—it turns treat-making into a bonding experience. Don’t forget to enjoy the process too!
How to Serve & Storage Tips
Serving these treats is simple, but a few little tricks make them even more enjoyable for your dog and easier for you to manage:
How to Serve
- Training Rewards: I like using bite-sized treats as quick rewards during training sessions. They’re small enough for multiple repetitions without overfeeding.
- Snack Time: Larger treats work perfectly for a mid-day snack or after a walk. My dog’s tail always wags the moment I pull one out of the fridge!
- Post-Brushing Treats: These make a gentle, herb-infused reward after brushing, helping freshen breath naturally.
- Supervised Treats: I always give these treats under supervision, especially the first few times, to ensure my dog chews them properly.
Storage Tips
- Refrigeration: Store in an airtight container in the fridge for up to 1 week. I usually keep a small batch ready for daily use.
- Freezing: For longer storage, freeze in a single layer on a tray, then transfer to a freezer-safe container. They can last 1–2 months this way and thaw quickly before serving.
- Portioning: I like dividing them into small containers or baggies, so I can grab the right amount for training or snack time without handling the whole batch.
- Avoid Heat & Moisture: Keep them away from direct sunlight or humid areas to prevent softening or spoilage.
Tip from Experience: I always let my dog enjoy one treat fresh from the fridge—it’s firm enough to hold together but soft enough to chew, making it perfect for teeth cleaning and a tasty reward.
Final Thoughts
These parsley and mint teeth-cleaner treats are more than just snacks—they’re a fun, healthy, and practical way to care for your dog’s oral health.
I love knowing that every treat I give supports fresh breath, healthy gums, and a happy tail wag.
Making treats at home also gives me peace of mind—I know exactly what’s going in, and I can customize each batch to suit my dog’s taste and size.
For me, it’s a small act of care that makes a big difference.
If you’ve ever wanted to make something safe, effective, and delicious for your dog, these treats are a perfect starting point.
Once you try them, you’ll find yourself making a batch regularly, and your dog will thank you with every wag and eager sniff!