
I’ve always loved giving our dog little treats, but over time, I started noticing all the ingredients in store-bought options.
Sugars, preservatives, fillers — nothing I wanted my dog to eat every day. I knew I could make something healthier at home, but I also wanted it to be easy and something my dog would actually enjoy.
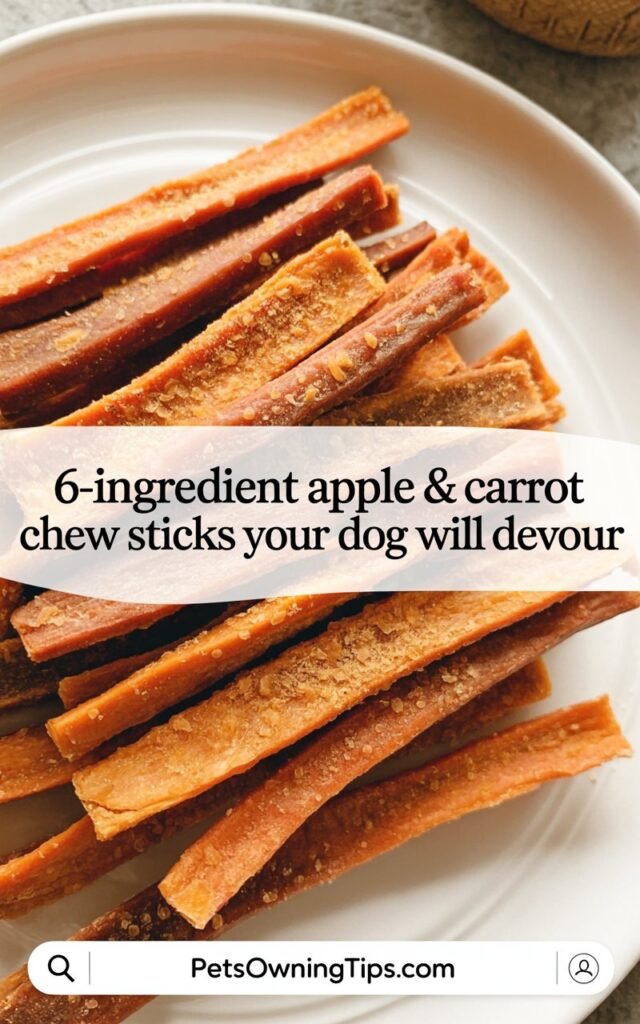
That’s when I decided to try making apple and carrot chew sticks myself.
The first batch was… chaotic, to say the least. I had carrots grated all over the counter, apple pieces scattered everywhere, and our dog sitting patiently (or maybe impatiently) at my feet while I tried to roll the dough into sticks.
My kids were helping too, measuring flour and sneaking little carrot shreds into their mouths. Even with the mess, the smell of baking apples and carrots filled the kitchen and made it feel cozy.
The dog’s tail didn’t stop wagging from the moment the sticks went into the oven, and when the first one cooled enough to taste, I realized we had a winner.
Why I Chose Apples and Carrots
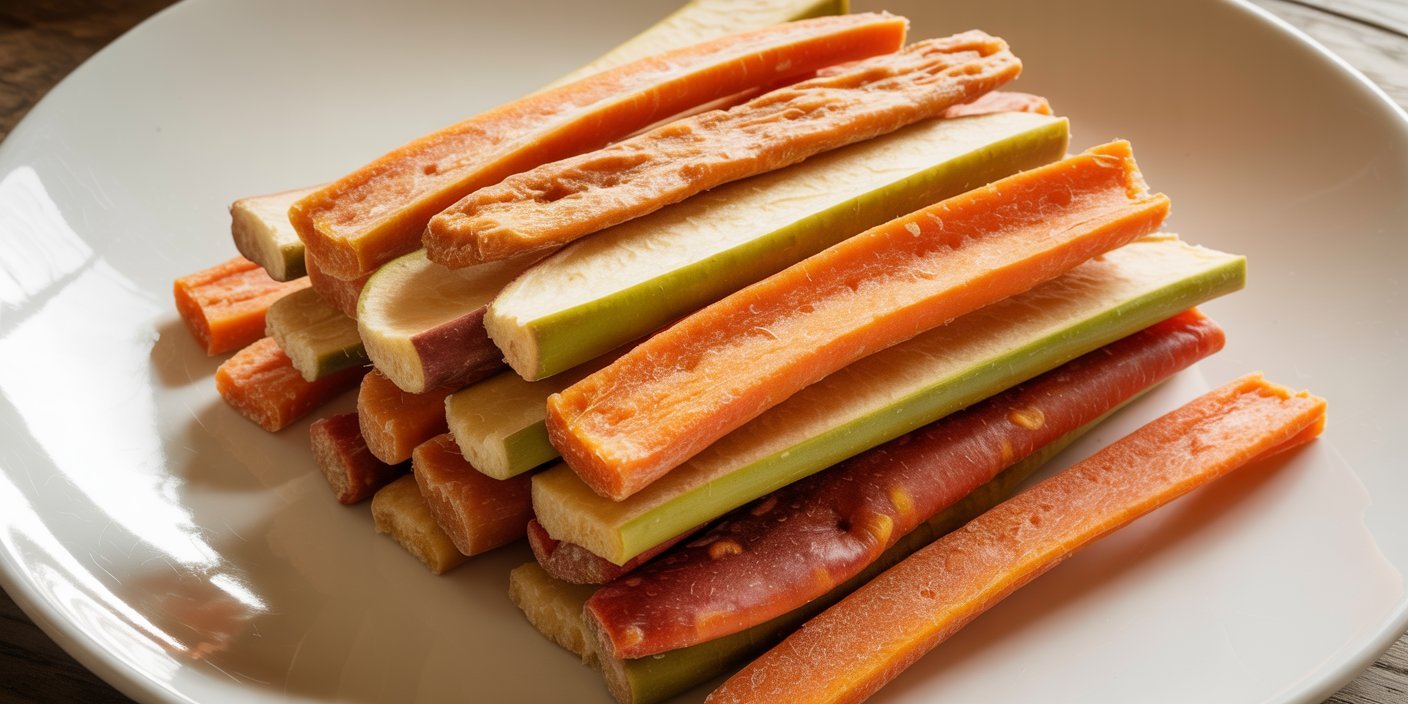
Apples and carrots are naturally sweet, crunchy, and full of nutrients — perfect for dogs.
Apples give fiber and vitamins that support digestion and overall health, while carrots are packed with beta-carotene and help maintain healthy teeth.
Both are gentle on the stomach, which is great because our dog sometimes gets sensitive after richer treats.
I love that these ingredients are simple and wholesome. There’s no mystery in what my dog is eating, and it feels good knowing every ingredient serves a purpose.
Making treats at home also lets me control the size, so they’re perfect for training, snacking, or keeping occupied while I prep meals or tidy the house.
How I Make My Apple & Carrot Chew Sticks
Over time, I perfected a method that’s quick, easy, and works even on busy days when the kids are clamoring for breakfast and I’m juggling homework, laundry, and a cup of coffee. Here’s my process:
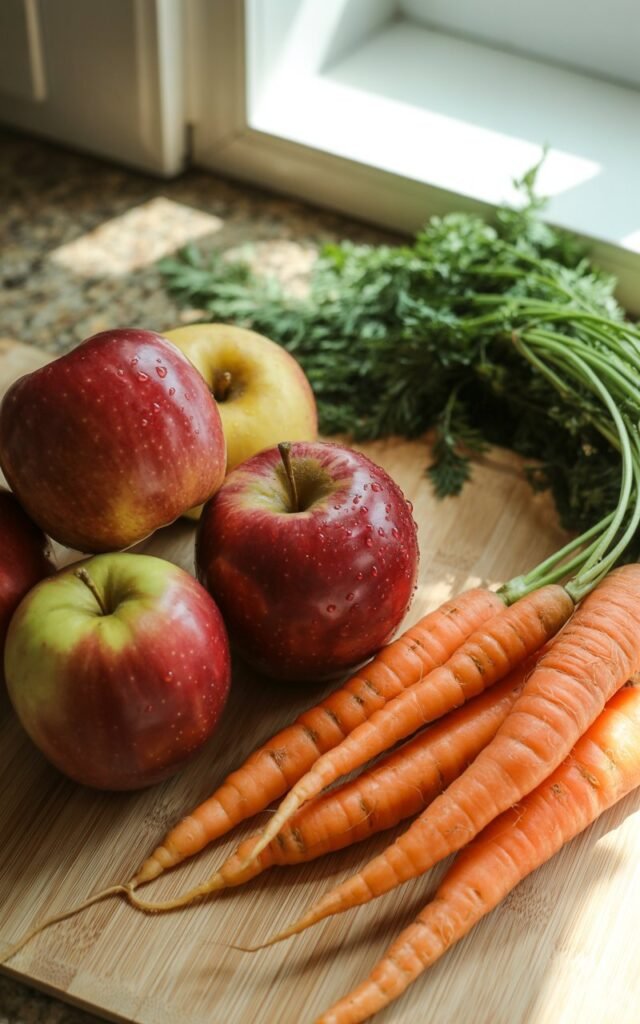
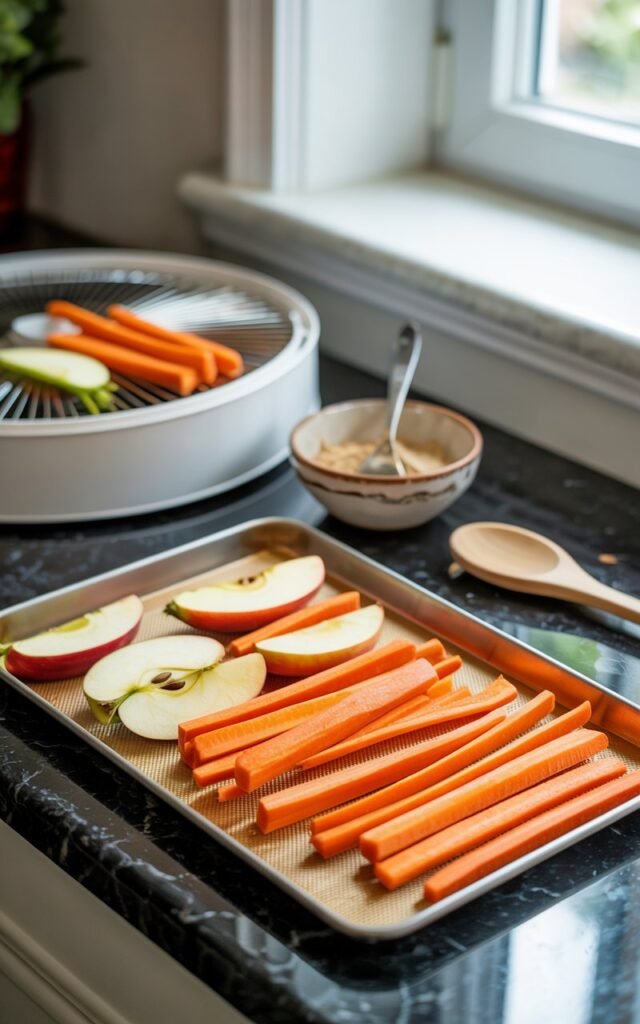
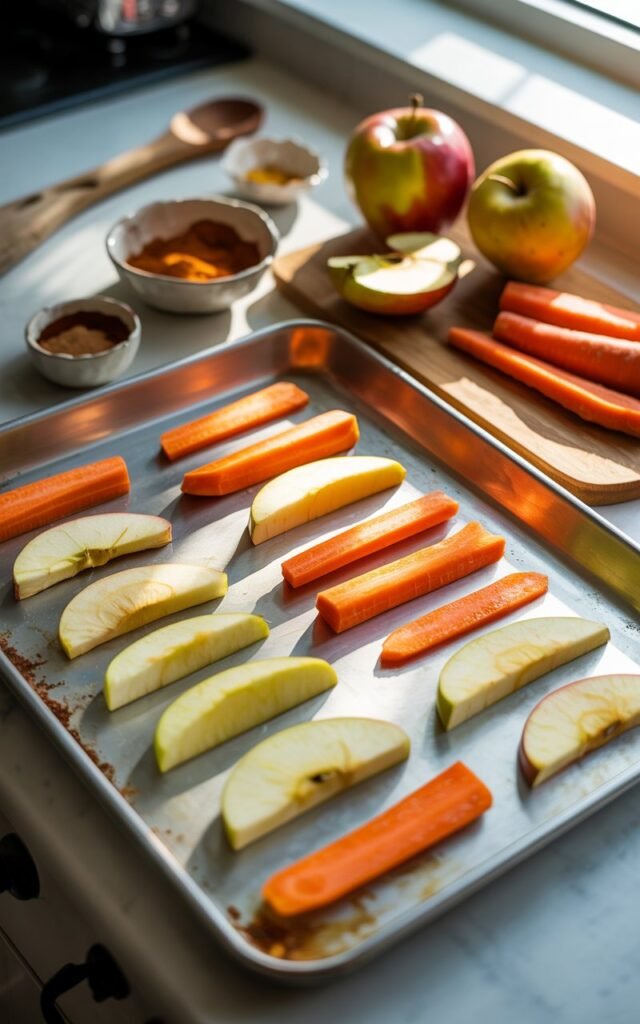
- Prep the ingredients: I peel and grate one carrot and chop one apple into small pieces. Sometimes I leave the peel on the apple for extra fiber.
- Mix the dough: I combine the grated carrot, apple, 1 cup of whole wheat flour, a little oat flour, and a teaspoon of coconut oil. It forms a soft but manageable dough. I usually let the kids help — measuring and mixing is messy but fun, and they love to see the dough come together.
- Shape the sticks: I roll the dough into long, thin sticks. Sometimes I make bite-sized pieces for training, or longer sticks for a longer chew session. The kids always fight over who gets to shape the last one.
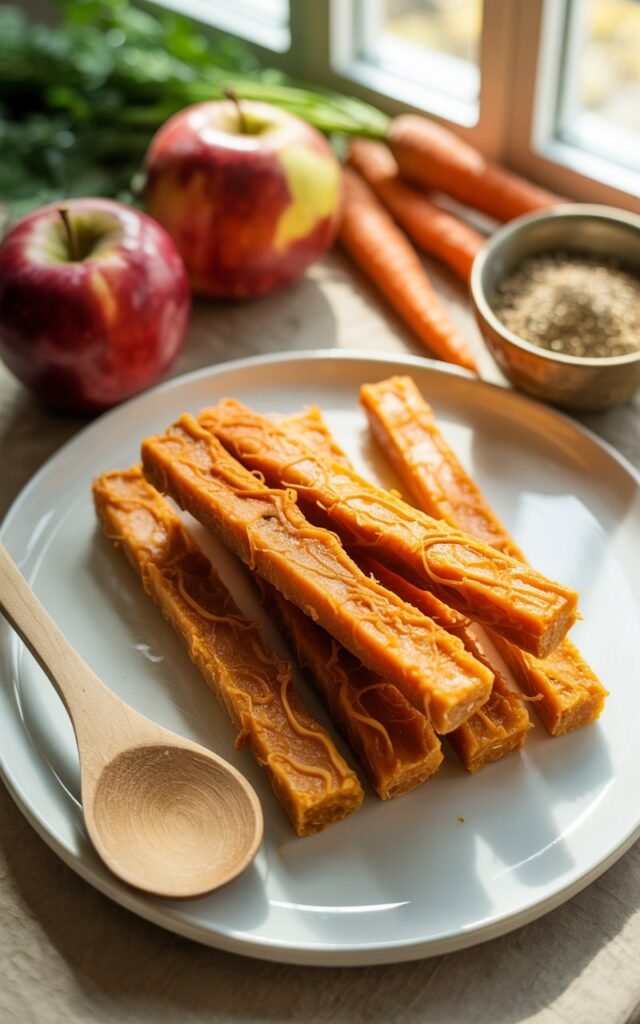
- Bake: I place the sticks on a lined baking sheet and bake at 350°F (175°C) for 20–25 minutes, until they’re slightly golden and firm. The smell is irresistible — even my husband stops by to see what’s baking.
- Cool and store: I let the sticks cool completely before storing them in an airtight container. They usually last about a week, but ours rarely make it that long!
Tips I’ve Learned From Making These Treats
Making homemade dog treats isn’t difficult, but I’ve learned a few tricks that make them even better:
- Coconut oil matters: It keeps the dough from being too dry and adds a little healthy fat.
- Size matters: Make smaller sticks for little dogs and longer ones for bigger breeds.
- Add variety: Occasionally, I sprinkle in oats, cinnamon, or a little pumpkin puree for flavor. Our dog notices the difference immediately!
- Rotate batches: Making treats every week keeps them fresh and keeps our dog excited.
Making Treats a Family Activity
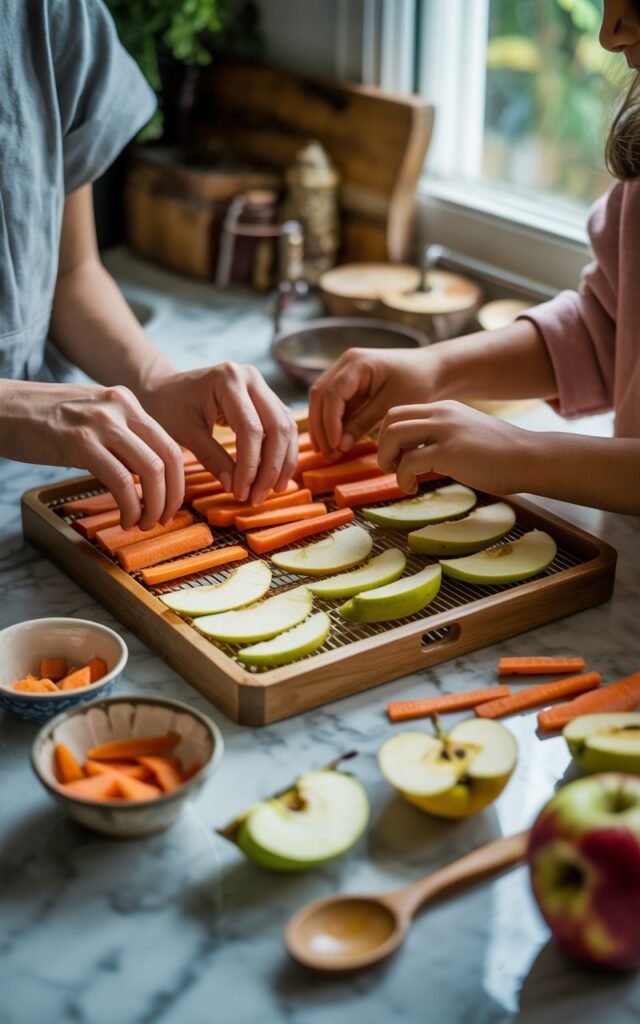
One of my favorite things about making these chew sticks is that it’s become a family activity.
The kids love helping with mixing and shaping, and it’s a fun way to teach them about healthy choices for pets.
Sometimes, they sneak bites of raw carrot shreds or apple pieces while I’m not looking. The dog watches eagerly, wagging their tail in anticipation of the finished product.
I even use the treats as part of our training sessions. A quick reward for sitting, staying, or coming when called.
It’s a small moment, but it teaches discipline while reinforcing healthy snacking.
Why Homemade Treats Are Worth It
There’s something special about giving your dog a treat you made with your own hands. Store-bought options are convenient, yes, but they often contain ingredients I wouldn’t choose.
Making them at home means I know exactly what my dog is eating, I can adjust textures and flavors, and it becomes a little ritual I genuinely enjoy.
Even on my busiest days, I can throw together a batch of these apple and carrot sticks while making breakfast or tidying up after dinner.
It’s a simple habit that makes our dog happy and keeps me connected to them in a meaningful way.
Watching the Joy of Homemade Treats
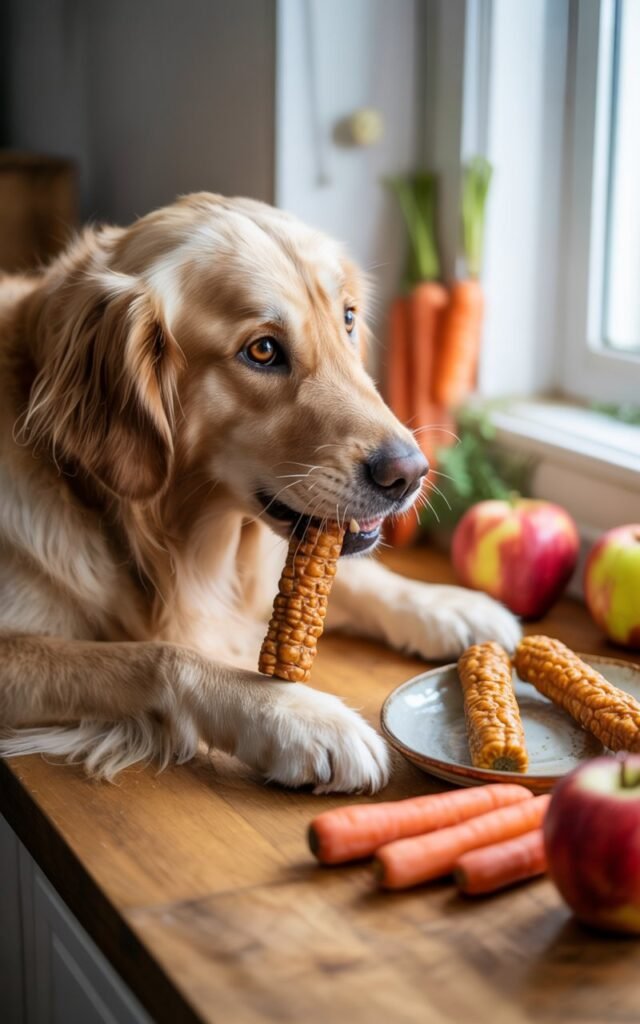
The best part of all? Seeing my dog’s reaction. That first crunch, the wagging tail, the little happy dance — it never gets old.
Even the kids notice and cheer when the dog enjoys the treats, which makes it feel like a small victory for the whole family.
Homemade treats also let me feel confident in what my dog is eating. No hidden sugars, no preservatives — just wholesome apples, carrots, and a little love baked into every stick.