
9 Easy Frozen Dog Snacks for First-Time Dog Owners (Healthy, Simple & Budget-Friendly Recipes)
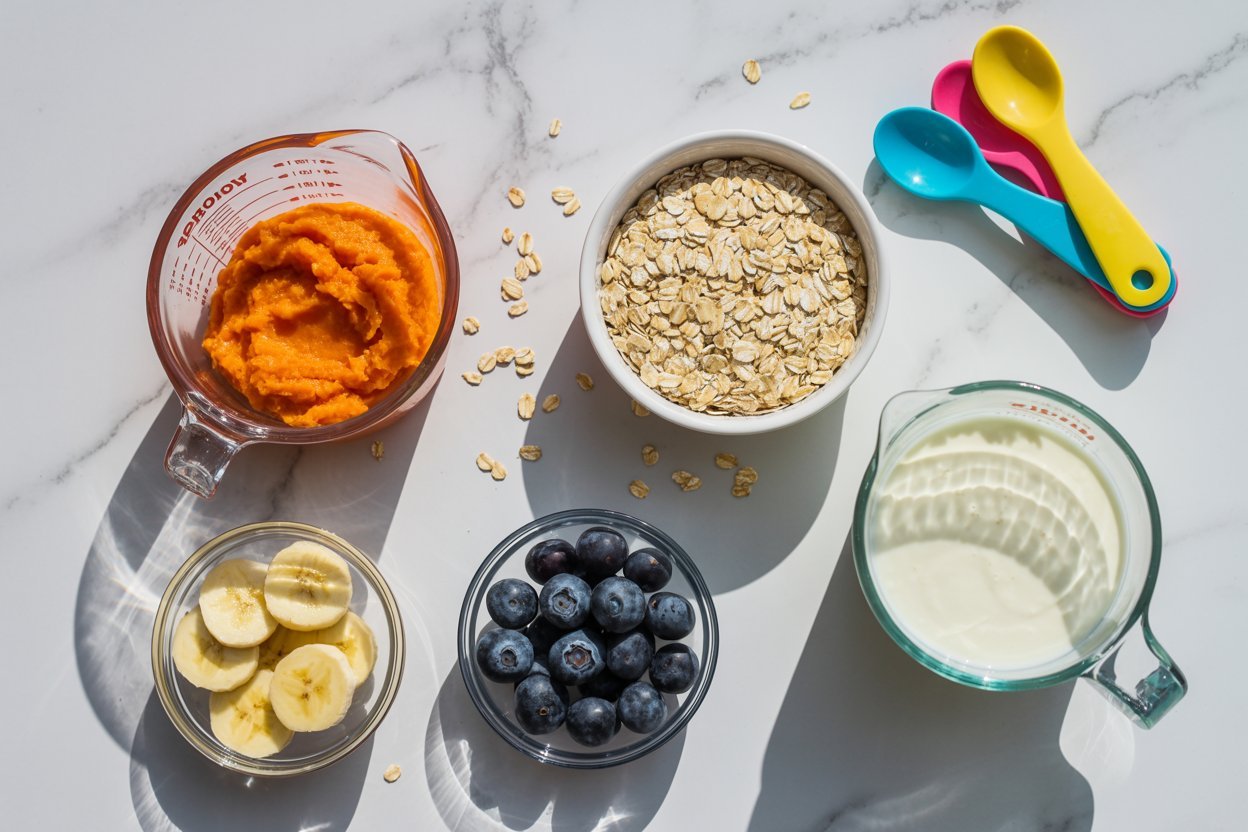
If you are a first time dog owner, making homemade treats can feel more complicated than it really is. I remember wanting snacks that were safe, simple, affordable, and did not require special ingredients or baking skills.
Frozen dog treats quickly became one of my favorite options because they are easy to prepare, simple to portion, and convenient to keep ready in the freezer.
I also like being able to make a batch at home and choose ingredients I already know my dog tolerates.
On hot days, a small frozen snack can be especially enjoyable, and some recipes can also add moisture to a dog’s overall snack routine. Fresh drinking water should still always be available.
What makes these treats especially beginner friendly is that you do not need much equipment. A blender, mixing bowl, silicone molds, and a freezer are enough for most of the recipes in this guide.
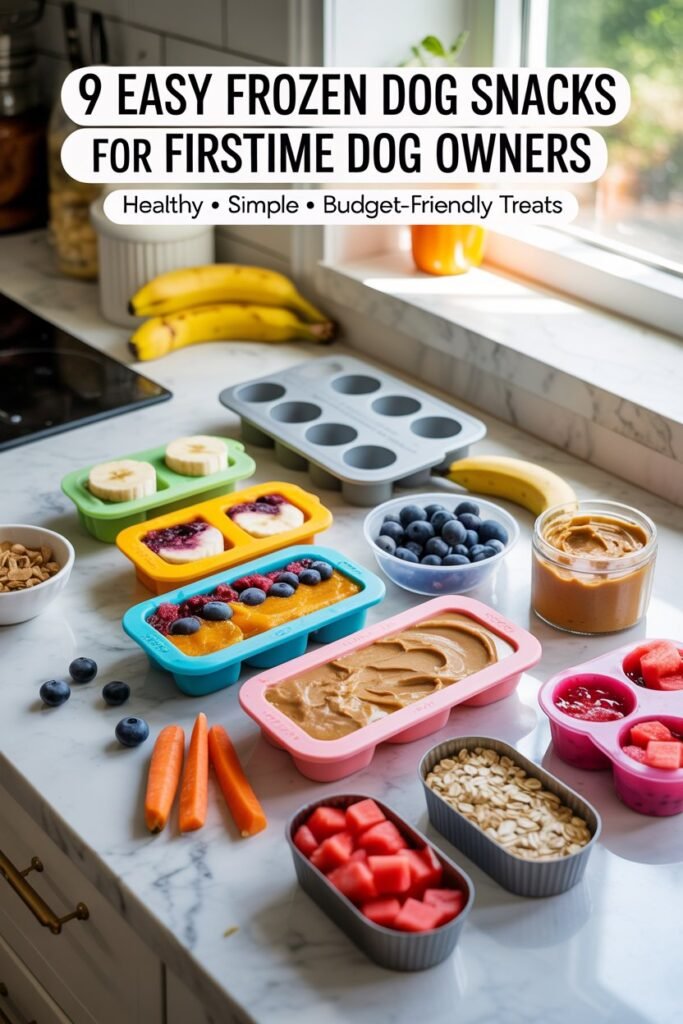
In this guide, you will find 9 easy frozen dog snacks you can make at home, including creamy fruit treats, savory chicken and sardine options, and simple recipes made with ingredients you may already have in your kitchen.
I have also included practical tips for choosing ingredients, checking labels, preparing safe portions, storing homemade treats, and introducing new foods gradually. The goal is to make homemade dog treats feel simple and manageable, even if you have never prepared one before.
Before trying any recipe, remember that homemade treats should complement your dog’s normal complete and balanced diet rather than replace it. If your dog has allergies, a medical condition, or follows a prescribed diet, it is always worth checking with your veterinarian before introducing new ingredients.
Disclaimer: This post may contain affiliate links, which means I may earn a small commission at no extra cost to you. Always use dog-safe ingredients and consult your veterinarian before introducing new treats, especially for dogs with allergies or health conditions.
Amazon Shopping List You Need
- Silicone Dog Treat Molds (Bone & Paw Shapes)
- Silicone Ice Cube Tray Set
- Dog-Safe Peanut Butter (Xylitol-Free)
- Plain Greek Yogurt (Unsweetened)
- Stainless Steel Mixing Bowl Set
- Measuring Cups and Spoons Set
- Airtight Freezer Storage Containers
Why Frozen Dog Snacks Are Perfect for Beginners
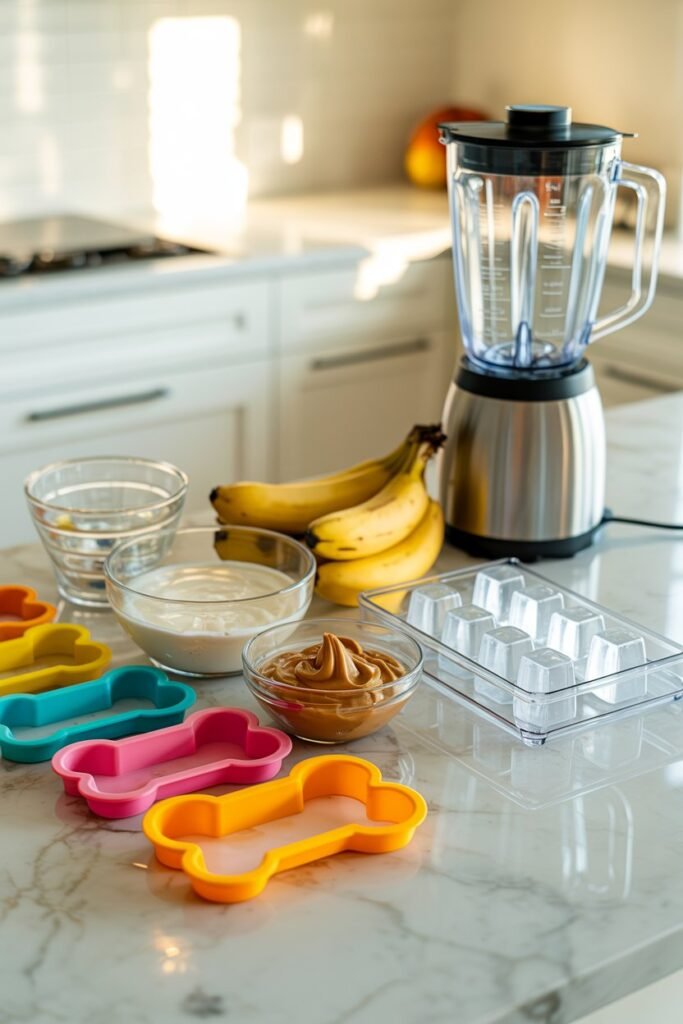
Frozen dog treats are one of the easiest places to start if you are new to making homemade snacks for your dog.
You do not need baking experience, complicated equipment, or a long list of ingredients. In most cases, a blender, a few silicone molds, and enough freezer space are all you need.
I especially like frozen recipes because they are easy to prepare ahead of time. Once you make a batch, you can keep individual portions in the freezer and take out only what you need.
They Are Refreshing on Warm Days
A frozen treat can be a fun way to give your dog something cool during hot weather.
This is particularly useful when your dog enjoys chilled snacks, although frozen treats should never replace access to fresh drinking water.
They Are Easy to Make in Batches
Most of the recipes in this guide can be prepared in one batch and divided into several small portions. I find this much more convenient than preparing a fresh treat every time.
Small silicone molds are especially useful because each portion is already separated before it goes into the freezer.
Some Recipes Add Extra Moisture
Ingredients such as plain water, appropriate broth, watermelon, and yogurt can contribute moisture to a frozen snack.
I still make sure my dog has fresh drinking water available throughout the day. A frozen treat can contain water, but it should not be considered a substitute for normal hydration.
You Can Adjust the Ingredients
One of the biggest advantages of making treats at home is having control over what goes into them.
You can choose simple ingredients that your dog already tolerates and avoid ingredients that do not agree with them. This can be especially helpful when you are familiar with your dog’s food preferences or known sensitivities.
That said, dogs with diagnosed allergies or medical conditions may need a veterinarian approved diet rather than homemade substitutions.
They Can Be Budget Friendly
Many frozen treats use inexpensive ingredients that you may already have in your kitchen, such as bananas, carrots, apples, pumpkin, water, or plain yogurt.
You also do not need to purchase specialized equipment. A basic blender and reusable silicone molds are enough for most of these recipes.
They Can Build Your Confidence as a New Dog Owner
When I was learning what worked best for my dog, simple recipes gave me an easy way to experiment without making the process feel overwhelming.
I could start with one familiar ingredient, make a small batch, and see how my dog responded. From there, it became much easier to understand which flavors and textures were favorites.
The goal is not to make every snack from scratch. It is simply to have a few safe, practical homemade options that you can prepare confidently while keeping your dog’s regular complete and balanced diet at the center of their nutrition.
Important Safety Tips Before Making Frozen Dog Snacks
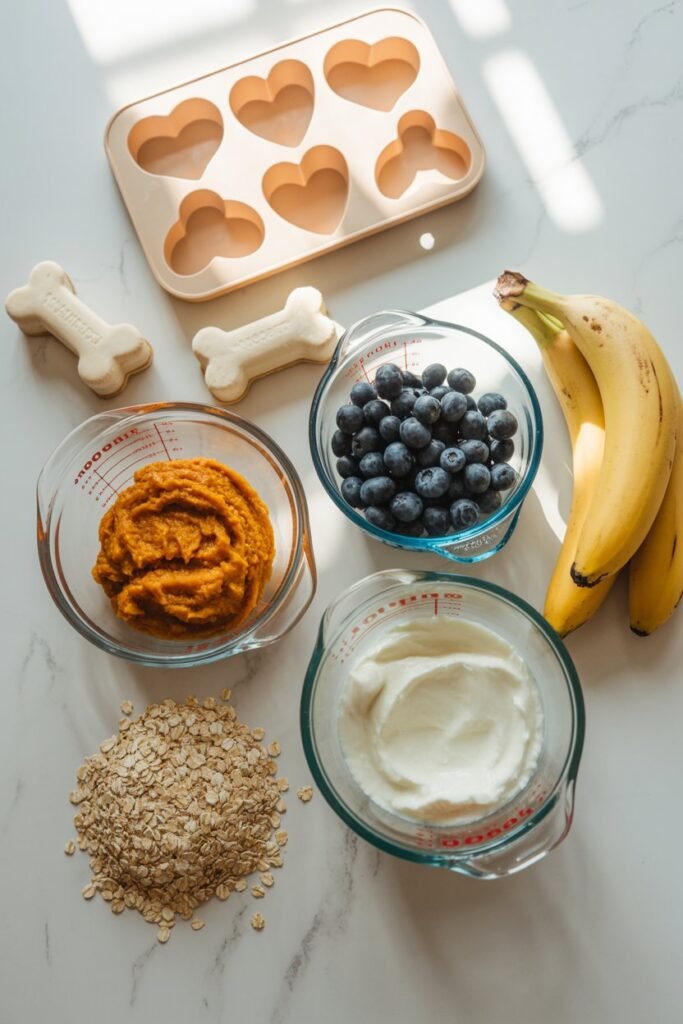
Before jumping into the recipes, there are a few simple safety rules I always keep in mind when making homemade treats for my dog. Homemade does not automatically mean every ingredient is safe, so I like to check each ingredient carefully before adding it to a recipe.
Avoid Xylitol
Never use xylitol in homemade dog treats. Xylitol is an artificial sweetener that is extremely toxic to dogs and can be found in some peanut butters, sugar free products, and other foods.
I always check ingredient labels carefully, especially when using peanut butter or yogurt.
Avoid Common Toxic Foods
I keep grapes, raisins, onions, garlic, and chocolate completely out of my dog’s treats. I also avoid foods containing sauces, seasoning blends, or other ingredients that may include these foods without making them obvious on the front of the package.
Choose Plain Yogurt
When a recipe calls for yogurt, I use plain, unsweetened yogurt without added sugar, artificial sweeteners, chocolate, fruit flavoring, or other unnecessary ingredients.
I also remember that some dogs do not tolerate dairy well, so I introduce yogurt in a small amount if my dog has not eaten it before.
Keep Portions Small
A homemade treat can still contain a meaningful number of calories, particularly when it contains ingredients such as peanut butter, yogurt, coconut products, meat, or bananas.
I prefer using small silicone molds because they make portion control much easier. Smaller treats are especially helpful for small dogs.
Introduce New Ingredients Slowly
I do not introduce several unfamiliar ingredients at once. Starting with a small portion of a simple recipe makes it easier to notice how my dog responds.
If your dog develops signs of an adverse reaction after eating something new, stop offering that ingredient and speak with your veterinarian if the reaction is concerning or persistent.
Consider Your Dog’s Individual Needs
Every dog is different. Puppies, senior dogs, dogs with food sensitivities, and dogs with medical conditions may have different nutritional and treat requirements.
If your dog has a health condition, follows a prescribed diet, or you are unsure whether a particular ingredient is appropriate, talk with your veterinarian before introducing homemade treats.
These simple precautions make homemade frozen treats much easier to prepare with confidence. The goal is not to create complicated recipes. It is to use simple, appropriate ingredients, keep portions sensible, and make treats that fit comfortably into your dog’s normal balanced diet.
1. Banana & Peanut Butter Frozen Cubes (Full Recipe)
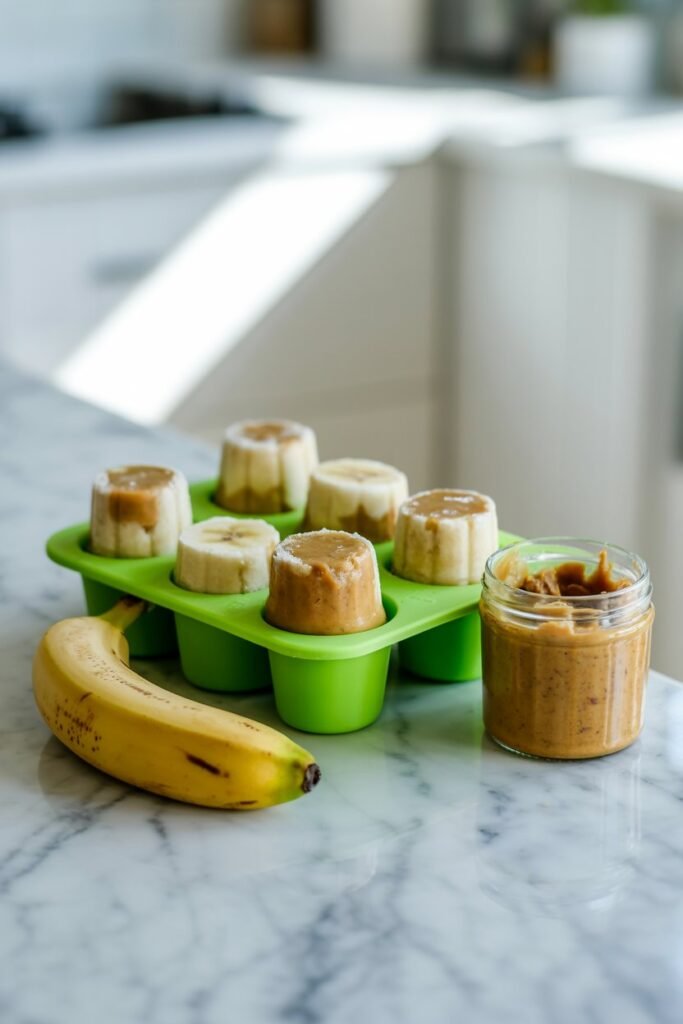
If you are new to making homemade dog treats, this is one of the easiest recipes to start with. I like it because the ingredient list is short, the preparation takes only a few minutes, and I can make a batch ahead of time and keep the treats in the freezer.
This is also a recipe I would use when I am still figuring out which flavors my dog enjoys. Banana gives the treats a naturally sweet flavor, while peanut butter adds a richer taste that many dogs find appealing. The finished treats are creamy when blended and firm once frozen.
Ingredients
- 1 ripe banana: Choose a ripe banana without any mold or spoiled areas. The natural sweetness and soft texture make it easy to blend into the mixture.
- 1 tablespoon natural peanut butter: This is the ingredient I pay the most attention to. Use plain peanut butter with no xylitol or other added sweeteners. I also prefer a simple ingredient list without chocolate, added flavorings, or unnecessary ingredients. Always check the label before using peanut butter for homemade dog treats.
- ½ cup plain water or unsweetened plain yogurt: Water keeps the recipe very simple, while plain unsweetened yogurt creates a creamier texture. If using yogurt, choose one without added sugar, artificial sweeteners, or flavorings.
How I Make These Frozen Dog Treats
- I peel the banana and break it into several smaller pieces. This makes it easier for the blender to process smoothly.
- I add the banana, peanut butter, and either plain water or unsweetened yogurt to a blender.
- I blend everything until the mixture is smooth and creamy. I usually stop once or twice to scrape down the sides so there are no large pieces of banana left behind.
- I pour the mixture into clean silicone ice cube trays or small freezer safe molds. I prefer smaller molds because they make portioning easier.
- I gently tap the tray against the counter to help remove large air pockets.
- I place the tray in the freezer and freeze the treats for approximately 3 to 4 hours, or until they are completely firm.
- Once frozen, I remove the treats from the molds and transfer them to a freezer safe container if I am not serving them immediately.
Getting the Texture Right
The mixture should be smooth enough to pour but not so thin that it runs everywhere when you transfer it to the molds.
If the mixture looks too thick for your blender, add a small amount of water rather than adding a large amount at once. If you are using yogurt, the finished mixture will naturally be creamier.
I also recommend using smaller molds when making these for the first time. It is much easier to offer a small portion and see how your dog responds than to make every treat large.
How I Serve Them
I start with a small portion when introducing any new homemade treat. The appropriate amount depends on your dog’s size, regular diet, activity level, and overall calorie needs.
For a small dog, one whole ice cube may be more than enough for a treat, while a larger dog may be able to have a larger portion. Homemade treats should still fit comfortably within your dog’s overall daily treat intake.
I also let the frozen treat soften slightly if it is extremely hard. This can make it easier for some dogs to eat and reduces the temptation to swallow a large frozen piece whole.
Why This Recipe Works
Banana gives the mixture a naturally sweet flavor and provides a creamy base when blended. Peanut butter adds a stronger aroma and richer flavor, while yogurt can make the finished treat smoother and creamier.
The biggest advantage for me is the simplicity. I do not need special ingredients or complicated preparation, and I can keep a few small portions in the freezer for days when I want to give my dog something homemade.
Important Peanut Butter Safety Check
Before making this recipe, check the peanut butter label carefully.
Never use peanut butter containing xylitol. Xylitol is extremely dangerous to dogs. I also avoid peanut butter with chocolate, added sweeteners, or unnecessary flavorings.
If you are unsure about an ingredient in the peanut butter, choose a different product rather than taking a chance.
Storage Tip
Once the treats are completely frozen, I transfer them to an airtight freezer safe container or freezer bag. I separate the portions so they do not stick together and keep them frozen until needed.
I like making smaller batches because homemade treats are easiest to manage when I can take out only what I need rather than repeatedly opening and closing a large container.
A Simple Beginner’s Tip
If your dog has never had banana, peanut butter, or yogurt before, introduce new ingredients gradually rather than combining several unfamiliar foods at once. That makes it easier to notice whether your dog tolerates each ingredient well.
And while these frozen bites can be a fun homemade snack, they should complement your dog’s normal complete and balanced diet rather than replace it.
2. Yogurt & Blueberry Frozen Treats (Full Recipe)
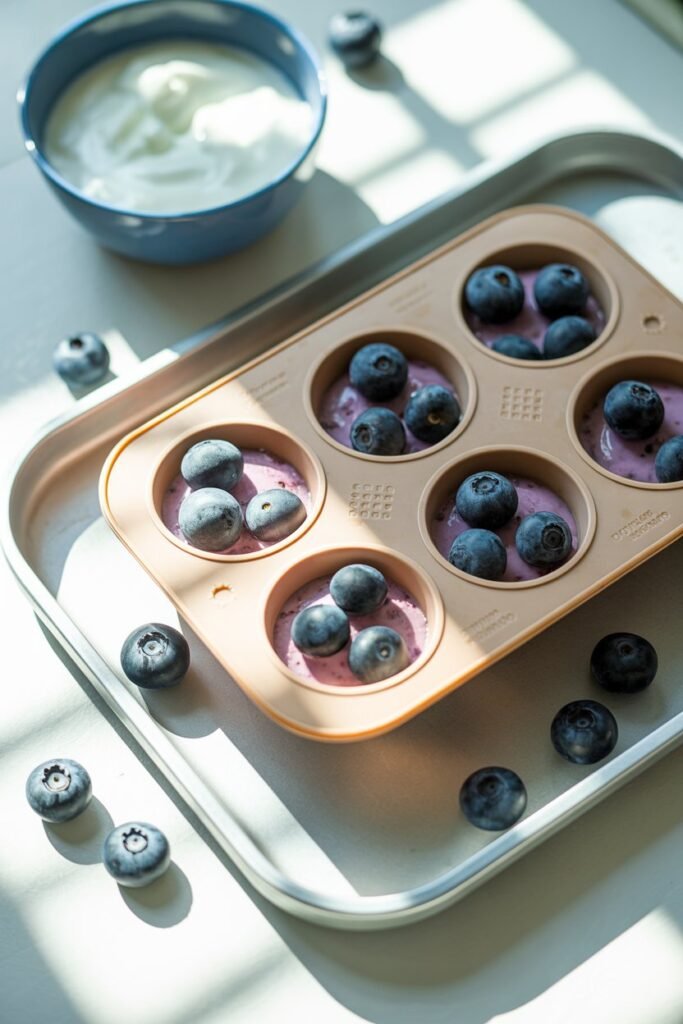
These blueberry yogurt frozen treats are one of the simplest options I like when I want to make a cool homemade snack with just a couple of ingredients. There is very little preparation involved, and I can have a batch ready for the freezer in just a few minutes.
I especially like this recipe for warm days because the frozen yogurt creates a creamy texture while the blueberries add small bursts of flavor. It is also easy to adjust the size of the treats depending on the size of your dog.
Ingredients
- 1 cup plain unsweetened yogurt: Choose a plain yogurt without added sugar, artificial sweeteners, chocolate, fruit syrups, or flavorings. I prefer a simple ingredient list. If your dog does not tolerate dairy well, yogurt may not be the right choice for them.
- ½ cup fresh or frozen blueberries: Fresh or frozen blueberries both work well. I check fresh berries carefully and remove any stems before using them. Frozen blueberries can be used directly, although allowing them to soften slightly can make them easier to mash.
How I Make These Frozen Dog Treats
- I add the plain yogurt and blueberries to a mixing bowl.
- I lightly mash some of the blueberries with a fork. I do not mash every berry because I like leaving a few small pieces throughout the mixture.
- I stir everything together until the blueberries are evenly distributed through the yogurt.
- I spoon the mixture into clean silicone molds or ice cube trays. Smaller molds make it easier to control portions.
- I gently smooth the surface with the back of a spoon.
- I place the molds in the freezer for approximately 3 to 5 hours, or until the treats are completely firm.
- Once frozen, I remove the treats from the molds and store them in a freezer safe airtight container.
How I Serve Them
I treat these as an occasional snack rather than something I would add to every meal. The appropriate portion depends on your dog’s size, regular diet, activity level, and overall calorie needs.
For smaller dogs, I prefer using very small molds or breaking a larger frozen treat into smaller pieces. I also watch my dog the first few times to make sure they are comfortable eating the frozen texture.
If your dog tends to swallow treats quickly, allowing the treat to soften slightly before serving can make it easier to eat.
Why I Like This Combination
The yogurt gives these treats a creamy base, while blueberries add natural flavor and texture. I also like that there is no complicated preparation. Everything can be mixed in one bowl and portioned directly into the freezer molds.
The recipe is particularly convenient when you already have plain yogurt and blueberries in the refrigerator or freezer and want to turn them into a simple homemade snack.
A Note About Yogurt
Not every dog handles dairy in the same way. Some dogs can tolerate small amounts of plain yogurt, while others may experience digestive upset after eating dairy.
When introducing this recipe, I would start with a small portion rather than giving your dog several treats at once. If your dog has previously reacted poorly to dairy, choose a different frozen treat recipe instead.
Also check the yogurt label carefully. Avoid products containing xylitol or other artificial sweeteners, added sugar, chocolate, or flavored dessert ingredients.
Storage Tip
Once the treats are completely frozen, I transfer them from the silicone molds into a freezer safe airtight container. I keep them frozen and take out only the portions I plan to serve.
Making smaller batches works well for me because it keeps the treats easy to portion and prevents them from taking up unnecessary freezer space.
Helpful Beginner Tip
If you are making homemade frozen treats for the first time, resist the temptation to add several ingredients at once. Keeping this recipe to yogurt and blueberries makes it much easier to see how your dog responds to each ingredient.
And as with any homemade treat, these frozen bites should be given in moderation alongside your dog’s normal complete and balanced diet.
3. Chicken Broth Ice Pops (Full Recipe)
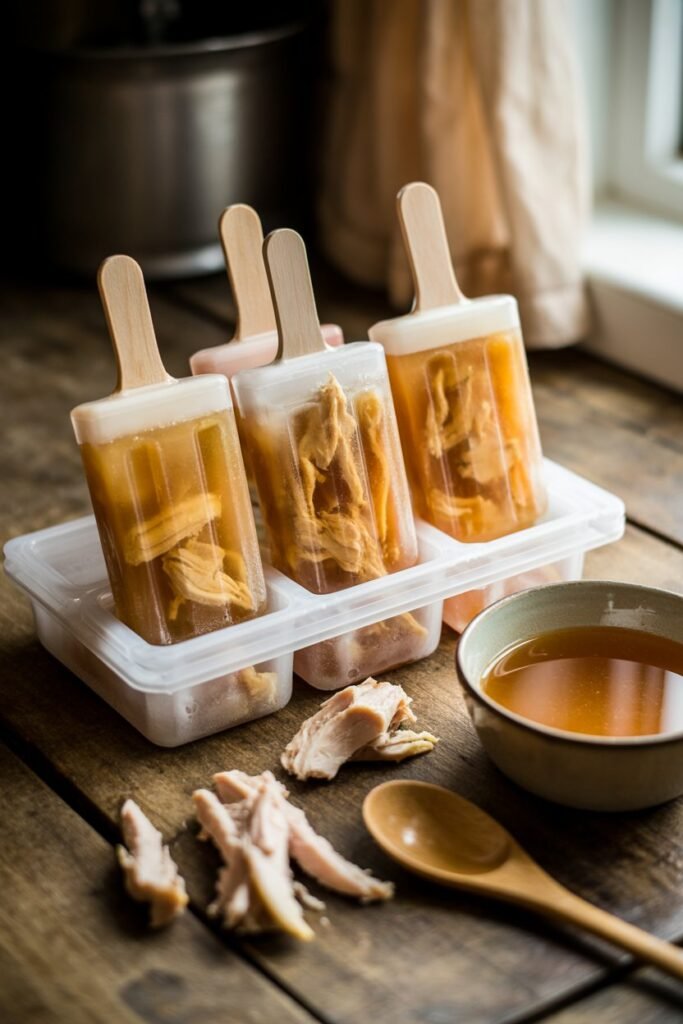
This is one of the simplest savory frozen dog treats I make when I want something different from the usual fruit based recipes. Some dogs are simply more interested in savory flavors, so chicken broth can be a useful option when sweet frozen treats are not getting much attention.
I also like this recipe because it requires very little preparation. Once the broth and chicken are ready, everything can go straight into the freezer molds. It makes a refreshing little treat for warm days and is easy to portion for dogs of different sizes.
Ingredients
- 2 cups low sodium chicken broth: Choose a broth specifically checked for dog safety. The ingredient list should not contain onion, garlic, heavy seasoning, or unnecessary additives. I prefer the simplest broth I can find, and homemade unsalted chicken broth gives me the most control over the ingredients.
- ½ cup plain shredded boiled chicken: This is optional, but I like adding it because it gives the frozen cubes a little more texture and a stronger chicken flavor. Use fully cooked, skinless chicken without salt, butter, oil, sauces, or seasoning.
- Plain water, if needed: If your broth is particularly concentrated or you simply want a milder flavor, you can dilute it with a little plain water.
How I Make These Frozen Chicken Treats
- I start by checking the chicken broth carefully. This is an important step because some commercial broths contain ingredients that are not appropriate for dogs. I avoid any broth containing onion or garlic.
- If I am adding chicken, I cook a small piece of plain chicken breast until it is completely cooked through. Once it has cooled enough to handle, I shred it into very small pieces.
- I place a few small pieces of shredded chicken into each silicone mold or ice cube compartment. I do not fill the molds with large pieces because smaller pieces are easier to portion.
- I slowly pour the chicken broth over the shredded chicken until the molds are almost full.
- I gently tap the tray against the counter to help the broth settle around the chicken and remove larger air bubbles.
- I place the tray in the freezer and freeze for approximately 4 to 6 hours, or until the treats are completely solid.
- Once frozen, I remove the treats from the molds and transfer them to a freezer safe airtight container if I am storing them for later.
How I Serve Them
I start with a small portion, especially when introducing frozen treats to a dog that has never had one before.
For small dogs, a whole ice cube may be more than they need, so I prefer using smaller molds or breaking a larger cube into an appropriate portion. Larger dogs may be able to handle a larger piece, but treats should still remain a small part of their overall daily food intake.
I also supervise my dog when introducing frozen treats for the first time. If your dog tends to swallow food quickly, allowing the cube to soften slightly can make it easier to eat.
Why I Like This Recipe
The savory chicken aroma makes these treats different from the fruit and yogurt recipes in this collection. That makes them useful when your dog simply prefers savory flavors.
The frozen broth also adds water to the treat itself, although I would still keep fresh drinking water available at all times. These cubes should be thought of as an occasional snack, not as a replacement for your dog’s normal water intake.
Adding shredded chicken gives the treat a little more substance and makes each cube more interesting than plain frozen broth.
My Helpful Tip
If I am making these regularly, I prefer using small silicone molds rather than large ice cube trays. Smaller portions are much easier to manage, especially if I have a small dog or want to control how many treats I offer throughout the day.
You can also make a batch without chicken and keep the frozen broth cubes simple. That version is particularly convenient when you want a quick savory frozen snack with minimal preparation.
Important Safety Check
Always check the ingredients in commercial chicken broth before using it for homemade dog treats.
Avoid broth containing:
- Onion
- Garlic
- Excessive salt
- Strong spices
- Seasoning blends
- Sauces or flavoring concentrates
The chicken should also be completely cooked and free from bones, skin, seasoning, and sauces.
If your dog has a medical condition, a prescribed diet, or a history of food sensitivities, it is best to check with your veterinarian before introducing new homemade treats.
As with the other recipes in this guide, these frozen chicken treats are meant to complement your dog’s normal complete and balanced diet rather than replace it.
4. Apple & Carrot Frozen Bites (Full Recipe)
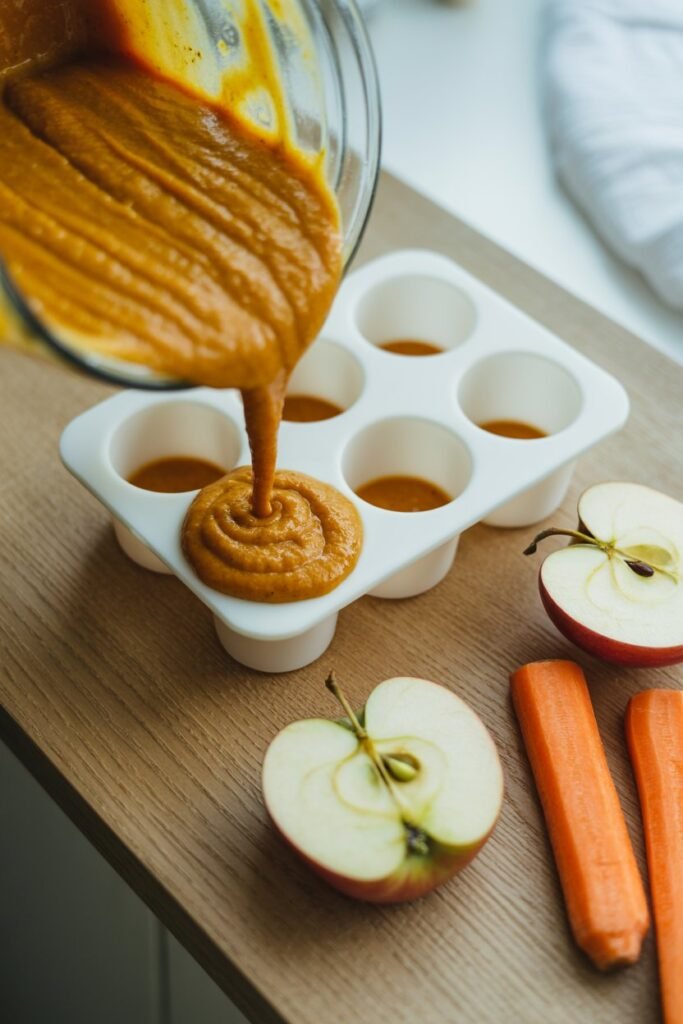
This is one of my favorite options when I want to make a frozen dog treat with fresh ingredients that I already have in the kitchen. The combination of apple and carrot gives the treats a naturally mild flavor, while the frozen texture makes them feel different from the usual soft homemade snacks.
I also like this recipe because there is no complicated preparation. Once the apple and carrot are washed, trimmed, and blended with water, the mixture can go straight into the freezer. It is a simple option for warm days when I want to give my dog a small homemade treat.
Ingredients
- 1 small apple: Choose a fresh apple and wash it thoroughly before preparing it. Remove the stem, core, and all seeds completely. I cut the apple into smaller pieces before blending so the mixture is easier to process.
- 1 medium carrot: Wash the carrot well and peel it if the outside is particularly rough. I cut it into smaller pieces before blending. Fresh carrot provides a natural crunch and adds texture and flavor to the mixture.
- ½ cup clean water: Water helps create a blendable consistency and keeps the recipe simple. You can adjust the amount slightly depending on how juicy the apple is and how powerful your blender is.
How I Make These Frozen Dog Treats
- I wash the apple and carrot thoroughly under clean running water.
- I remove the apple stem and core completely and make sure there are no seeds left. This is one step I never rush when preparing apple treats for my dog.
- I cut the apple and carrot into smaller pieces so they blend more easily.
- I add the prepared apple, carrot, and water to a blender.
- I blend everything until the mixture reaches the texture I want. I prefer a mostly smooth mixture for smaller dogs, while a slightly textured mixture can work well for dogs that enjoy a little more texture.
- I spoon the mixture into clean silicone molds or small ice cube trays.
- I place the molds in the freezer for approximately 3 to 5 hours, or until the treats are completely firm.
- Once frozen, I remove the treats from the molds and transfer them to a freezer safe container if I am making them ahead.
Why I Like This Combination
Apple and carrot give these treats a naturally fresh flavor without needing added sugar or other sweeteners. The carrot also adds a little texture, while the apple helps create a softer mixture when blended.
Both ingredients contain fiber and other nutrients, but I think of these treats primarily as an occasional snack rather than a way to provide specific health benefits. Your dog’s main nutrition should still come from a complete and balanced diet.
How I Serve Them
I start with a small portion when introducing this recipe, particularly if my dog has not eaten apple or carrot before.
For small dogs, I prefer using miniature silicone molds so the portions are naturally smaller. If the treats are too large, I break them into smaller pieces before serving.
I also watch my dog when introducing any new frozen treat. If your dog tends to swallow treats quickly, letting the piece soften slightly before serving may be more comfortable.
Important Apple Preparation Tip
Always remove the apple core, stem, and seeds before blending.
I also never use the core as part of the recipe simply because it is being blended. Removing these parts first makes the preparation safer and gives you a cleaner finished mixture.
My Helpful Tip
If you want a smoother treat, add the water gradually rather than pouring all of it into the blender at once. This gives you more control over the final consistency.
I also like making these in small molds. It makes portioning much easier and means I can take out only what I need from the freezer instead of thawing an entire batch.
Storage
Once the treats are completely frozen, I store them in an airtight freezer safe container or freezer bag. Keeping the portions separated makes it easier to grab one whenever I want to give my dog a treat.
I prefer making smaller batches so the treats stay convenient to portion and do not occupy too much freezer space.
As with any homemade dog treat, these should be offered in moderation and alongside your dog’s normal complete and balanced diet.
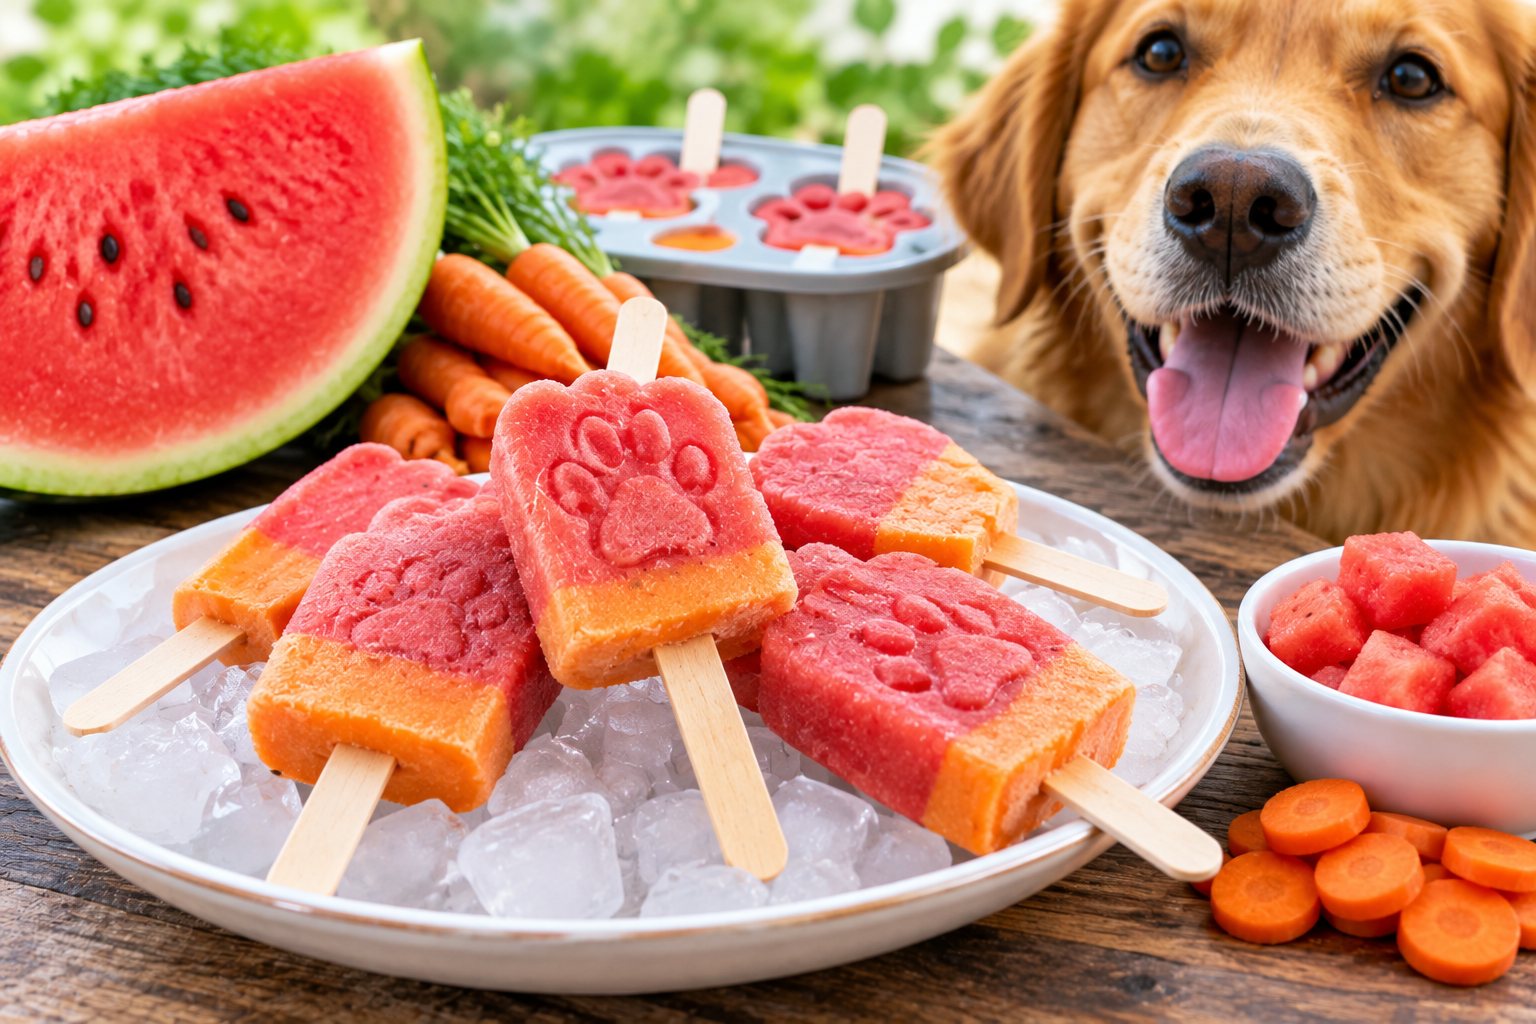
5. Watermelon Hydration Cubes (Full Recipe)
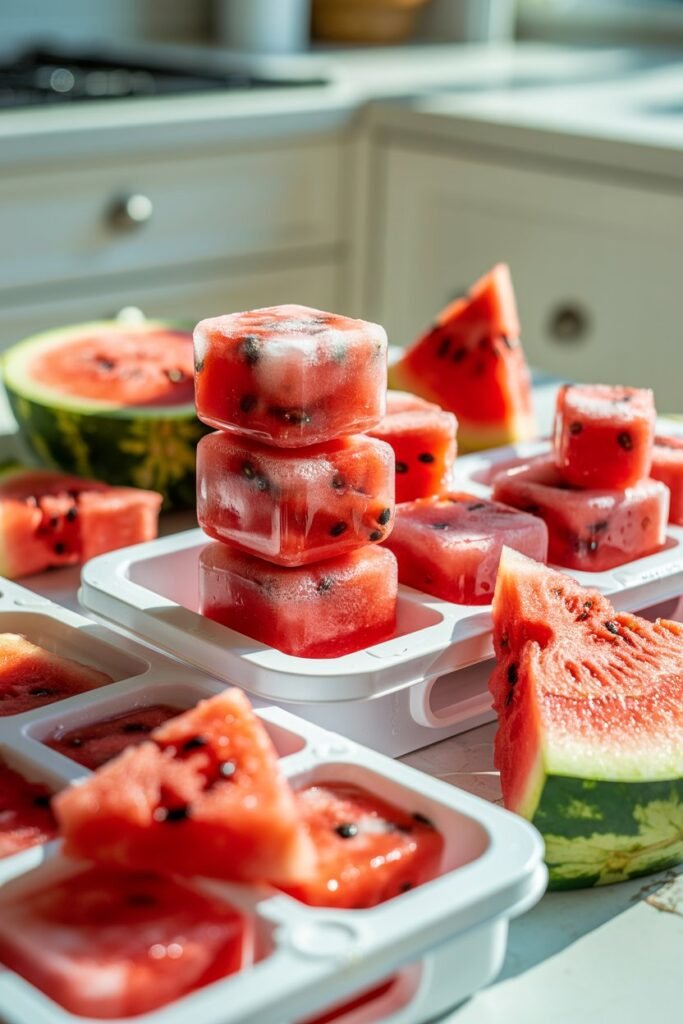
These are one of the most refreshing frozen dog snacks I like to make during hot weather. The recipe is naturally sweet, very simple, and mostly made from watermelon, so there is very little preparation involved.
I especially like this one when I want a light treat that feels different from the richer yogurt or peanut butter recipes. The high water content of watermelon also makes these treats naturally refreshing, although I always keep a bowl of fresh drinking water available because frozen treats should never replace a dog’s normal water intake.
Ingredients
- 2 cups seedless watermelon: Choose fresh, ripe watermelon and remove the rind completely. Even when you buy seedless watermelon, I still check the pieces for any remaining seeds before blending.
- ¼ cup clean water, optional: Most ripe watermelon contains enough moisture to blend on its own, so you may not need any additional water. I only add a small amount if the blender needs help processing the fruit.
How I Make These Frozen Dog Treats
- I start by washing the outside of the watermelon before cutting it. This helps prevent anything from the rind from being transferred to the fruit while preparing it.
- I remove the rind and cut the watermelon into small chunks.
- Even though I am using seedless watermelon, I check the pieces carefully and remove any seeds I find.
- I place the watermelon chunks into a blender and blend until the mixture is smooth and juicy.
- If the blender struggles to process the fruit, I add a small amount of water. I do not add water automatically because watermelon already contains plenty of liquid.
- If I want a smoother frozen treat, I can strain the mixture. Otherwise, I leave it slightly pulpy for a little more texture.
- I pour the watermelon mixture into clean silicone molds or small ice cube trays.
- I place the molds in the freezer for approximately 3 to 4 hours, or until the treats are completely solid.
- Once frozen, I remove the treats from the molds and transfer them to a freezer safe airtight container if I am storing them for later.
Why I Like These Treats
Watermelon contains a high percentage of water, which is what makes it such a refreshing fruit. It also provides naturally occurring vitamins and minerals, but I think of these treats primarily as a light snack rather than a source of complete nutrition.
The natural sweetness means there is no need to add sugar, honey, syrup, or artificial sweeteners. That is one of the reasons I like keeping this recipe so simple.
How I Serve Them
I prefer making these in small molds so I can control the portion easily. For smaller dogs, I choose smaller cubes or break a larger frozen piece into smaller portions.
Because watermelon contains natural sugars, I treat these as an occasional snack rather than something I would offer in large amounts throughout the day.
I also watch my dog when introducing any new frozen treat. If your dog tends to swallow frozen food quickly, allowing the treat to soften slightly before serving may be a better option.
My Helpful Tip for Hot Days
I like keeping a small container of these in the freezer during particularly warm weather. They are convenient when I want to give my dog something cool without spending much time preparing a recipe.
I still keep fresh, clean drinking water available at all times. Even though watermelon contains a lot of water, it should not be used as a replacement for normal hydration.
Important Preparation Note
Always remove the watermelon rind and check carefully for seeds before blending. The rind is much tougher than the fruit and is not something I would include in a homemade dog treat.
I also keep the recipe completely plain. There is no reason to add sugar, salt, syrup, seasoning, or other ingredients.
Storage
Once the watermelon treats are completely frozen, I transfer them into an airtight freezer safe container or freezer bag.
I prefer making smaller batches because the treats are easier to portion and take up less freezer space. When I want one, I simply remove the appropriate portion and let it soften slightly if necessary before serving.
As with all homemade dog treats, these frozen watermelon bites should be offered in moderation and should complement your dog’s normal complete and balanced diet.
6. Pumpkin & Yogurt Frozen Bites (Full Recipe)
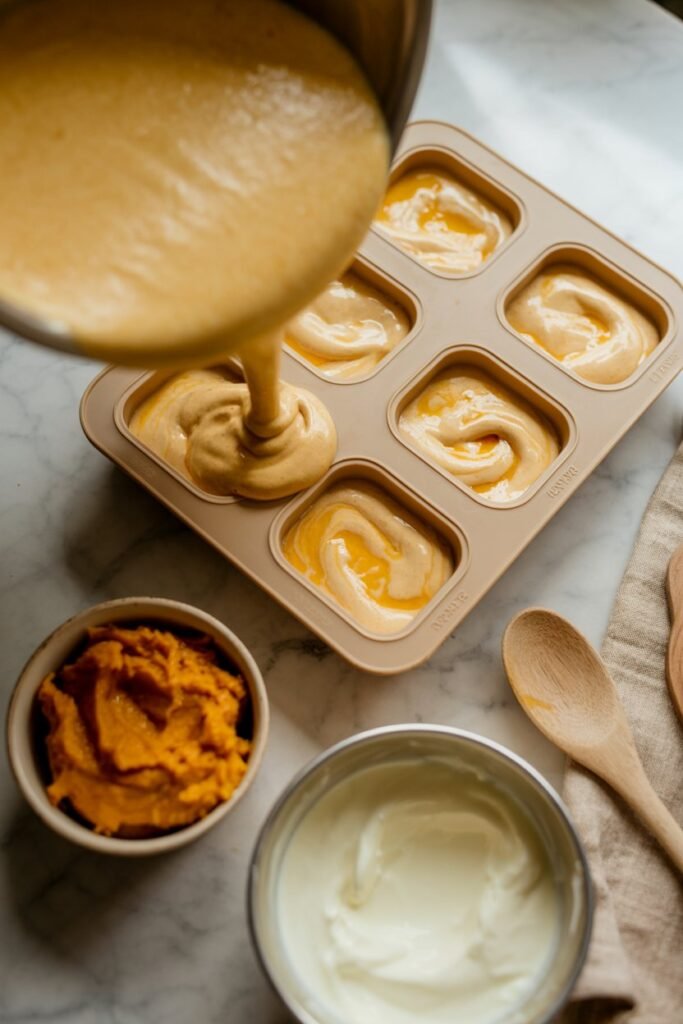
These frozen pumpkin yogurt treats are one of the simplest recipes I like to make when I want a cool homemade snack with a soft, creamy texture. There are only two main ingredients, so preparation takes just a few minutes and the treats can go straight into the freezer.
I particularly like this combination because pumpkin gives the treats a naturally rich texture, while plain yogurt makes them creamy and easy to portion into small molds. If your dog already tolerates both ingredients well, this can be a convenient addition to a homemade treat rotation.
Ingredients
- ½ cup pure pumpkin puree: Choose 100 percent plain pumpkin puree with no added sugar, spices, salt, or other flavorings. I always check the label because pumpkin pie filling is a completely different product and may contain ingredients that dogs do not need.
- ½ cup plain unsweetened yogurt: Use plain yogurt without added sugar, artificial sweeteners, fruit flavoring, chocolate, or other dessert ingredients. If your dog does not tolerate dairy well, this ingredient may not be appropriate.
How I Make These Frozen Dog Treats
- I add the pumpkin puree and plain yogurt to a clean mixing bowl.
- I stir the ingredients together until the mixture is completely smooth and evenly combined. I take a moment to scrape the sides of the bowl so there are no large pockets of pumpkin or yogurt left unmixed.
- I spoon the mixture into clean silicone molds or small ice cube trays. I prefer smaller molds because they make portioning easier.
- I gently tap the tray against the counter to level the mixture and remove larger air pockets.
- I place the molds in the freezer for approximately 3 to 5 hours, or until the treats are completely firm.
- Once frozen, I remove the treats from the molds and transfer them to a freezer safe airtight container if I am keeping them for later.
Why I Like This Combination
Pumpkin provides fiber, while yogurt gives the treats a creamy texture and adds protein and other nutrients. However, I would not treat this recipe as a digestive remedy.
Every dog responds differently to food, and dairy can cause digestive upset in some dogs. If your dog already has a sensitive digestive system, introduce the recipe in a very small amount and watch how they respond.
I also would not use a homemade frozen treat as a replacement for a complete and balanced diet or as a treatment for ongoing digestive problems.
How I Serve Them
I start with a small portion the first time I offer these treats. For small dogs, I prefer using miniature silicone molds so the portions are naturally smaller.
If the treats come out extremely hard, I let them soften slightly before serving. This can make the texture easier to manage for some dogs.
I also keep fresh drinking water available, even when serving frozen treats.
Important Pumpkin Tip
Make sure you are buying plain pumpkin puree, not pumpkin pie filling.
The ingredient list should be very simple. I avoid products containing added sugar, spices, salt, or other flavorings.
Important Yogurt Tip
Check the yogurt label before using it. I choose plain unsweetened yogurt without artificial sweeteners or flavored additions.
If your dog has previously experienced loose stools, gas, vomiting, or other digestive problems after eating dairy, I would skip the yogurt version and choose a different frozen treat instead.
Storage
Once completely frozen, I store these treats in an airtight freezer safe container. I prefer making small portions so I can take out only what I need rather than thawing a large batch.
For the best quality, keep the treats consistently frozen and avoid repeatedly thawing and refreezing them.
My Beginner Tip
If this is your first time making homemade frozen treats for your dog, this is a good recipe to keep simple. Do not add honey, sugar, cinnamon, flavored yogurt, or other ingredients just to make the recipe more interesting.
Two simple ingredients are enough to create a creamy frozen snack, provided your dog already tolerates both of them well.
7. Sardine Protein Frozen Cubes (Full Recipe)
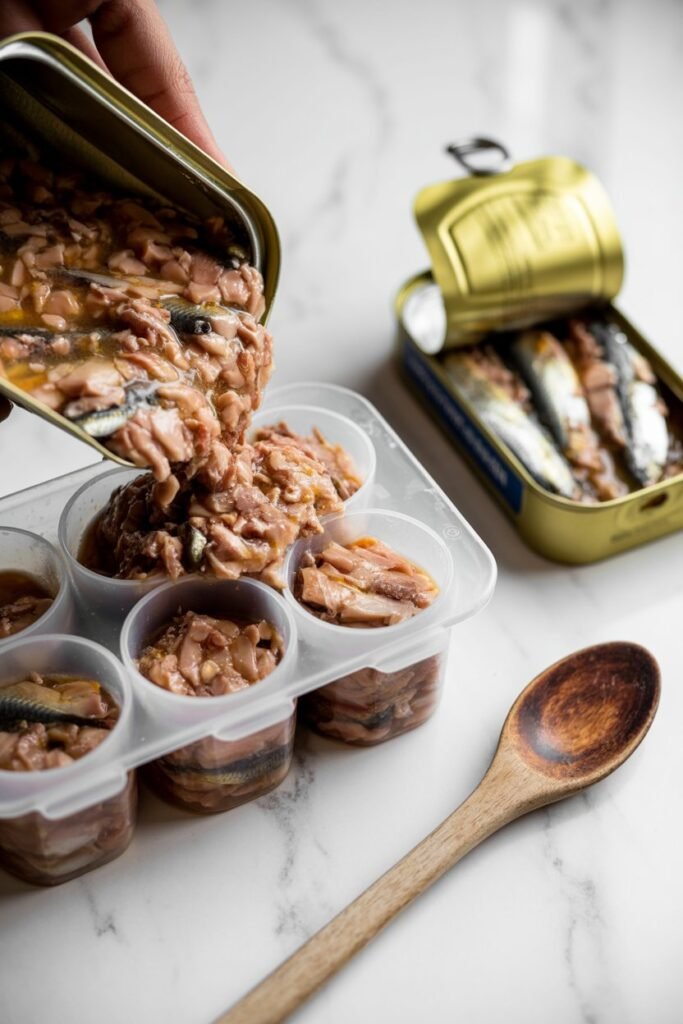
I like this recipe when I want to make a savory frozen treat with a strong fishy aroma. Sardines have a naturally rich flavor that many dogs enjoy, and the recipe requires only two main ingredients.
I also like that these treats can be prepared in one small batch and stored in the freezer. Because sardines are rich and flavorful, I keep the portions small and use them as an occasional treat rather than something I give my dog every day.
Ingredients
- 1 small can of sardines packed in water: Choose plain sardines with no added salt, spices, sauces, or seasoning. I also check the label carefully to make sure the sardines are not packed in oil or flavored with ingredients that are unnecessary for dogs.
- ½ cup clean water: Water helps thin the sardines into a mixture that is easy to blend and freeze. You can adjust the amount slightly depending on the consistency you want.
How I Make These Frozen Sardine Treats
- I open the sardines and drain any excess liquid.
- I check the sardines carefully and remove any obvious large bones or hard pieces before blending. Sardine bones are generally small and soft, but I still prefer checking the mixture carefully.
- I place the sardines in a blender and add approximately ½ cup of clean water.
- I blend everything until smooth. If my dog prefers more texture, I mash the sardines thoroughly with a fork instead of completely pureeing them.
- I spoon the mixture into small silicone molds or ice cube trays.
- If I want a little extra texture, I can place a very small piece of sardine into each mold before freezing.
- I place the tray in the freezer for approximately 4 to 6 hours, or until the treats are completely solid.
- Once frozen, I transfer the treats to a freezer safe airtight container so they are ready to portion whenever needed.
How I Serve Them
Because sardines are rich and flavorful, I prefer starting with a small portion. For a small dog, half of a small cube or an even smaller piece may be plenty.
I also introduce new treats gradually rather than giving several pieces at once. That makes it easier to see how my dog responds to the new food.
These are best treated as an occasional addition to your dog’s regular diet. I would not rely on a specific schedule such as two or three times a week for every dog because the appropriate amount depends on the dog’s size, diet, calorie needs, and overall health.
Why I Like Sardines for Homemade Treats
Sardines naturally contain omega 3 fatty acids and provide protein, making them a nutrient rich ingredient for an occasional dog treat.
I particularly like using them when I want something different from the sweeter fruit based frozen treats in this collection. The strong fish aroma also makes these cubes appealing to dogs that prefer savory flavors.
I would avoid promising that a small homemade treat will directly improve a dog’s coat, joints, brain function, or immune system. Those benefits depend on the dog’s overall diet and nutritional needs. The better approach is to think of sardines as one nutritious ingredient that can contribute useful nutrients when offered appropriately.
Important Ingredient Check
The sardines should be plain and packed in water whenever possible.
I avoid sardines containing:
- Added salt
- Garlic
- Onion
- Spices
- Sauces
- Heavy seasoning
- Flavored oils
I also check the label every time rather than assuming every can of sardines has the same ingredients.
My Helpful Tip
The smell of sardines can be quite strong, especially once the mixture starts thawing. I prefer preparing these treats in a well ventilated kitchen and keeping the finished portions in a tightly sealed freezer container.
Using small molds is also helpful because it gives you much better control over portions. Since sardines are rich, there is usually no need to make large cubes.
As with every homemade treat in this guide, these frozen sardine bites should complement your dog’s normal complete and balanced food rather than replace it. If your dog has a medical condition, food allergy, or prescribed diet, check with your veterinarian before adding sardines or other new treats.
8. Oat & Banana Frozen Bites (Full Recipe)
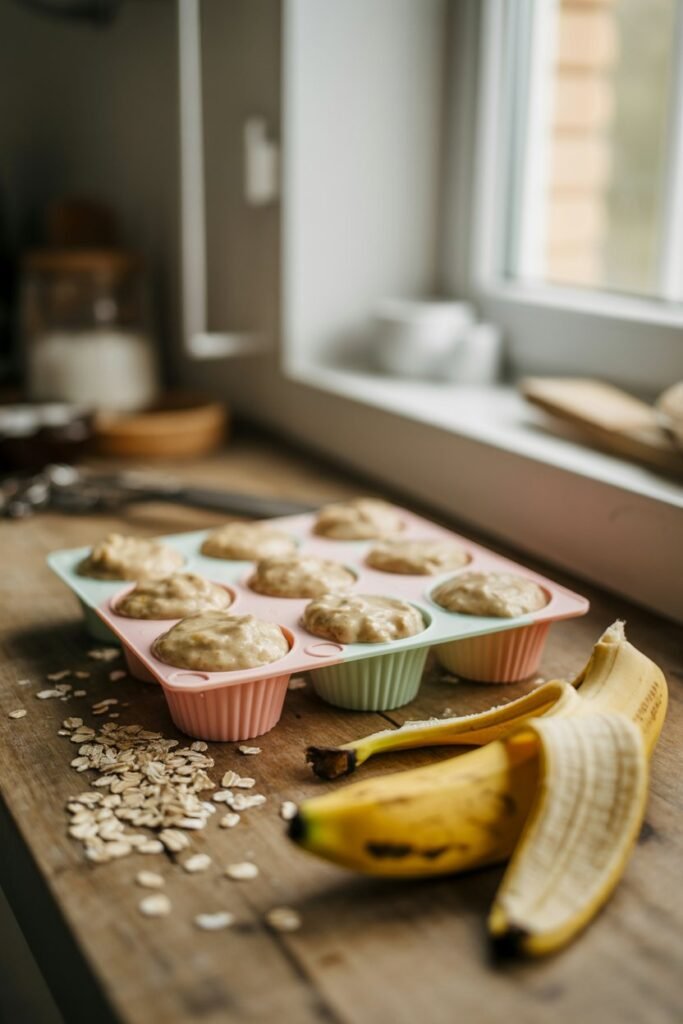
This is a simple frozen dog treat to make when I want something filling without spending much time in the kitchen. I like it as a beginner recipe because the ingredient list is short, the preparation is straightforward, and the mixture freezes nicely in small portions.
The banana gives these treats a naturally sweet flavor, while the oats add texture and make the finished snack a little more substantial. I also like that I can use water to keep the recipe very simple or plain yogurt when I already know my dog tolerates dairy well.
Ingredients
- 1 ripe banana: Choose a ripe banana without mold or spoiled areas. The softer texture makes it easier to blend and provides enough natural sweetness without adding sugar.
- 2 tablespoons plain oats: Use plain oats without sugar, flavoring, sweeteners, or added seasoning. I prefer blending the oats with the other ingredients so the finished treats have a smoother consistency.
- ½ cup clean water or plain yogurt: Water keeps this recipe simple and dairy free. If using yogurt, choose plain unsweetened yogurt without artificial sweeteners or added flavorings, and only use it if your dog already tolerates dairy well.
How I Make These Frozen Dog Treats
- I peel the banana and break it into smaller pieces before adding it to the blender.
- I add the banana, plain oats, and water or yogurt to the blender.
- I blend everything until the mixture becomes smooth and creamy. If my dog prefers more texture, I pulse the mixture briefly instead of blending it completely smooth.
- If the mixture looks too thick for the blender, I add a small amount of water and blend again. I prefer adding liquid gradually so the mixture does not become unnecessarily thin.
- I spoon the mixture into clean silicone molds or small ice cube trays.
- I gently tap the tray against the counter to help settle the mixture and remove larger air pockets.
- I place the molds in the freezer for approximately 3 to 5 hours, or until the treats are completely firm.
- Once frozen, I transfer the treats to an airtight freezer safe container if I am making them ahead.
Why I Like This Combination
Bananas provide carbohydrates, fiber, and naturally occurring potassium, while oats contribute carbohydrates and fiber. Together, they create a simple frozen snack with a creamy texture and mild flavor.
I would not describe these treats as a treatment for sensitive stomachs, though. Dogs can react differently to individual ingredients, and a dog with ongoing digestive problems may need a diet recommended specifically by a veterinarian.
For me, the biggest advantage is how easy the recipe is to prepare and portion. I can make several small treats at once and keep them ready in the freezer.
How I Serve Them
Because banana and oats make these treats relatively filling compared with a plain frozen water treat, I prefer starting with a small portion.
For a small dog, a miniature cube or half of a regular ice cube may be plenty. Larger dogs can have a larger portion depending on their overall diet and daily calorie needs.
I also supervise my dog when introducing a new frozen treat. If your dog tends to swallow frozen food quickly, allow the treat to soften slightly before serving.
My Helpful Tip
If your dog already enjoys bananas and tolerates oats well, you can make these treats smoother by soaking the oats briefly before blending. This is especially useful if your dog prefers softer textures.
I also recommend using smaller molds rather than making large frozen blocks. Smaller portions are easier to serve and make it much simpler to control how many treats your dog receives.
Important Ingredient Check
If you choose yogurt instead of water, check the label carefully. I use only plain, unsweetened yogurt and avoid products containing artificial sweeteners, especially xylitol, as well as chocolate or flavored dessert ingredients.
If your dog has a history of digestive problems or does not tolerate dairy, I would simply use water and keep the recipe dairy free.
As with the other homemade treats in this guide, these banana oat bites should be offered in moderation alongside your dog’s normal complete and balanced diet rather than used as a replacement for regular meals.
9. Coconut & Peanut Butter Frozen Treats (Full Recipe)
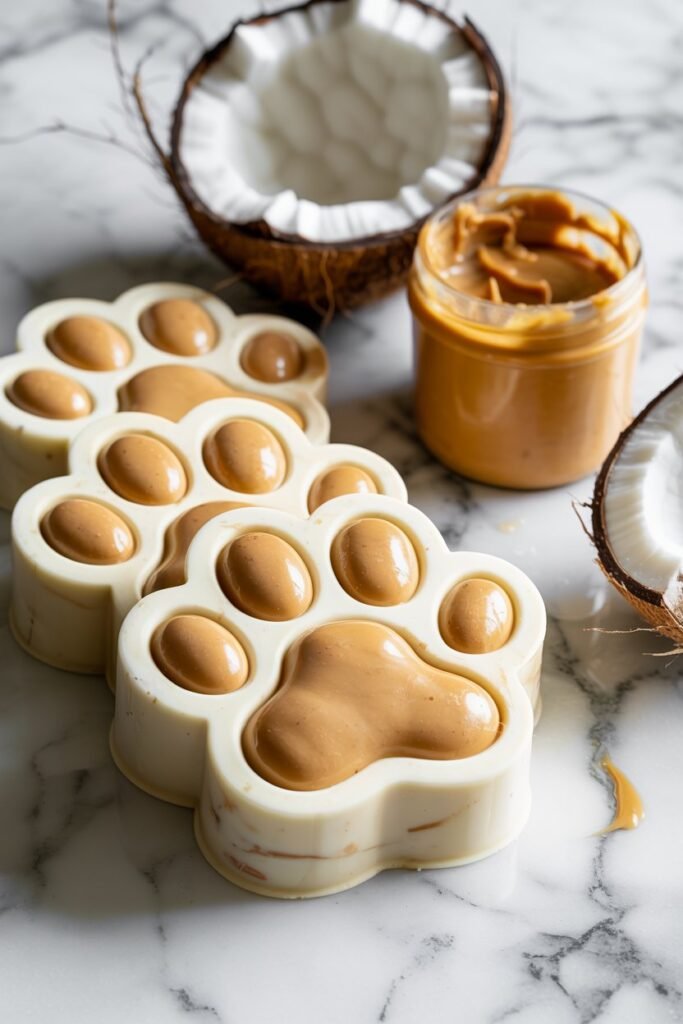
These are one of the richer frozen dog treats I like to make when I want something that feels a little more special. The creamy texture and peanut butter flavor make them appealing to many dogs, while the preparation is simple enough that you do not need much cooking experience.
I would keep these as an occasional reward rather than an everyday snack because coconut products and peanut butter can add more calories and fat than some of the lighter fruit based recipes in this guide.
Ingredients
- ½ cup unsweetened coconut milk or plain coconut yogurt: Choose a product without added sugar, artificial sweeteners, chocolate, or flavorings. I prefer an unsweetened product with a short ingredient list.
- 1 tablespoon natural peanut butter: Use plain peanut butter without xylitol or other artificial sweeteners. I also check that it does not contain chocolate, added flavors, or unnecessary ingredients.
- ½ cup clean water, optional: Water can be added if the mixture feels too thick. I usually add it gradually because the amount needed depends on the coconut product being used.
How I Make These Frozen Dog Treats
- I add the unsweetened coconut milk or coconut yogurt to a clean mixing bowl.
- I add the peanut butter and stir thoroughly until the mixture becomes smooth and the peanut butter is evenly incorporated.
- If the mixture is too thick to pour easily, I add a small amount of water and continue stirring.
- I aim for a smooth, pourable consistency rather than making the mixture overly thin.
- I spoon the mixture into clean silicone molds or small ice cube trays.
- I gently tap the tray against the counter to settle the mixture and remove larger air pockets.
- I place the molds in the freezer for approximately 3 to 5 hours, or until the treats are completely firm.
- Once frozen, I transfer the treats to an airtight freezer safe container if I am storing them for later.
Why I Like This Recipe
The main appeal of this recipe is the creamy texture and rich peanut butter flavor. It feels more like a special reward than some of the lighter fruit based frozen treats, which is why I prefer keeping the portions small.
Peanut butter also contributes protein and fat, while coconut products provide fat and calories. I would not make a strong claim that coconut specifically improves a dog’s skin, coat, or overall health from a small homemade treat. Your dog’s complete diet is much more important for meeting nutritional needs.
How I Serve Them
Because this is a richer recipe, I start with a small portion. For small dogs, a miniature mold or half of a regular cube may be plenty.
I also consider the calories from homemade treats alongside my dog’s normal food. If I am giving a richer treat like this, I keep the portion modest rather than offering several pieces at once.
For dogs that tend to swallow frozen treats quickly, I let the treat soften slightly before serving.
Important Peanut Butter Safety Check
Always check the peanut butter label before making this recipe.
Never use peanut butter containing xylitol. Xylitol can be extremely dangerous for dogs.
I also avoid peanut butter containing chocolate, added sweeteners, or flavored ingredients. When in doubt, a simple peanut butter with a short ingredient list is the better choice.
Choosing Coconut Milk or Coconut Yogurt
Whichever option you use, choose an unsweetened product without artificial sweeteners or dessert flavorings.
I would not use sweetened coconut milk, coconut cream designed for desserts, chocolate coconut products, or flavored coconut yogurt for this recipe.
If your dog has never had coconut products before, start with a very small portion to see how they tolerate it.
My Helpful Tip
I prefer using small silicone molds for this recipe because the mixture is rich and creamy. Smaller portions make it easier to give your dog a special reward without accidentally offering too much.
These treats are best viewed as an occasional homemade snack rather than a replacement for your dog’s normal complete and balanced food.
How to Store Frozen Dog Snacks Properly
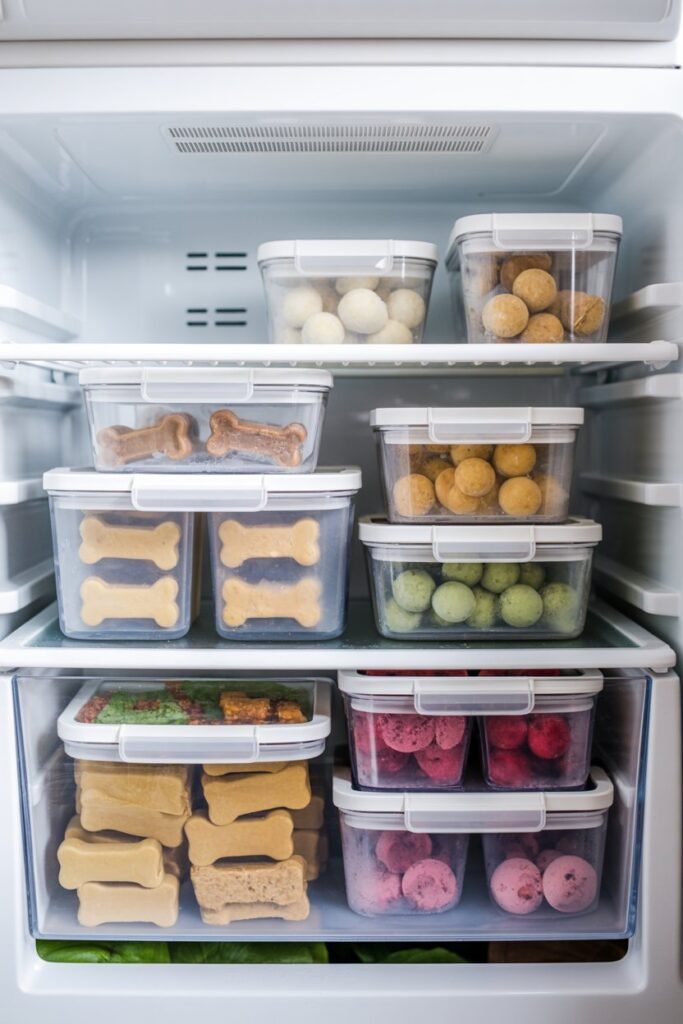
Proper storage makes homemade frozen treats easier to portion and helps prevent freezer burn and unwanted odors from affecting their quality. Once the treats are completely frozen, I transfer them to an airtight freezer safe container or a good quality freezer bag.
My Storage Tips
- Use an airtight container or freezer bag: Keep the treats well sealed to protect their texture and prevent them from absorbing other freezer odors.
- Label the container: Write the preparation date on the container so you know how long the treats have been stored. For the best quality, I prefer using homemade frozen treats within about 2 to 3 weeks.
- Keep portions separate: Smaller portions make it easier to take out only what your dog needs without repeatedly handling the entire batch.
- Avoid repeatedly thawing and refreezing: If a treat has completely thawed, I would not put it back into the freezer. Instead, prepare portions that can be used individually.
- Keep the treats frozen until serving: Remove only the amount you plan to give your dog and return the remaining treats to the freezer promptly.
- Watch portion sizes: Homemade treats can still contribute calories to your dog’s daily intake, so small portions are usually the easiest way to keep treats occasional and manageable.
For recipes containing ingredients such as yogurt, meat, broth, or other perishable foods, I would also use good food handling practices and avoid keeping treats indefinitely simply because they remain frozen.
Common Mistakes First-Time Dog Owners Should Avoid
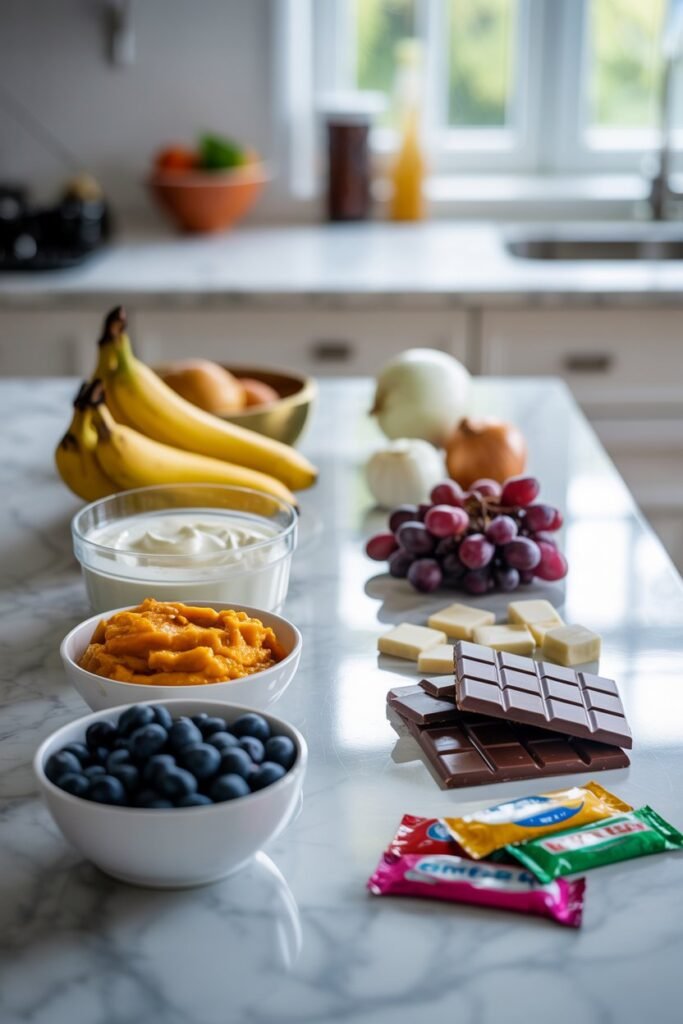
Making homemade frozen dog treats does not have to be complicated. In fact, I have found that the simplest recipes are often the easiest to prepare, portion, and keep consistent. Most problems come from adding unnecessary ingredients or offering too much of a good thing.
If you are new to making treats at home, these are some of the mistakes I would pay the most attention to.
Using Sweetened or Flavored Yogurt
Plain yogurt is very different from flavored yogurt. Many flavored products contain added sugar, sweeteners, fruit syrups, or other ingredients that are unnecessary in a homemade dog treat.
When I use yogurt, I always check the label and choose a plain, unsweetened option with a simple ingredient list.
Adding Salt or Seasonings
Dogs do not need the same seasonings we use when preparing food for ourselves. I keep homemade treats completely plain and avoid adding salt, garlic, onion, spice blends, sauces, or other flavorings.
This is particularly important with recipes containing chicken broth, beef broth, peanut butter, or cooked meat because these products can sometimes contain additional ingredients.
Making the Portions Too Large
A frozen treat can look small when it goes into the freezer mold, but a large cube can still represent quite a lot of food for a small dog.
I prefer using smaller silicone molds whenever possible. It gives me much better control over portions and allows me to offer an appropriate amount without having to guess how much of a large treat my dog should eat.
Introducing Too Many New Ingredients at Once
If your dog has never eaten one of the ingredients before, I would not introduce several unfamiliar foods in the same recipe.
Starting with a simple recipe makes it easier to notice whether your dog tolerates each ingredient. This is particularly helpful for dogs with known food sensitivities.
Forgetting to Check Ingredient Labels
Some ingredients that appear simple can contain additional sweeteners, flavorings, salt, or seasonings.
Before making a recipe, I check products such as yogurt, peanut butter, broth, and canned fish carefully. I would rather spend an extra minute reading the label than discover that a product contains an ingredient I did not intend to give my dog.
Overfeeding Homemade Treats
Homemade does not automatically mean calorie free. Ingredients such as peanut butter, yogurt, coconut products, bananas, and meat can all contribute calories to your dog’s daily intake.
I treat these recipes as snacks rather than meal replacements. Your dog’s main diet should continue to provide the complete and balanced nutrition they need.
Keeping It Simple Is Usually Best
You do not need a long ingredient list to make a homemade dog treat your dog enjoys. A few carefully chosen ingredients, appropriate portions, and safe preparation are usually much more important than trying to create complicated recipes.
When I am making a new frozen treat, I would rather start with a simple version and see how my dog responds before adding anything else.
FAQ: Easy Frozen Dog Snacks for First Time Dog Owners
Can all dogs eat frozen dog snacks?
Not necessarily. Many healthy adult dogs can enjoy appropriate frozen treats in moderation, but individual needs vary. Puppies, senior dogs, dogs with dental problems, dogs with food sensitivities, and dogs with medical conditions may need different treat choices or smaller portions.
I recommend introducing any new treat gradually and watching how your dog responds. If your dog has a health condition or follows a prescribed diet, check with your veterinarian before adding homemade treats.
How often can I give my dog frozen treats?
Frozen treats should be treated as occasional snacks rather than meal replacements. There is not one specific number of times per week that works for every dog because portion size, ingredients, daily calorie needs, activity level, and the rest of the diet all matter.
I prefer focusing on small portions and moderation rather than following a strict weekly schedule. Treats should fit alongside your dog’s normal complete and balanced diet.
Are homemade frozen dog treats better than store bought treats?
Homemade treats can give you more control over the ingredients, which is one of the reasons I enjoy making them. You can choose simple ingredients, adjust portion sizes, and avoid ingredients your dog does not tolerate.
That does not automatically make homemade treats healthier than every store bought option, though. Some commercial treats are carefully formulated and can be perfectly appropriate. What matters most is choosing safe ingredients and keeping treats appropriate for your dog’s overall diet.
What ingredients should I avoid when making frozen dog treats?
There are several ingredients I would never intentionally include in homemade dog treats. These include xylitol, chocolate, grapes, raisins, onions, and garlic. I also avoid heavily salted foods, seasoned broths, sauces, and products containing unnecessary additives.
Always check ingredient labels rather than assuming a product is safe simply because the main ingredient appears suitable for dogs.
Can I give my dog the same frozen treat every day?
I prefer rotating a few simple recipes rather than relying heavily on one treat every day. This gives you more variety and can make it easier to notice if your dog does not tolerate a particular ingredient.
The important thing is not to let treats replace your dog’s regular complete and balanced food. Even nutritious ingredients can contribute extra calories when given too frequently.
What is the best frozen treat for a beginner?
I would start with one of the simplest recipes in this guide, especially one containing ingredients your dog has already eaten safely.
A simple banana based treat or a plain broth based frozen snack can be easier to introduce than a recipe containing several unfamiliar ingredients. Once you know what your dog enjoys and tolerates, you can experiment with other combinations.
Final Thoughts
Making frozen dog treats at home does not have to involve complicated recipes or expensive ingredients. A few simple, dog appropriate foods can be turned into convenient little snacks that are easy to portion and keep in the freezer.
What I like most about making these treats is being able to adjust them to my dog’s preferences. Some dogs immediately go for banana and peanut butter, while others would choose chicken broth, pumpkin, or a savory fish based option every time.
If you are a first time dog owner, I would start with one or two simple recipes instead of making everything at once. Introduce new ingredients gradually, keep portions modest, and pay attention to what your dog actually enjoys.
Once you figure out your dog’s favorite flavors and textures, homemade frozen treats can become a simple part of your routine without making mealtime complicated.
One Comment