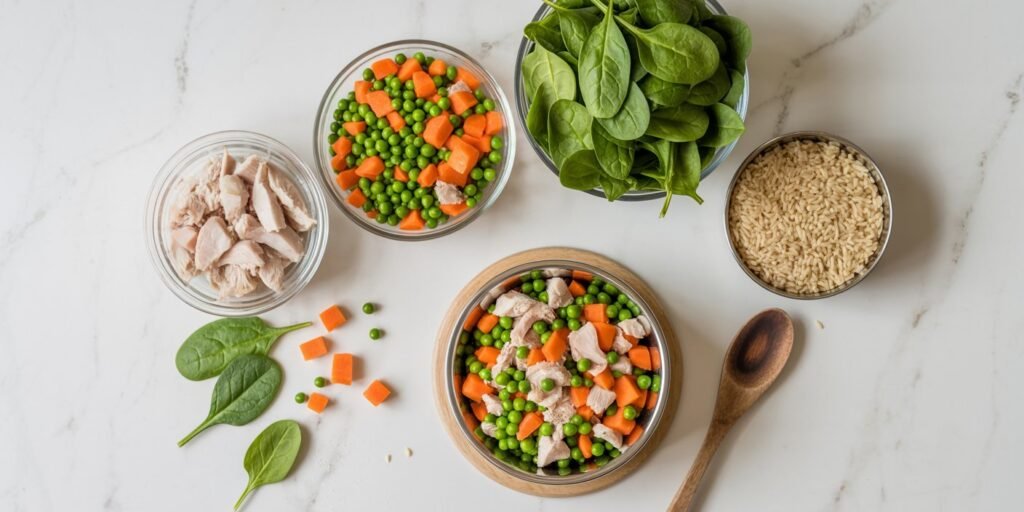
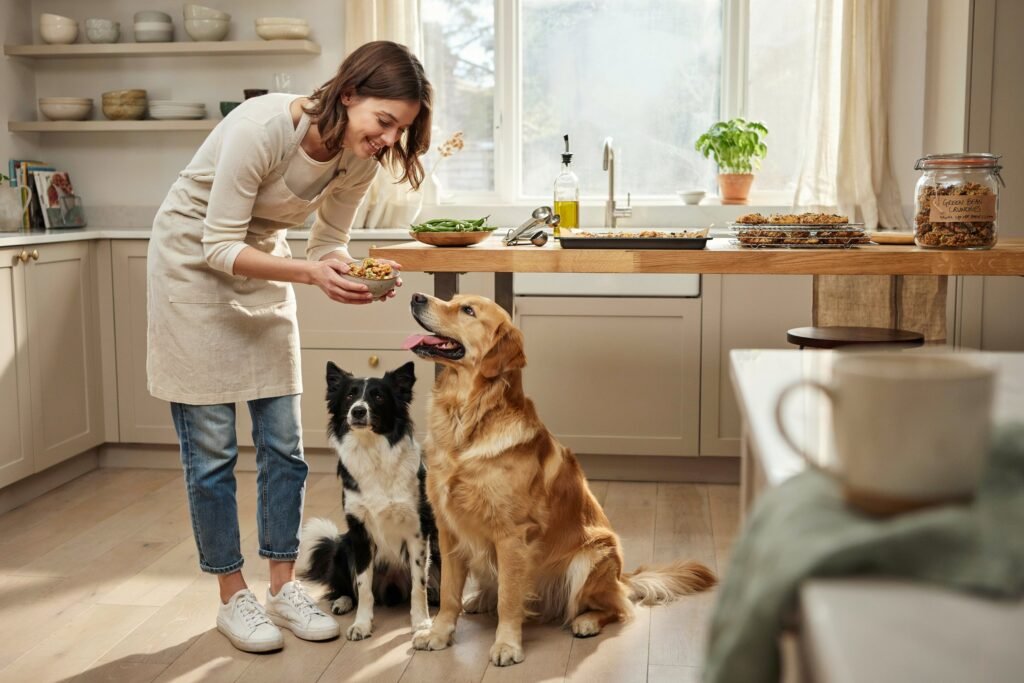
There is something special about making homemade treats for my dogs.
Whenever the weather gets warm or I simply want to give them a refreshing snack, I head to my kitchen and use ingredients I already have on hand.
Most of these ingredients are simple pantry staples that many dog owners keep at home, which makes these recipes affordable and easy to prepare.
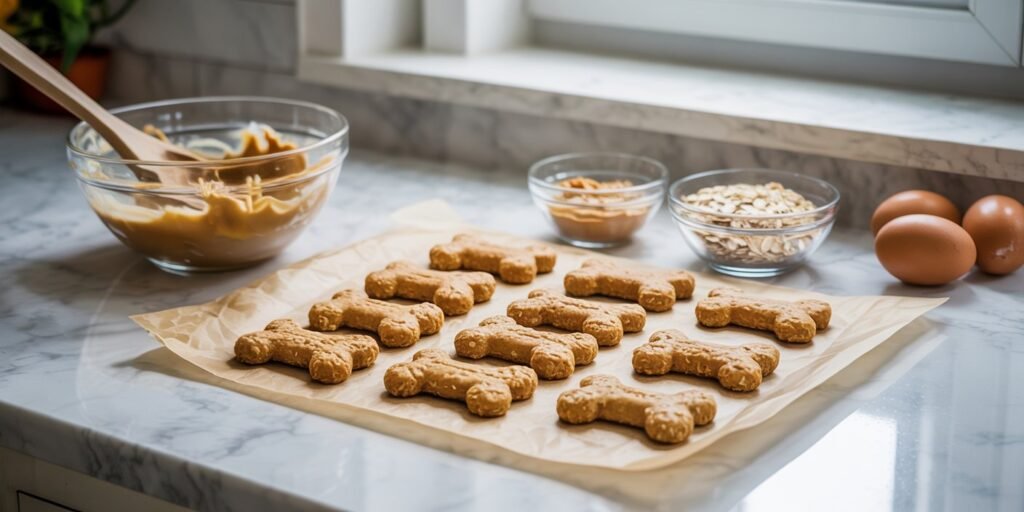
What I love most about frozen dog treats is that they require very little effort.
A few minutes of mixing, blending, or mashing ingredients is usually all it takes before the freezer does the rest of the work.
My dogs get excited every time they see me pull out the silicone molds because they know something delicious is coming.
These recipes use dog-friendly ingredients that create tasty frozen snacks while allowing you to know exactly what your dog is eating.
Each recipe focuses on simple ingredients and easy instructions that anyone can follow.
Disclaimer
This post may contain affiliate links. As an Amazon Associate, I earn from qualifying purchases at no additional cost to you. The information in this article is for educational and informational purposes only. I only recommend products that I believe are relevant to this topic. Always use dog-safe ingredients and consult your veterinarian before introducing new foods or treats, especially if your dog has allergies or health conditions.
Amazon Shopping List
- Silicone Dog Treat Molds
- KONG Classic Dog Toy (for stuffing with frozen treats)
- Stainless Steel Mixing Bowls Set
- Measuring Cups and Spoons Set
- BPA-Free Silicone Ice Cube Trays
- Glass Food Storage Containers with Lids
- Organic Natural Peanut Butter (Xylitol-Free)
Why Frozen Dog Treats Are Great for Dogs
Frozen treats offer several benefits:
- Help cool dogs down during warm weather
- Provide mental stimulation and enrichment
- Use simple ingredients you already have
- Can support hydration
- Make excellent rewards and snacks
- Easy to prepare in large batches
Always introduce new treats gradually and serve them in moderation as part of a balanced diet.
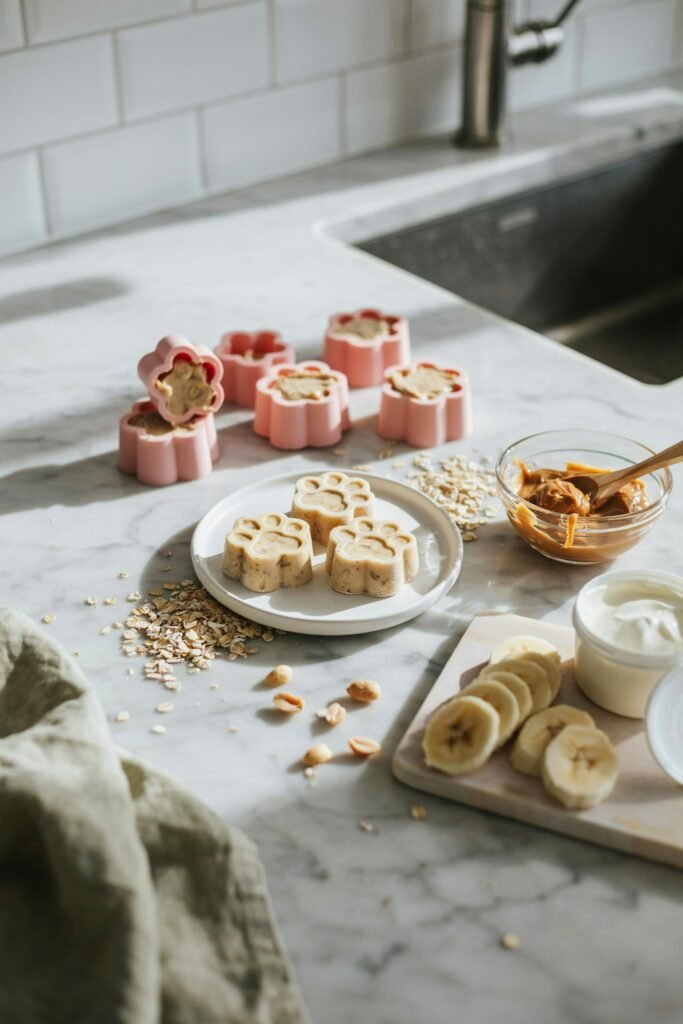
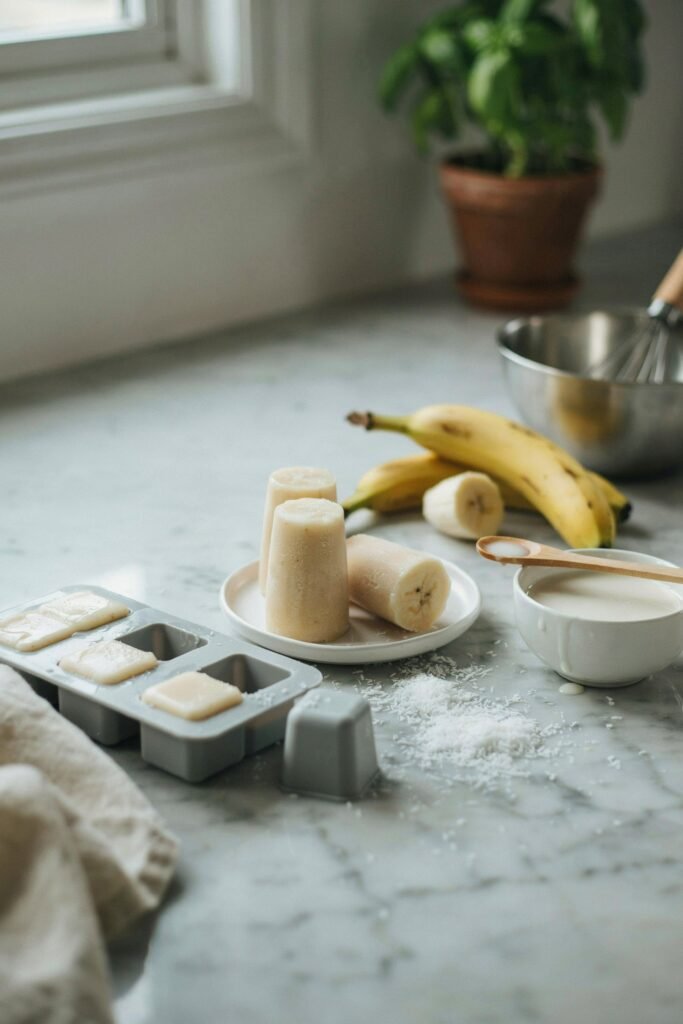
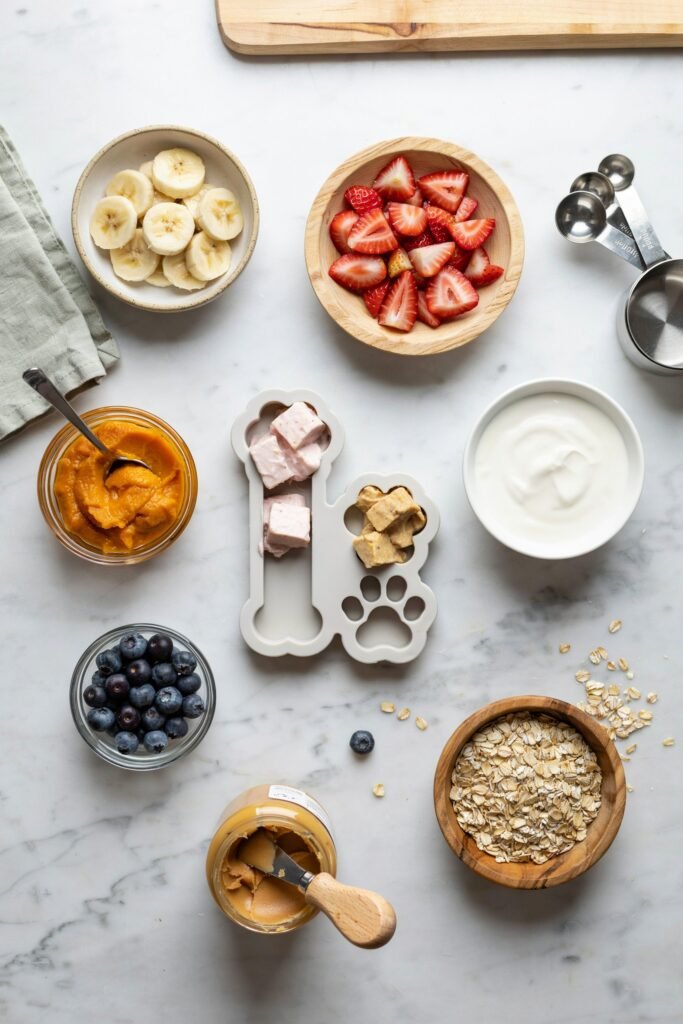
1. Peanut Butter Banana Frozen Dog Bites
Whenever I need a quick frozen treat that I know my dogs will love, this is usually the first recipe I make.
It uses simple ingredients that are often already sitting in my kitchen, and it only takes a few minutes to prepare before the freezer does the rest of the work.
The combination of banana, peanut butter, and yogurt creates a creamy texture that freezes beautifully.
These treats are perfect for warm afternoons, after walks, or anytime your dog deserves a special snack.
Ingredients You’ll Need
1 Ripe Banana
I use a ripe banana because it is naturally sweet and easy to mash. The softer the banana, the smoother the final mixture becomes.
Bananas also help bind the ingredients together and create a creamy texture once frozen.
2 Tablespoons Natural Peanut Butter
Peanut butter adds a rich flavor that most dogs absolutely love.
It also makes the treats feel a little more indulgent while helping create a smooth consistency.
Before using peanut butter, I always check the ingredient label to make sure it does not contain xylitol, which is unsafe for dogs.
½ Cup Plain Unsweetened Yogurt
Plain yogurt helps create a smooth and creamy texture.
It blends easily with the banana and peanut butter and freezes into a refreshing treat that dogs enjoy licking and chewing.
Step 1: Mash the Banana
Place the ripe banana into a medium mixing bowl.
Using a fork, mash the banana thoroughly until it becomes mostly smooth.
Take a little extra time here because large chunks can create an uneven texture in the finished treats.
I usually continue mashing until only a few small lumps remain.
Step 2: Add the Peanut Butter
Add the peanut butter to the mashed banana.
Use a spoon to stir the mixture until the peanut butter starts blending into the banana.
At first it may seem slightly thick, but keep mixing until the two ingredients are evenly combined.
Step 3: Mix in the Yogurt
Pour the yogurt into the bowl.
Stir slowly until everything becomes smooth and creamy.
Scrape the sides of the bowl as you mix to make sure all of the ingredients are fully incorporated.
You should end up with a thick, creamy mixture that has an even color throughout.
Step 4: Fill the Molds
Spoon the mixture into silicone molds or ice cube trays.
Fill each section almost to the top while leaving a little room for expansion during freezing.
Gently tap the tray on the countertop a few times to remove any trapped air bubbles.
Step 5: Freeze Until Firm
Place the tray into the freezer and allow the treats to freeze for at least four hours.
Once completely frozen, remove the treats from the molds and transfer them to a freezer-safe container for storage.
Serving Tips
I usually give one or two treats depending on my dog’s size.
These are especially refreshing after outdoor playtime and are one of the easiest frozen dog treats to keep stocked in the freezer.
2. Pumpkin Yogurt Freezer Cubes
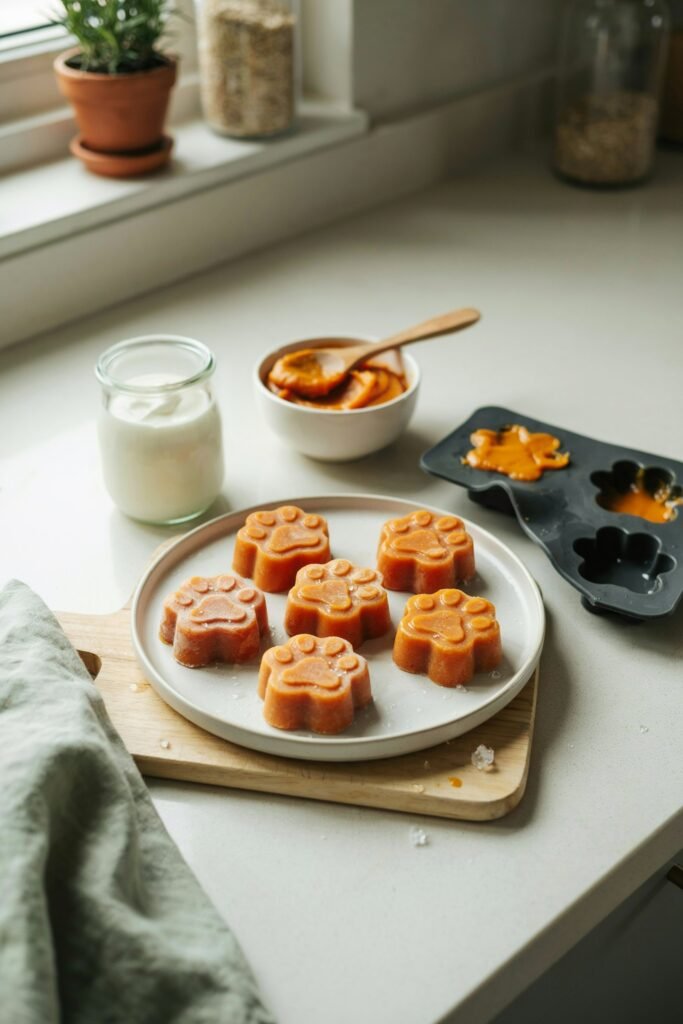
This is one of my favorite recipes when I have a can of pumpkin sitting in the pantry.
The ingredients are simple, the preparation is easy, and the treats freeze into creamy cubes that are perfect for a cooling snack.
My dogs love the smooth texture, and I love how quickly these come together.
Ingredients You’ll Need
½ Cup Pure Pumpkin Purée
I use pure pumpkin purée because it mixes easily and creates a rich, creamy base for frozen treats.
When shopping, I always make sure the can says pure pumpkin and not pumpkin pie filling, which contains added sugars and spices that are not intended for dogs.
½ Cup Plain Unsweetened Yogurt
The yogurt adds creaminess and helps balance the texture of the pumpkin. It also makes the treats easier to pour into molds.
Step 1: Combine the Ingredients
Add the pumpkin purée and yogurt to a medium mixing bowl.
Stir slowly until the mixture becomes completely smooth. Continue mixing until there are no visible streaks of pumpkin or yogurt remaining.
The final mixture should be thick, creamy, and evenly blended.
Step 2: Fill the Molds
Using a spoon, carefully transfer the mixture into silicone molds or an ice cube tray.
Try to fill each section evenly so the treats freeze at the same rate.
If needed, smooth the tops with the back of a spoon.
Step 3: Freeze Completely
Place the tray into the freezer.
Allow the treats to freeze for at least four to six hours, or until completely solid.
Step 4: Remove and Store
Once frozen, gently pop the treats out of the molds.
Transfer them to an airtight freezer container or freezer bag to keep them fresh.
Serving Tips
These pumpkin yogurt cubes make a simple snack that is easy to prepare whenever you have pumpkin and yogurt available in the kitchen.
3. Apple Cinnamon Frozen Dog Treats
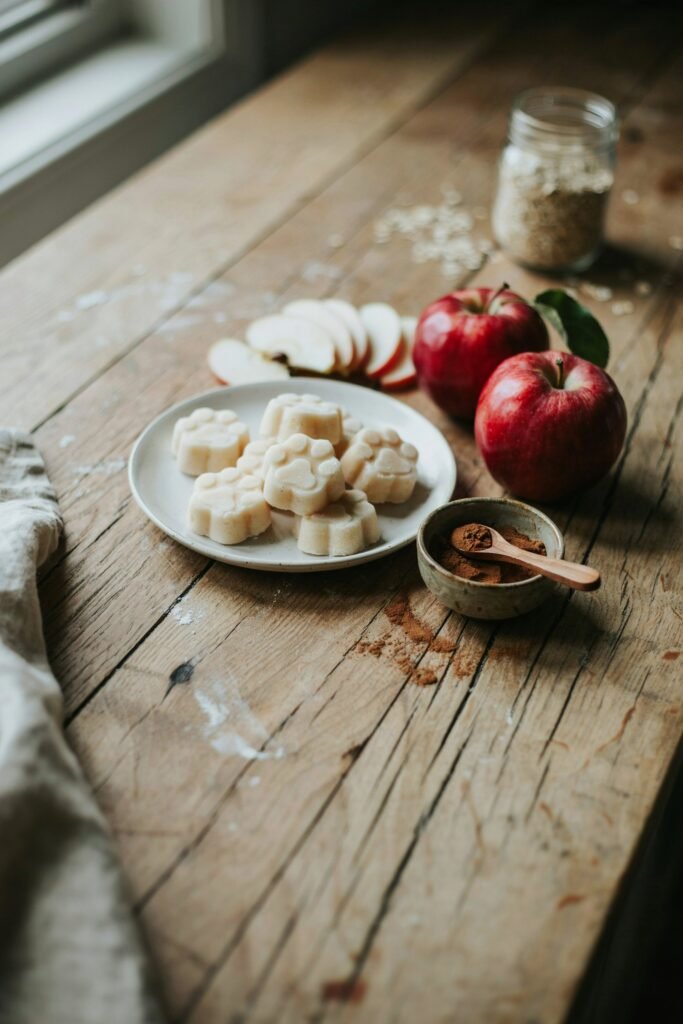
Whenever I have an extra apple sitting on the counter, I love turning it into these refreshing frozen treats.
The apple provides natural sweetness while the yogurt creates a creamy texture that freezes beautifully.
A tiny pinch of cinnamon adds a little extra flavor without overpowering the recipe.
Ingredients You’ll Need
1 Apple
I use a fresh apple because it naturally sweetens the treats without adding sugar.
Before using it, I peel the apple and remove the core and seeds. This helps create a smoother texture and makes blending easier.
½ Cup Plain Unsweetened Yogurt
The yogurt helps create a creamy consistency and blends perfectly with the apple.
It also helps the mixture freeze into a softer texture compared to fruit alone.
A Small Pinch of Cinnamon
A small amount of cinnamon adds extra flavor to the treats.
Only a tiny pinch is needed because a little goes a long way.
Step 1: Prepare the Apple
Wash the apple thoroughly.
Peel it, remove the core, and cut it into small chunks.
Smaller pieces blend more easily and help create a smoother mixture.
Step 2: Blend the Ingredients
Add the apple chunks, yogurt, and cinnamon to a blender.
Blend until the mixture becomes completely smooth.
Stop occasionally to scrape down the sides if necessary.
Step 3: Fill the Molds
Pour the blended mixture into silicone molds or ice cube trays.
Fill each section evenly and tap the tray lightly on the counter to remove any air pockets.
Step 4: Freeze Until Solid
Place the tray into the freezer.
Allow the treats to freeze for at least four to six hours, or until completely firm.
Step 5: Store for Later
Remove the frozen treats from the molds and transfer them to a freezer-safe container.
Keep them frozen until you’re ready to serve them.
Serving Tips
These apple cinnamon frozen treats are perfect for dogs that enjoy fruit flavors.
The combination of apple and yogurt creates a refreshing snack that is easy to make and simple to keep on hand in the freezer.
4. Blueberry Oat Frozen Dog Treats
Whenever I have blueberries in the refrigerator and oats in the pantry, this is one of the easiest frozen treats to make.
The blueberries add natural sweetness and a beautiful color, while the oats help create a thicker texture that freezes nicely.
My dogs always seem excited when I make these because they have a slightly fruity flavor and a refreshing texture.
Ingredients You’ll Need
½ Cup Blueberries
I use blueberries because they blend easily and add natural flavor without any added sugar.
Fresh or frozen blueberries both work well for this recipe. If I’m using frozen blueberries, I let them sit for a few minutes before blending.
¼ Cup Rolled Oats
Rolled oats help thicken the mixture and give the treats a smoother consistency.
They also help the blended mixture hold together better once frozen.
½ Cup Water
Water helps everything blend smoothly and creates a lighter frozen texture.
It also makes it easier to pour the mixture into molds.
Step 1: Add Everything to a Blender
Place the blueberries, oats, and water into a blender.
Make sure the lid is secured properly before blending.
Step 2: Blend Until Smooth
Blend the ingredients until the blueberries are completely broken down and the oats are well incorporated.
The mixture should look smooth with no large pieces remaining.
If the mixture seems too thick, add a small splash of water and blend again.
Step 3: Fill the Molds
Carefully pour the mixture into silicone molds or ice cube trays.
Fill each section evenly so all the treats freeze at the same rate.
Step 4: Freeze Completely
Place the tray into the freezer and allow the treats to freeze for at least four to six hours.
They should feel completely solid before removing them from the molds.
Step 5: Store Properly
Transfer the frozen treats to an airtight freezer container.
This helps keep them fresh and prevents freezer odors from affecting the flavor.
Serving Tips
These treats are perfect for warm afternoons when your dog needs a cool snack.
I usually keep a batch in the freezer because they are quick to grab whenever my dogs need a little treat.
5. Sweet Potato Frozen Dog Treats
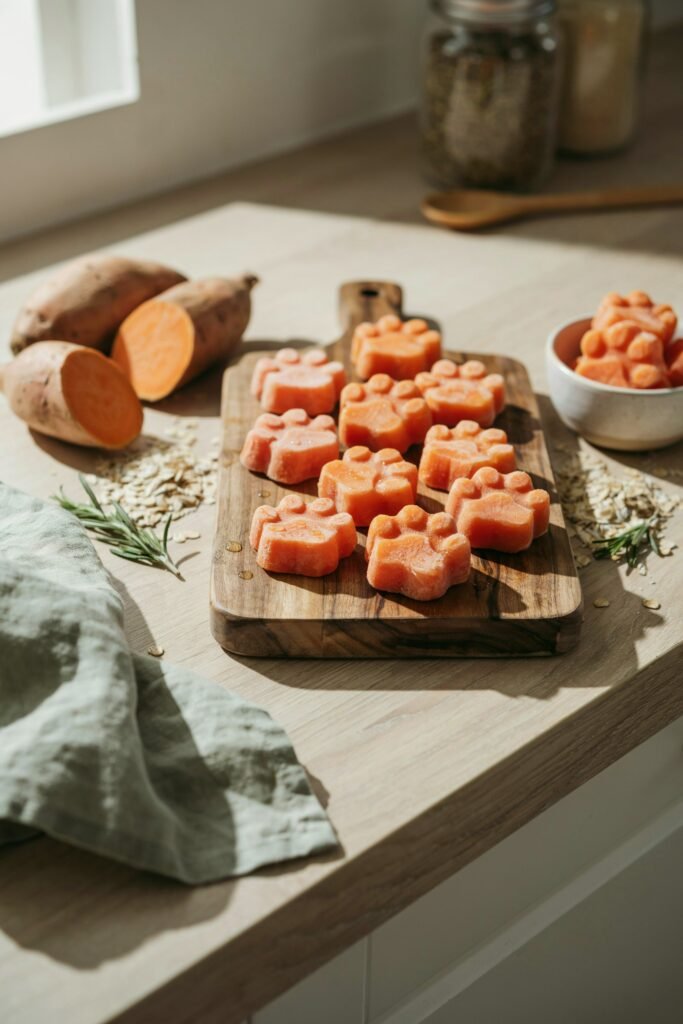
Sweet potatoes are one of my favorite ingredients to use in homemade dog treats because they create a naturally creamy texture and are easy to work with.
Whenever I have leftover cooked sweet potato from dinner, I save some specifically for this recipe.
Ingredients You’ll Need
1 Medium Cooked Sweet Potato
I use sweet potato because it becomes smooth when mashed and freezes surprisingly well.
The natural sweetness makes these treats appealing without needing any added ingredients.
¼ Cup Water
The water helps loosen the sweet potato and creates a smoother mixture that is easier to spoon into molds.
Step 1: Prepare the Sweet Potato
Allow the cooked sweet potato to cool completely.
Remove the skin if it has not already been removed.
Place the sweet potato into a mixing bowl.
Step 2: Mash Until Smooth
Using a fork or potato masher, mash the sweet potato thoroughly.
Try to remove as many lumps as possible so the frozen treats have a smooth texture.
Step 3: Add the Water
Pour the water into the mashed sweet potato.
Stir until the mixture becomes smooth and easy to scoop.
If it still seems very thick, add a little more water one tablespoon at a time.
Step 4: Fill the Molds
Spoon the mixture into silicone molds.
Use the back of a spoon to smooth the tops so the treats freeze evenly.
Step 5: Freeze Until Firm
Place the molds into the freezer and allow them to freeze for at least four to six hours.
Once frozen solid, remove the treats and store them in a freezer-safe container.
Serving Tips
These sweet potato treats are simple, filling, and easy to make with ingredients many people already have at home.
6. Watermelon Frozen Dog Pops
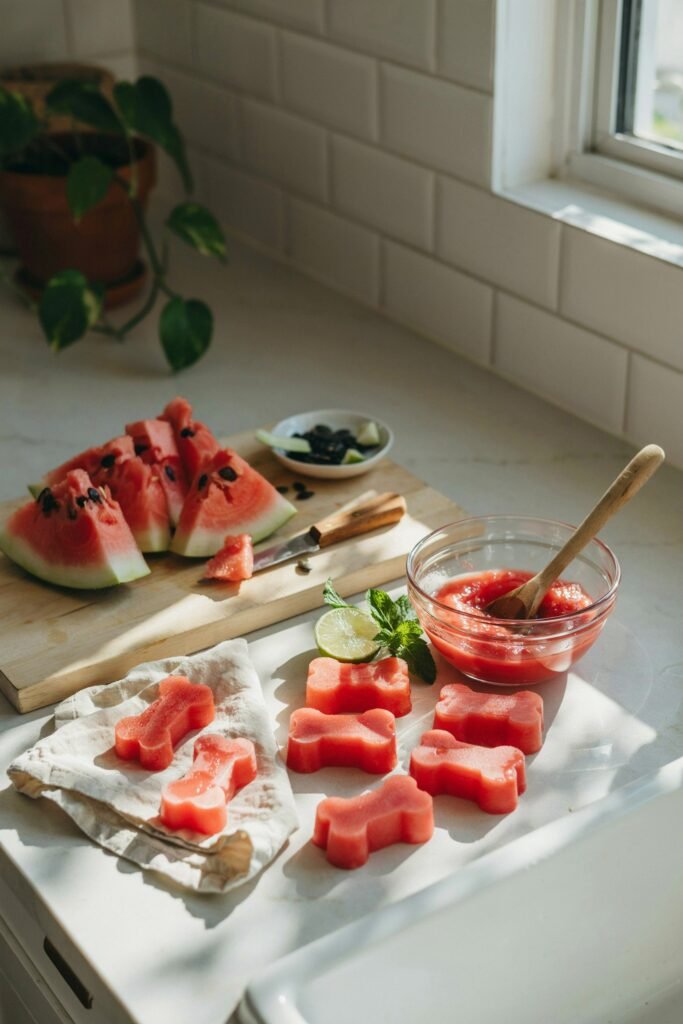
This recipe is one of the simplest frozen dog treats you can make.
It requires only one ingredient and takes just a few minutes to prepare.
Whenever I have extra watermelon in the refrigerator, I like turning it into frozen treats instead of letting it go to waste.
Ingredients You’ll Need
1 Cup Seedless Watermelon Chunks
I use watermelon because it contains a lot of moisture, which makes it incredibly refreshing once frozen.
Make sure all seeds have been removed before preparing the recipe.
Step 1: Prepare the Watermelon
Cut the watermelon into small chunks.
Check carefully to make sure there are no seeds remaining.
Place the chunks into a blender.
Step 2: Blend Until Smooth
Blend the watermelon until it becomes completely liquid.
Because watermelon contains so much water, this usually only takes a few seconds.
Step 3: Pour Into Molds
Carefully pour the blended watermelon into silicone molds or ice cube trays.
Try not to overfill the molds since the liquid can be easy to spill.
Step 4: Freeze Completely
Place the molds into the freezer.
Allow the watermelon treats to freeze for at least four hours or until completely solid.
Step 5: Remove and Store
Pop the frozen treats out of the molds and place them in a freezer-safe container.
Store them in the freezer until ready to serve.
Serving Tips
These watermelon frozen dog pops are especially refreshing during warm weather.
Because they contain only one ingredient, they are one of the easiest homemade frozen treats to prepare.
7. Carrot Yogurt Cooling Cubes
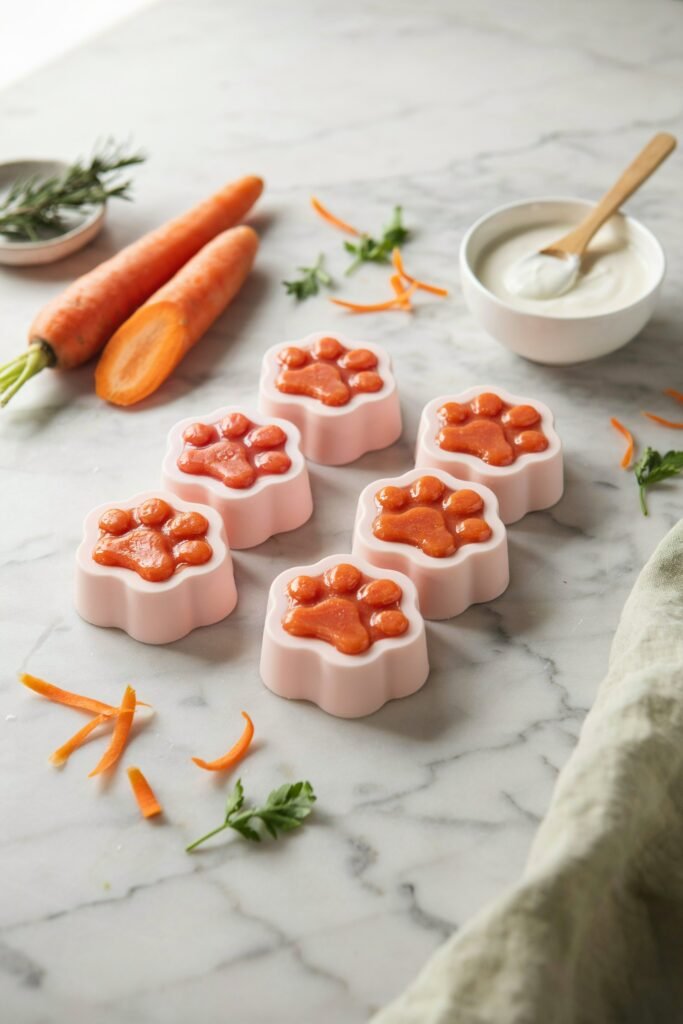
Whenever I have a few extra carrots in the refrigerator, I love making these simple frozen treats.
The carrots blend into a smooth mixture and pair perfectly with yogurt to create a cool and creamy snack.
My dogs seem to enjoy the slightly sweet flavor, and I like how easy these treats are to prepare with ingredients I usually already have at home.
Key Points
- Uses only 2 simple ingredients
- Easy to make in less than 10 minutes
- Naturally sweet flavor from carrots
- Smooth and creamy frozen texture
- Great for warm afternoons
- Easy to store in the freezer
Ingredients You’ll Need
½ Cup Cooked Carrots
I use cooked carrots because they blend much more easily than raw carrots.
Cooking also helps create a smoother mixture, which results in a better frozen texture once the treats are ready.
½ Cup Plain Unsweetened Yogurt
The yogurt helps make the treats creamy and easy to blend.
It also balances the texture of the carrots and creates a refreshing frozen snack.
Step 1: Prepare the Carrots
Allow the cooked carrots to cool completely.
Place them into a blender or food processor.
Smaller pieces blend more easily, so I usually cut larger carrot pieces before blending.
Step 2: Add the Yogurt
Pour the yogurt into the blender with the carrots.
Make sure both ingredients are evenly distributed before blending.
Step 3: Blend Until Smooth
Blend the mixture until it becomes completely creamy.
Stop occasionally to scrape down the sides if necessary.
The finished mixture should be smooth with no visible carrot chunks remaining.
Step 4: Fill the Molds
Carefully spoon or pour the mixture into silicone molds.
Fill each section evenly so all the treats freeze consistently.
Step 5: Freeze Completely
Place the molds into the freezer and allow them to freeze for at least four to six hours.
Once fully frozen, remove the treats and place them into a freezer-safe container.
Serving Tips
These cooling cubes are perfect after outdoor playtime or walks. I usually keep a batch ready in the freezer because they disappear quickly in my house.
8. Coconut Banana Frozen Dog Treats
This recipe creates one of the creamiest frozen dog treats on the list.
The banana adds natural sweetness while the coconut milk creates a smooth texture that freezes beautifully.
Whenever I want something simple but a little different from my usual recipes, this is one of my favorite options.
Key Points
- Requires only 2 ingredients
- Naturally sweet without added sugar
- Creamy texture dogs enjoy
- Quick and beginner-friendly recipe
- No cooking required
- Perfect freezer treat for warm weather
Ingredients You’ll Need
1 Ripe Banana
I use a ripe banana because it blends easily and provides natural sweetness.
A soft banana also helps create a smoother final texture.
½ Cup Unsweetened Coconut Milk
The coconut milk gives these treats a rich and creamy consistency.
I always choose unsweetened coconut milk so there are no unnecessary added ingredients.
Step 1: Prepare the Banana
Peel the banana and break it into smaller pieces.
Place the pieces into a blender.
Using smaller pieces helps everything blend more quickly.
Step 2: Add the Coconut Milk
Pour the coconut milk into the blender.
Make sure the banana is mostly covered so it blends evenly.
Step 3: Blend Until Creamy
Blend the ingredients until completely smooth.
The mixture should look creamy and uniform with no visible banana chunks remaining.
Step 4: Fill the Molds
Pour the mixture into silicone molds or ice cube trays.
Leave a small amount of room at the top of each mold.
Step 5: Freeze Until Firm
Place the molds into the freezer for at least four to six hours.
Once frozen, remove the treats and transfer them to an airtight container.
Serving Tips
These treats are wonderfully creamy and make an excellent snack when your dog needs something cool and refreshing.
9. Chicken Broth Ice Cubes
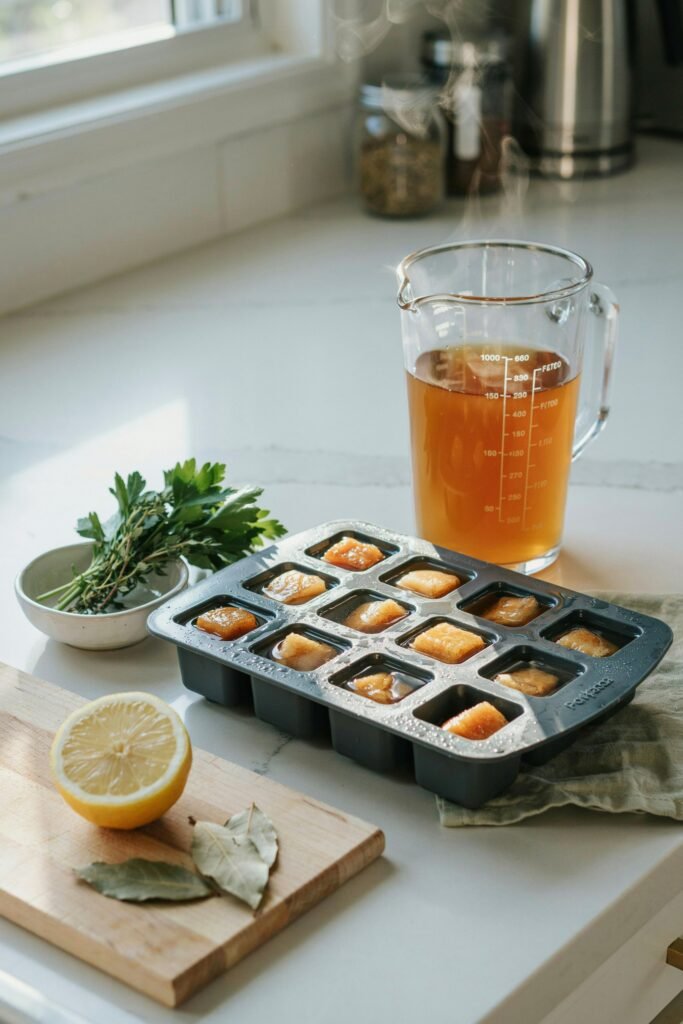
Sometimes the simplest recipes end up being the most useful.
These chicken broth ice cubes require almost no preparation and can be made whenever you have dog-safe broth available.
My dogs get excited every time they hear the freezer open because they know these flavorful frozen cubes might be coming.
Key Points
- Made with only 1 ingredient
- Extremely easy to prepare
- No blending required
- Encourages hydration
- Perfect for busy dog owners
- Can be prepared in large batches
Ingredients You’ll Need
1 Cup Low Sodium Chicken Broth
I use low sodium chicken broth because it adds flavor while keeping the recipe simple.
Before using any broth, I always check the ingredient label to make sure it does not contain onions, garlic, or other ingredients that are not suitable for dogs.
Step 1: Choose the Right Tray
Select an ice cube tray or silicone mold.
Smaller molds work especially well if you have a small dog.
Step 2: Pour the Broth
Carefully pour the chicken broth into each section of the tray.
Fill each compartment evenly so all the cubes freeze at the same rate.
Step 3: Freeze Completely
Place the tray into the freezer.
Allow the broth to freeze for at least four hours or until completely solid.
Step 4: Remove the Frozen Cubes
Once frozen, gently remove the cubes from the tray.
Transfer them to a freezer-safe container for storage.
Step 5: Store Until Needed
Keep the cubes in the freezer and remove them as needed.
This makes it easy to have a refreshing treat ready at any time.
Serving Tips
I like giving these cubes after outdoor activities or during warmer weather.
They are simple, refreshing, and incredibly easy to keep stocked in the freezer.
10. Strawberry Oat Frozen Dog Treats
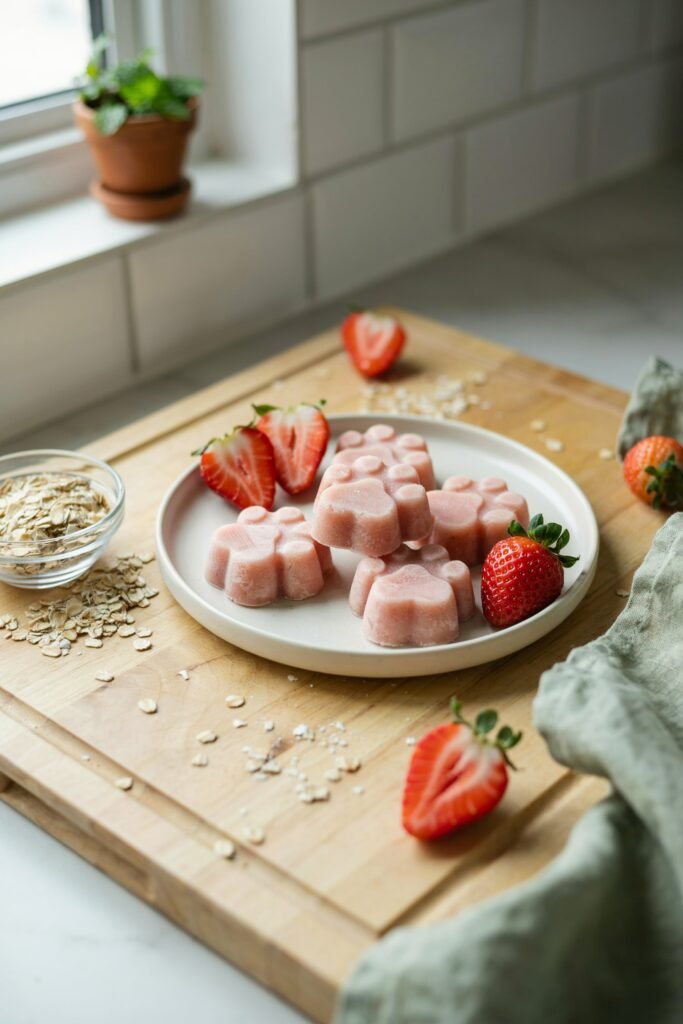
Whenever I have strawberries in the refrigerator and oats in the pantry, I like making these frozen treats.
They are simple to prepare, naturally sweet, and freeze into a refreshing snack that my dogs always seem excited about.
The strawberries create a fruity flavor while the oats help give the treats a thicker texture.
Combined with yogurt, they become creamy, easy to freeze, and perfect for keeping in the freezer for whenever your dog deserves a special treat.
Ingredients You’ll Need
½ Cup Strawberries
I use strawberries because they add natural sweetness and blend easily into a smooth mixture.
Fresh strawberries work great, but frozen strawberries can also be used if they are thawed slightly before blending.
Before using them, I always wash the strawberries thoroughly and remove the green tops.
¼ Cup Rolled Oats
Rolled oats help thicken the mixture and create a more satisfying texture once frozen.
They also blend well with the strawberries and yogurt, helping everything hold together.
½ Cup Plain Unsweetened Yogurt
The yogurt creates a creamy consistency and helps turn the mixture into a smooth frozen treat.
I always use plain unsweetened yogurt because it keeps the recipe simple and dog-friendly.
Step 1: Prepare the Strawberries
Wash the strawberries thoroughly under cool water.
Remove the green tops and cut the strawberries into smaller pieces.
Smaller pieces blend much more easily and help create a smoother final mixture.
Step 2: Add the Ingredients to a Blender
Place the strawberries, rolled oats, and yogurt into a blender or food processor.
Make sure all ingredients are evenly distributed before blending.
Step 3: Blend Until Smooth
Blend the mixture until it becomes creamy and smooth.
Stop occasionally to scrape down the sides if needed.
You should not see large strawberry chunks or dry oats remaining in the mixture.
The final consistency should be thick but easy to pour.
Step 4: Fill the Molds
Carefully pour the mixture into silicone molds or ice cube trays.
Fill each mold evenly to help all the treats freeze consistently.
If necessary, use a spoon to smooth the tops.
Step 5: Freeze Until Completely Firm
Place the molds into the freezer.
Allow the treats to freeze for at least four to six hours, or until completely solid.
Avoid removing them too early because they can break apart if they have not fully frozen.
Step 6: Remove and Store
Once frozen, gently pop the treats out of the molds.
Transfer them to an airtight freezer container or freezer bag.
Keeping them sealed helps maintain freshness and prevents freezer odors from affecting the flavor.
Serving Tips
I usually give one or two treats depending on my dog’s size.
These strawberry oat frozen treats are especially refreshing after walks, outdoor play sessions, or warm afternoons when my dogs want something cool and tasty.
The combination of strawberries, oats, and yogurt creates a simple homemade treat that is easy to make and easy to keep stocked in the freezer whenever a special snack is needed.
Extra Tips for Making Frozen Dog Treats
Use Ripe Fruit
Ripe bananas, strawberries, and other fruits blend more easily and create a naturally sweeter treat without adding sugar.
Choose Plain Unsweetened Yogurt
Always use plain yogurt without added sugar, artificial sweeteners, or flavorings.
Blend Until Smooth
A smooth mixture creates a better texture and helps the treats freeze evenly.
Use Silicone Molds
Silicone molds make it much easier to remove frozen treats without breaking them.
Freeze Completely
Allow treats to freeze for at least 4 to 6 hours before serving to ensure they hold their shape.
Store in Airtight Containers
Transfer frozen treats to a sealed freezer container to keep them fresh and prevent freezer odors.
Label Your Batches
Write the recipe name and date on the container so you know how long they’ve been stored.
Make Small Portions
Smaller treats are easier to serve and help with portion control, especially for small dogs.
Common Mistakes to Avoid
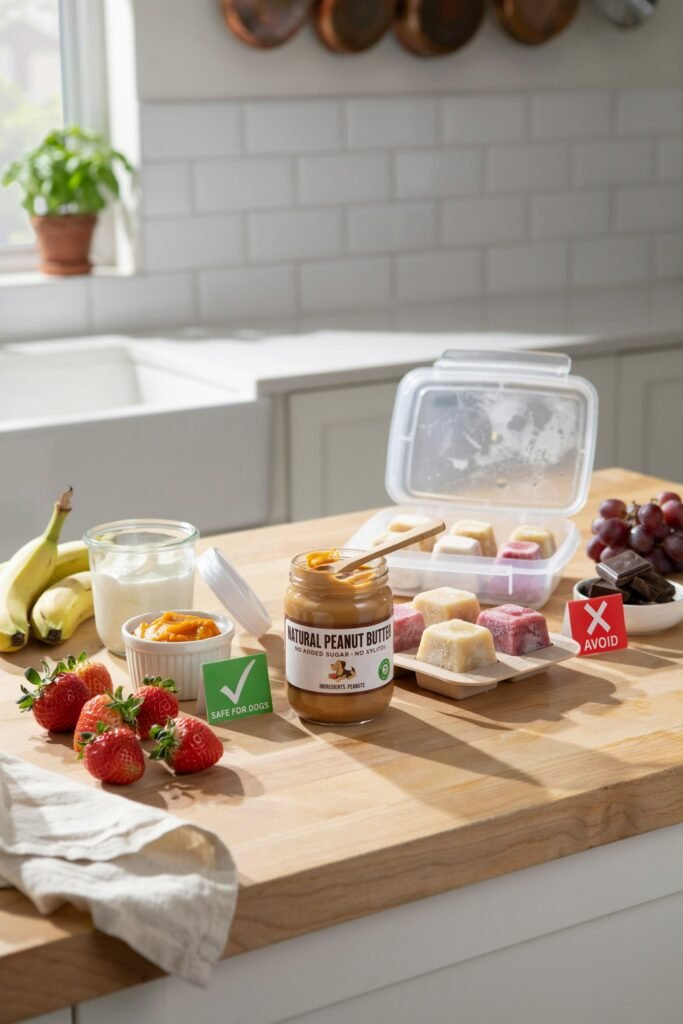
Using Peanut Butter That Contains Xylitol
Always check the label before using peanut butter. Xylitol is toxic to dogs.
Adding Sugar or Sweeteners
Dogs do not need added sugar in their treats. Stick to naturally sweet ingredients like fruit.
Using Unsafe Ingredients
Avoid grapes, raisins, chocolate, onions, garlic, and macadamia nuts.
Not Freezing Long Enough
Treats need at least 4 to 6 hours in the freezer to become fully firm.
Making Treats Too Large
Smaller treats are easier to serve and help with portion control.
Skipping Airtight Storage
Store frozen treats in a sealed container to keep them fresh and prevent freezer burn.
Introducing New Ingredients Too Quickly
Offer a small amount first if your dog has never tried a particular ingredient before.
Storing Your Frozen Dog Treats
Once the treats are completely frozen, transfer them to airtight freezer containers or freezer bags.
Label each container with the date so you know when they were made.
Most homemade frozen dog treats stay fresh for up to three months when stored properly in the freezer.
Final Thoughts
These DIY frozen dog treats using pantry ingredients make it easy to create refreshing snacks without buying special supplies.
With simple ingredients like bananas, pumpkin, yogurt, oats, apples, and peanut butter, you can make a variety of frozen treats that your dog will look forward to every time you open the freezer.