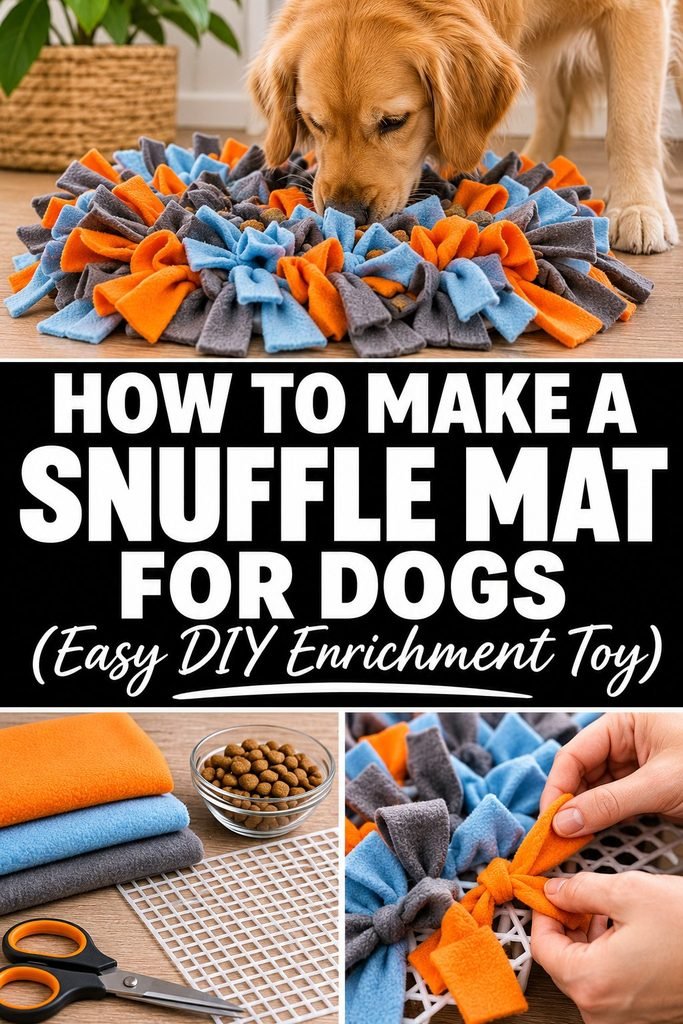
How to Make a Snuffle Mat for Dogs (Easy DIY Enrichment Toy)
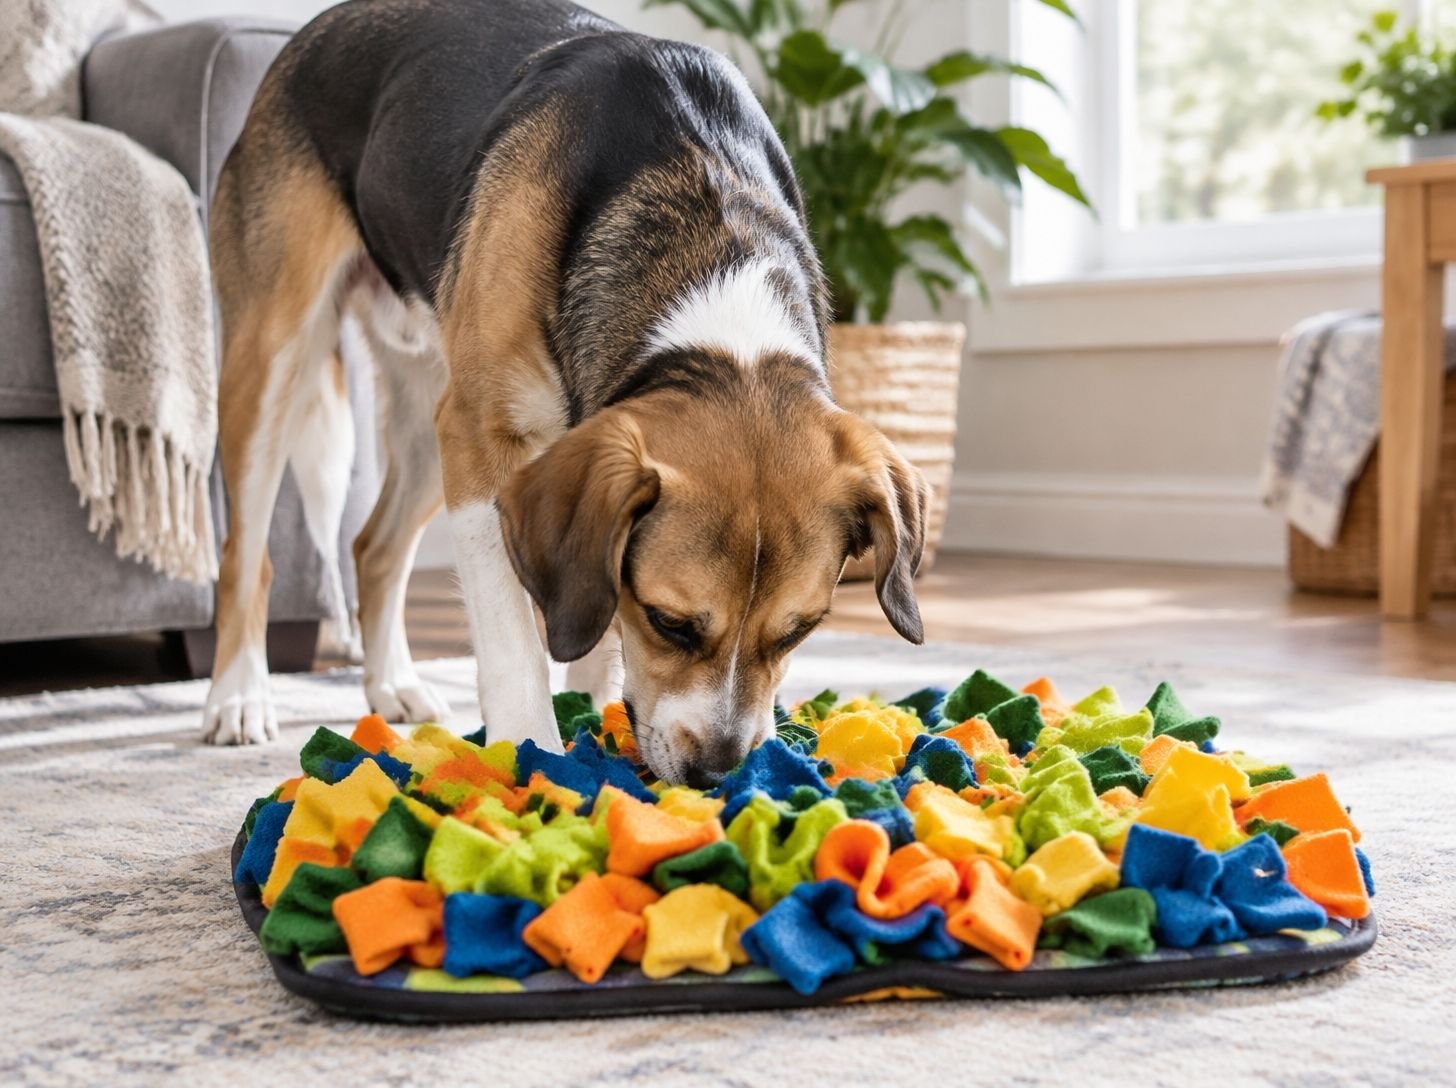
A snuffle mat is one of those simple homemade dog toys that can make a surprisingly big difference in how your dog spends their day.
Instead of eating treats straight from a bowl, your dog gets to use their nose to search through strips of fabric, discover hidden rewards, and work out where the next tasty bite is hiding.
The good news is that you don’t need expensive supplies or advanced crafting skills to make one. With a rubber mat, some fleece fabric, a pair of scissors, and a little patience, you can create a DIY snuffle mat at home.
I particularly like this project because it gives old fabric another purpose while creating an activity that encourages natural sniffing and searching.
It can be useful on rainy days, during quiet afternoons, or whenever you want to give your dog something different to do indoors.
In this guide, I’ll walk you through how to make a snuffle mat step by step, which materials to choose, how to attach the fabric securely, and how to make different versions depending on your dog’s size and experience.
What Is a Snuffle Mat for Dogs?
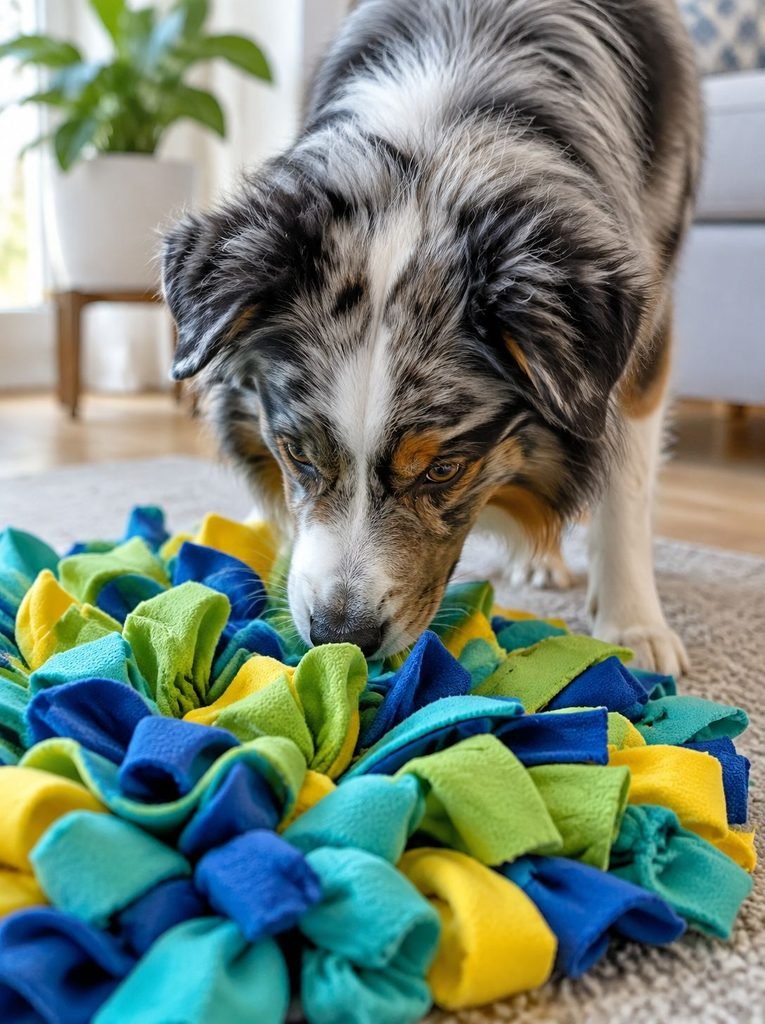
A snuffle mat is an enrichment toy made from a base with strips of fabric attached to it. Small treats or pieces of dry dog food are hidden between the fabric layers, encouraging dogs to sniff, search, and find their rewards.
Unlike a regular food bowl, a snuffle mat turns eating into an activity. Your dog has to investigate the fabric with their nose instead of simply swallowing food from one place.
Dogs naturally enjoy using their sense of smell to explore their surroundings. Snuffle mats provide a simple way to encourage this behavior indoors.
You can use one for:
- Hiding small training treats.
- Making mealtime more interesting.
- Providing an indoor activity on rainy days.
- Encouraging gentle nose work.
- Giving your dog a different form of mental enrichment.
A snuffle mat is not a replacement for walks, exercise, or training, but it can be a useful addition to your dog’s daily routine.
Why You’ll Love Making a DIY Snuffle Mat
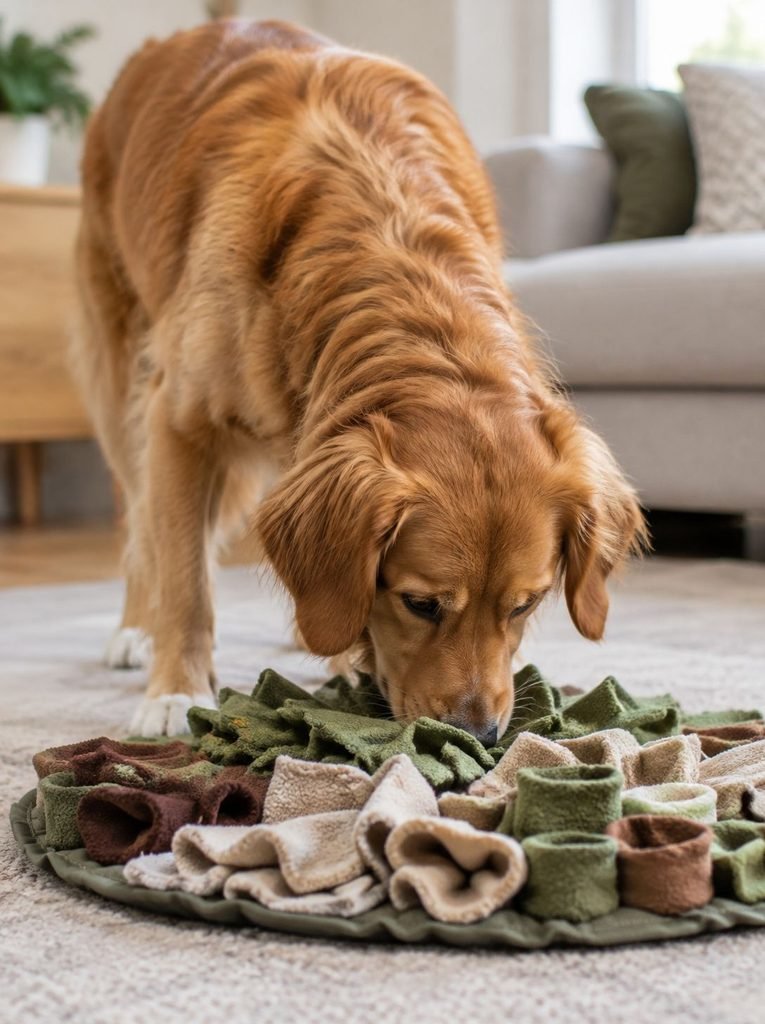
There are several reasons I like this project, especially if you enjoy making useful things for your dog without spending much money.
1. Budget friendly. You can use inexpensive fleece fabric or clean fabric scraps you already have at home. The base is also relatively inexpensive.
2. Encourages natural sniffing. Dogs rely heavily on their noses when exploring. Hiding treats in fabric gives them an opportunity to use this natural ability.
3. Provides mental stimulation. Searching for hidden food requires attention and problem-solving. Even a short sniffing session can give your dog an interesting activity.
4. Slows down treat eating. Instead of receiving several treats at once, your dog has to search for them individually. This can make snack time last longer.
5. Easy to customize. You can choose different fabric colors, strip lengths, and mat sizes to suit your dog’s needs.
6. Reusable. With proper cleaning and regular inspections, a well-made snuffle mat can be used repeatedly.
7. Great indoor enrichment. You don’t need a large yard or special equipment. A small area of your living room is enough to set up a sniffing activity.
What You’ll Need to Make a Snuffle Mat
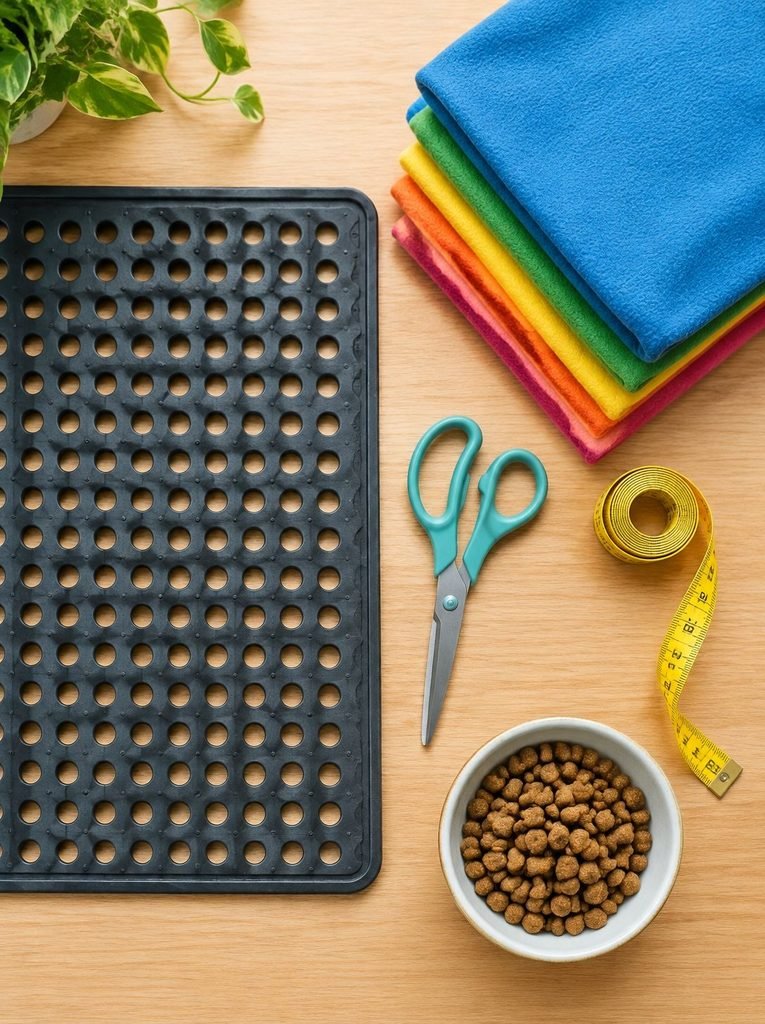
Before starting, gather your materials and prepare a clean workspace. The project is straightforward, but choosing the right base and fabric will make the finished mat easier to use and maintain.
Here are the supplies I recommend.
1. Rubber Sink Mat or Plastic Grid
This forms the base of your snuffle mat. Choose a flexible rubber sink mat or a sturdy plastic grid with evenly spaced holes.
The holes should be large enough to thread fabric strips through but small enough to hold the knots securely.
Avoid brittle plastic, sharp edges, or grids that crack when bent.
2. Fleece Fabric
Fleece is one of the easiest materials to work with because it is soft, flexible, and does not fray easily when cut.
You can use one color or combine several colors to create a more attractive design.
Choose clean, washable fabric without loose embellishments, buttons, or decorative attachments.
3. Sharp Fabric Scissors
A good pair of scissors makes cutting the strips much easier.
You want the fabric pieces to have relatively even widths so the finished mat looks full and consistent.
4. Measuring Tape or Ruler
Use a measuring tape to keep your strips approximately the same length and width.
5. Dog Treats or Kibble
You’ll need small, dry treats to hide between the fabric strips once the mat is finished.
Choose treats appropriate for your dog’s size and dietary needs.
How to Choose the Right Fabric for Your Snuffle Mat

The fabric you choose affects how the mat feels, how easily your dog can find treats, and how simple it is to clean.
I recommend fleece for beginners because it is easy to cut and tie.
Here are a few things to consider.
Fleece fabric: Soft, flexible, and beginner friendly. It is usually the easiest option for a homemade snuffle mat.
Cotton fabric: Clean cotton fabric can also work, although it may fray more easily depending on how it is cut.
Old T-shirts: Clean cotton T-shirts can be repurposed into strips, provided the material is in good condition and does not shed loose threads.
Recycled denim: Denim can be used for certain enrichment projects, but it is heavier and less flexible than fleece. It is not my first choice for filling a snuffle mat.
Avoid fabrics that shed easily, contain loose threads, or have small decorative pieces that could come off during play.
How to Prepare Your Fabric Strips
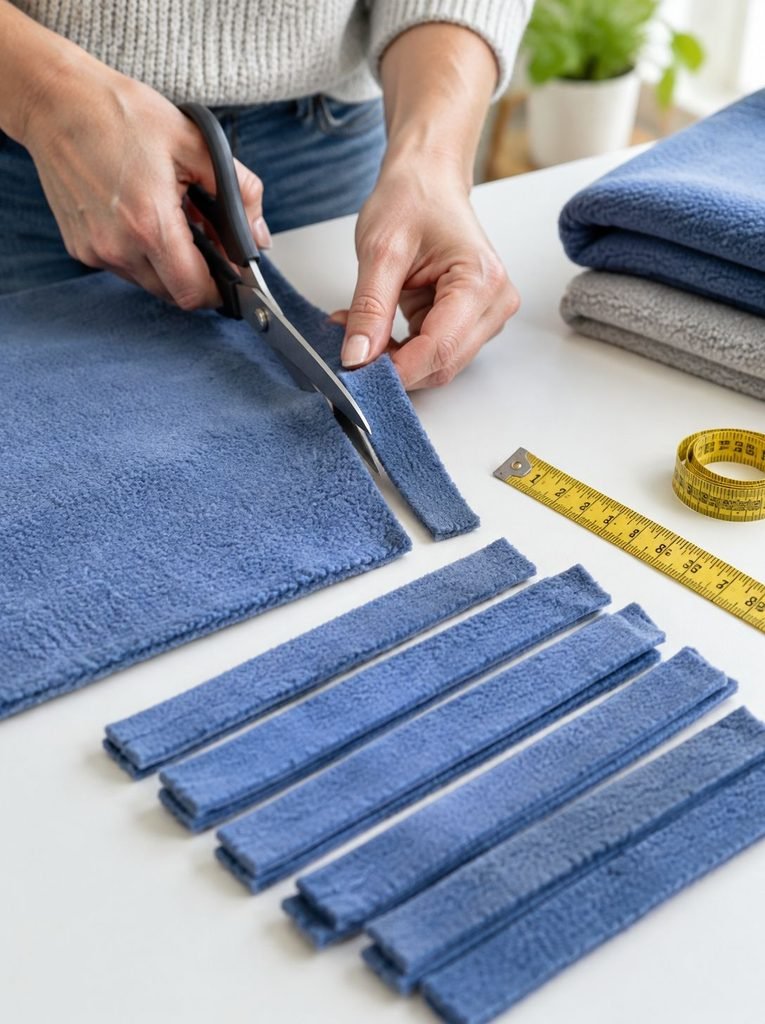
Preparing the strips is one of the most important parts of the project. If they are too short, the mat may not become full enough to hide treats effectively. If they are too long, they can become tangled or difficult to clean.
For a beginner-friendly snuffle mat, I recommend starting with strips approximately 1 inch wide and 6 to 8 inches long.
Step-by-Step Fabric Preparation
- Wash and completely dry your fleece fabric before cutting.
- Lay the fabric flat on a clean table.
- Use a ruler or measuring tape to mark strips approximately 1 inch wide.
- Cut the fabric into strips about 6 to 8 inches long.
- Separate the strips into manageable piles.
- Remove any loose threads or uneven pieces.
You will need quite a few strips, depending on the size of your base and how densely you want to fill it.
For a fuller snuffle mat, prepare extra fabric rather than stopping halfway through.
How to Make a Snuffle Mat Step by Step
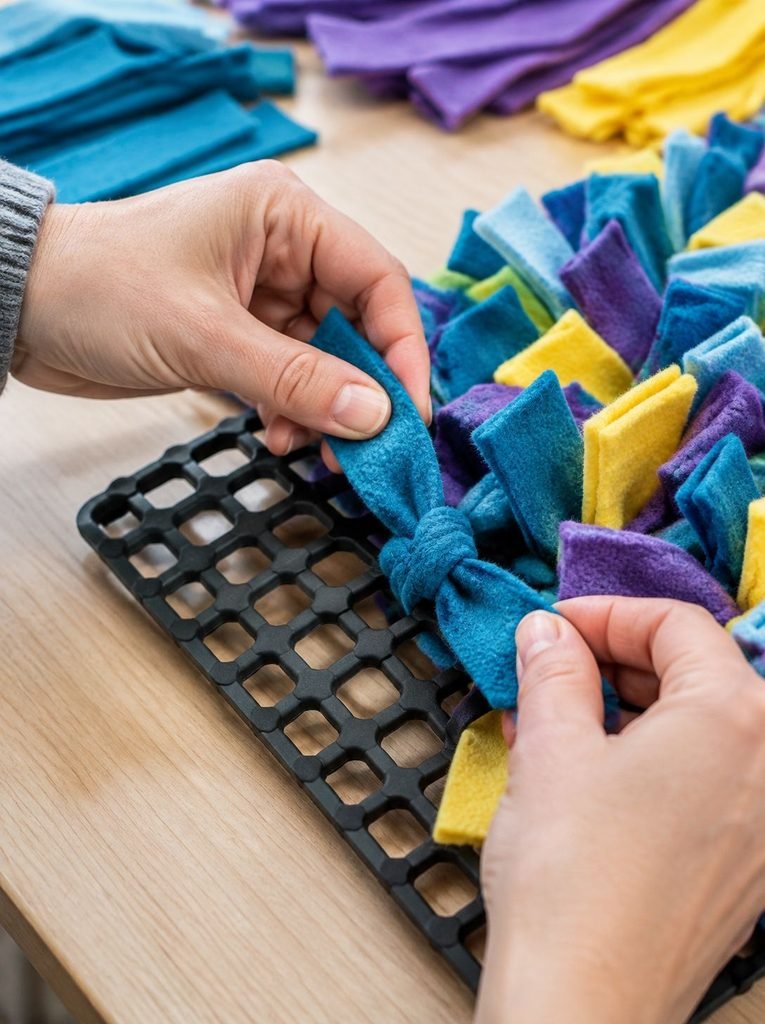
Once your base and fabric strips are ready, you can start assembling the mat.
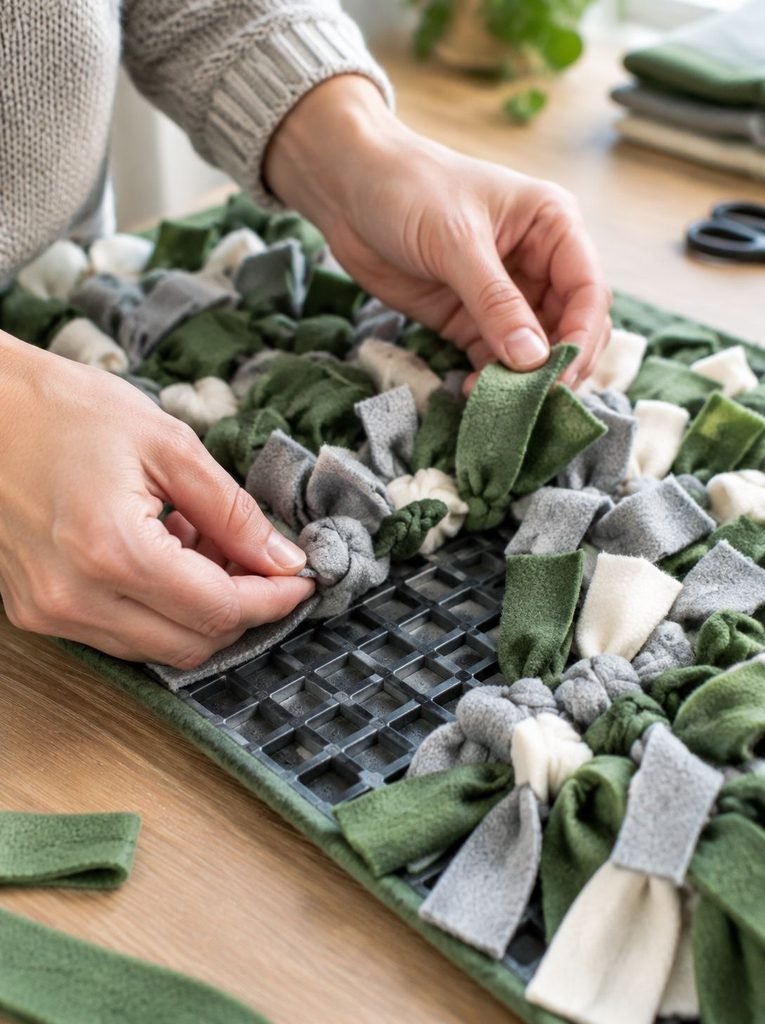
The basic technique involves threading each strip through two nearby holes in the grid and tying the ends securely.
Step 1: Prepare Your Rubber Base
Place your rubber sink mat or plastic grid on a flat work surface.
Check every edge and opening to make sure there are no sharp sections that could damage the fabric or hurt your dog.
If necessary, trim rough edges before starting.
Step 2: Take Your First Fabric Strip
Pick up one prepared fleece strip and fold it in half.
You should now have two loose ends on one side and a folded loop on the other.
Step 3: Thread the Strip Through the Grid
Push the folded end through one opening in the rubber grid.
Then bring the folded loop through a neighboring opening.
Make sure the strip is positioned neatly without twisting.
Step 4: Tie a Secure Knot
Take the two loose ends and pass them through the folded loop.
Pull the ends firmly until the fabric forms a secure knot against the grid.
The fabric should stay in place without sliding around easily.
Step 5: Repeat Across the Mat
Continue attaching strips through the grid openings.
Work in rows so you can keep track of the sections you have completed.
Place the knots relatively close together to create a thick surface where treats can be hidden.
Step 6: Fill the Entire Grid
Continue until the base is covered with fleece strips.
Check for empty sections where treats could fall straight through.
Add more fabric wherever necessary.
Step 7: Inspect Your Finished Mat
Before introducing the mat to your dog, turn it over and inspect the underside.
Check that:
- Every fabric strip is securely knotted.
- There are no loose threads.
- The grid has no sharp or broken edges.
- No small pieces can easily detach.
- The mat sits flat on the floor.
Your DIY snuffle mat is now ready for its first supervised sniffing session.
How to Introduce Your Dog to a Snuffle Mat
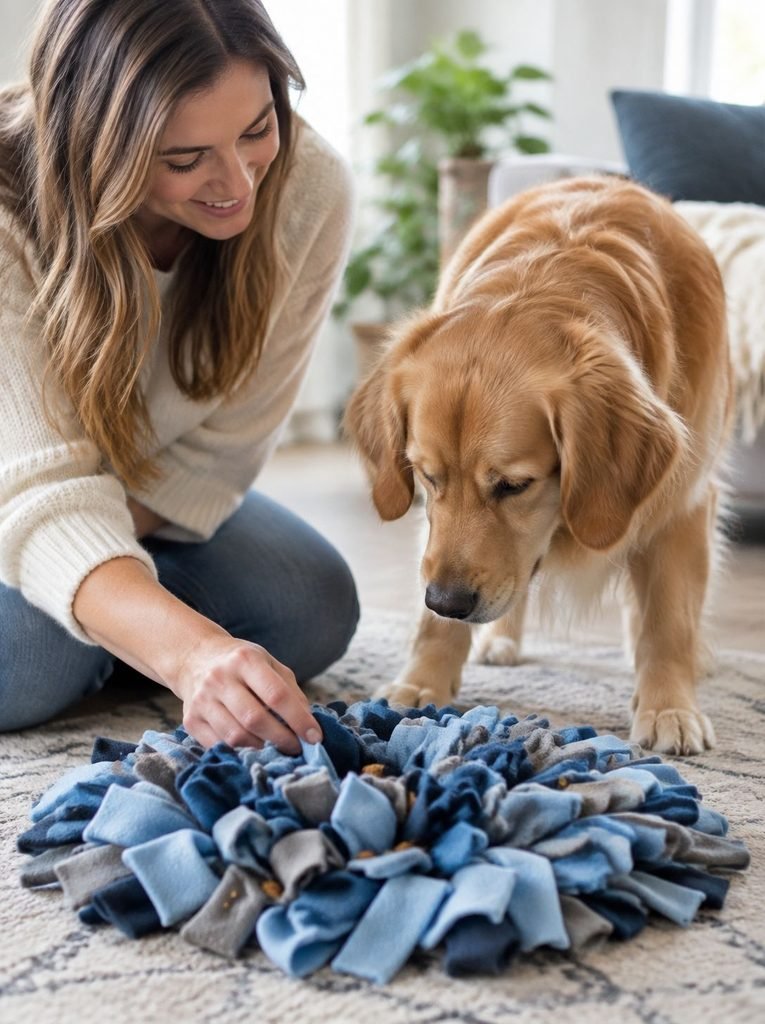
Once your snuffle mat is finished, you might be tempted to fill it with treats and let your dog figure everything out. However, some dogs need a little time to understand how this new toy works.
I recommend starting with a simple setup and allowing your dog to explore at their own pace.
Here is how to introduce it.
1. Start with a few visible treats.
Place several small treats on top of the fabric rather than hiding them deeply. Let your dog sniff around and discover that the mat contains something rewarding.
2. Encourage gentle searching.
Allow your dog to investigate the different fabric sections. You can point toward a treat or gently move the fabric to show where the food is hiding.
3. Gradually make the activity more challenging.
Once your dog understands the game, tuck a few treats between the fleece strips. Avoid hiding them too deeply at first.
4. Keep the first session short.
Start with approximately three to five minutes and observe how your dog behaves. You can gradually increase the time if your dog enjoys the activity.
5. Always supervise.
Watch your dog throughout the activity. If they begin chewing, pulling out, or swallowing the fabric, remove the mat.
The goal is to encourage sniffing and searching, not chewing the toy apart.
How to Hide Treats in a Snuffle Mat
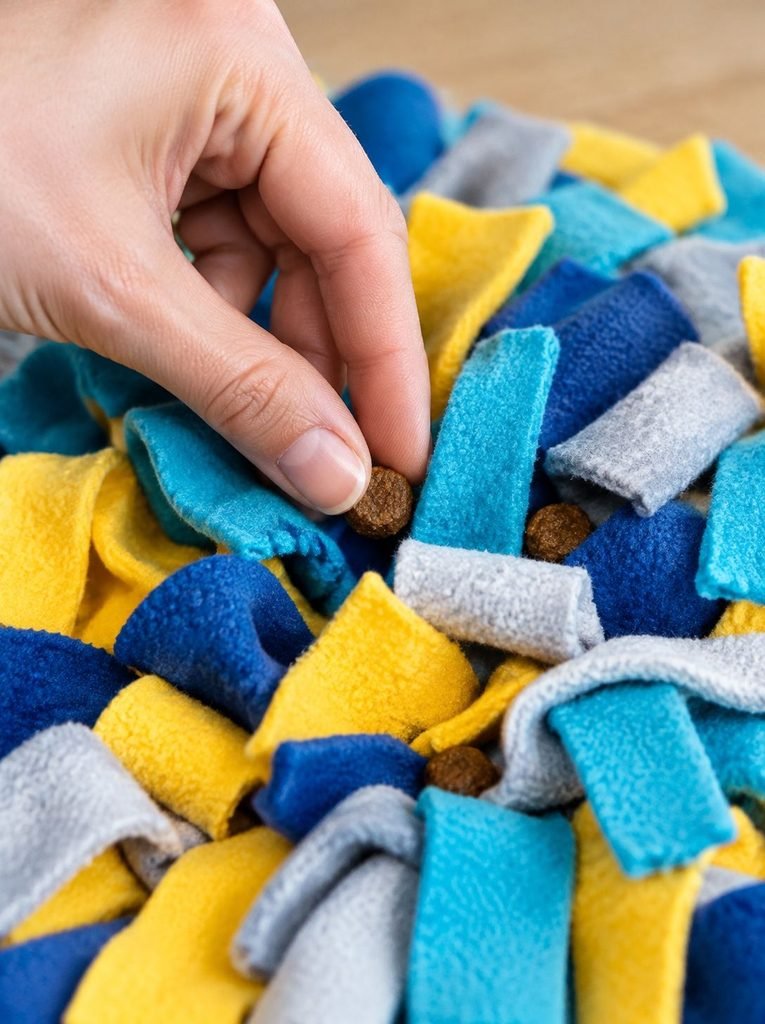
The way you distribute treats can make a big difference in how interesting the activity becomes.
You do not need to fill every section with food. A few carefully hidden rewards are enough to get your dog interested.
Here are some easy ways to make the game more engaging.
Surface treats: Place a few treats on top of the fleece for beginners.
Between the strips: Gently tuck small treats between neighboring fabric pieces.
Different sections: Spread treats across several areas instead of concentrating everything in one corner.
Easy and difficult spots: Leave some treats visible while hiding others slightly deeper.
Use regular kibble: You can use part of your dog’s normal daily food allowance instead of adding extra treats.
Avoid placing food so deeply that your dog has to bite or aggressively pull at the fabric to reach it.
DIY Snuffle Mat Variations to Try
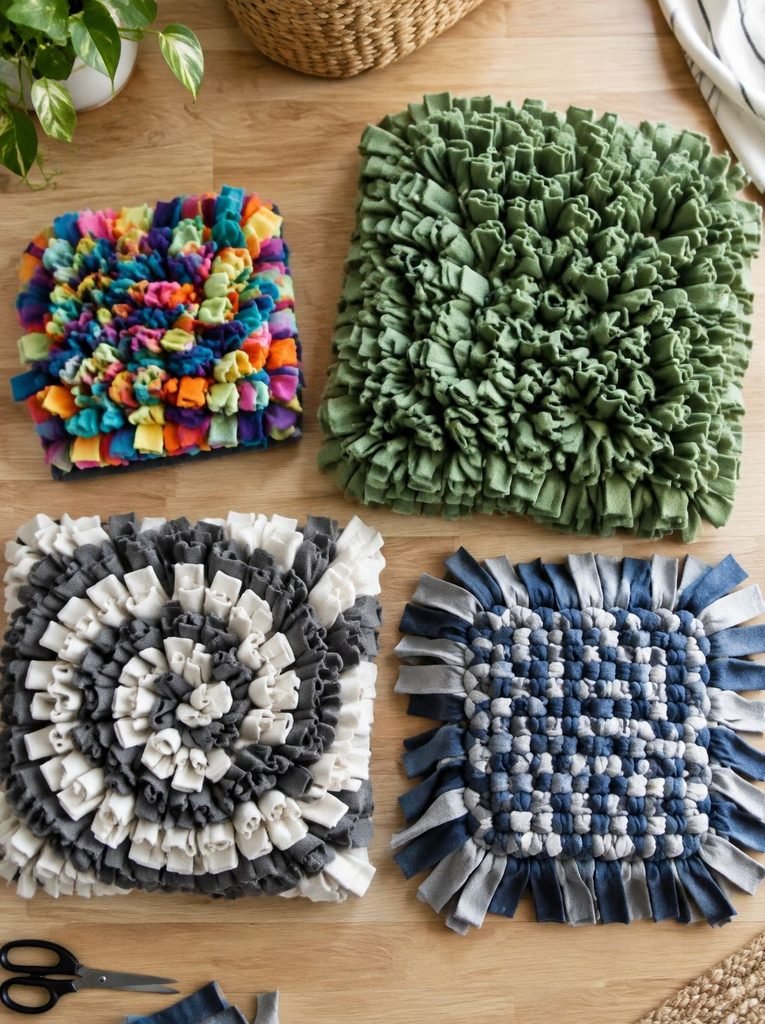
Once you understand the basic design, there are several ways to customize your homemade snuffle mat.
You can change the size, use different fabrics, or create a slightly different arrangement depending on your dog’s needs.
1. Small Snuffle Mat for Puppies and Small Dogs
A smaller mat is convenient if you have limited space or a small dog that prefers shorter activities.
Use a smaller rubber grid and cut the fleece strips to approximately 5 to 6 inches long.
Keep the fabric soft and the knots secure. Puppies need especially close supervision because they may be more interested in chewing the fabric than searching for treats.
2. Large Snuffle Mat for Bigger Dogs
If you have a larger dog, you may prefer a wider mat with more fabric sections.
A larger surface gives you more room to distribute treats and create different searching areas.
Choose a sturdy base that stays flat during use, and make sure the finished mat is large enough that your dog cannot easily pick it up and chew it.
3. Recycled T-Shirt Snuffle Mat
You can also repurpose clean old cotton T-shirts instead of buying new fleece.
Cut the shirts into strips of similar width and length, then attach them to the rubber grid using the same knotting technique.
Choose fabric that is in good condition and does not shed loose threads. Inspect it carefully before every session.
4. Two-Color Snuffle Mat
Using two different fleece colors is an easy way to make your project look more attractive.
Alternate the colors as you work across the grid, or create separate color sections.
This does not necessarily make the game more challenging for your dog, but it gives the finished project a neat, personalized appearance.
5. Denim and Fleece Combination Mat
If you have leftover denim from another DIY project, you might be tempted to combine it with fleece.
For this variation, I recommend using fleece as the main material because it is softer and easier to work with. Any denim sections must be securely attached, free of hardware, and carefully inspected.
Avoid heavy or stiff pieces that could make the mat uncomfortable or difficult to clean.
How to Clean and Maintain Your Snuffle Mat
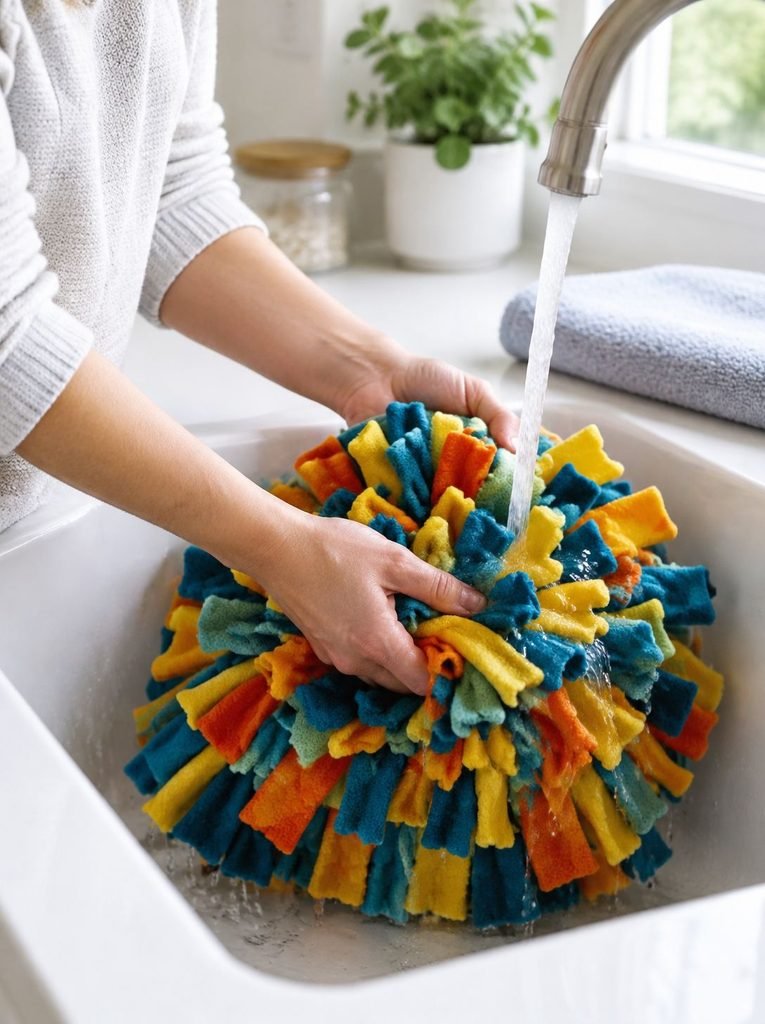
A snuffle mat can collect food crumbs, saliva, dirt, and moisture during regular use. Cleaning it properly helps keep it fresh and suitable for repeated play.
I recommend checking the manufacturer’s cleaning instructions for your rubber or plastic base before washing the entire mat.
1. Remove Leftover Food
After each session, shake the mat gently over a bin to remove loose kibble and crumbs.
Check between the fabric strips for hidden food that your dog may have missed.
2. Inspect the Fabric
Look for loose threads, damaged strips, and knots that have started to come undone.
Remove the mat from use if any pieces can easily detach.
3. Wash the Mat
If the materials are machine washable, follow their care instructions.
Use a mild, fragrance-free detergent and rinse thoroughly to remove detergent residue.
If the base cannot go into the washing machine, clean it separately according to its material instructions.
4. Dry Completely
Allow the mat to dry completely before storing or using it again.
Pay particular attention to the fabric sections underneath the knots, where moisture can become trapped.
5. Store It Properly
Keep the clean mat in a dry storage area away from dirt, moisture, and pests.
Do not store it while damp because this can encourage unpleasant odors and mold growth.
Common Snuffle Mat Mistakes to Avoid
Making a snuffle mat is easy, but a few mistakes can affect how well it works and how safe it is.
Here are the things I would watch out for.
1. Using fabric that sheds easily.
Loose fibers and threads can be swallowed. Choose durable, clean fabric that stays intact during use.
2. Leaving gaps between the fabric strips.
If the mat is too sparse, treats may fall straight through the grid. Add enough fabric to create a useful sniffing surface.
3. Making the strips too short.
Very short strips may not provide enough coverage to hide treats effectively.
4. Leaving loose knots.
Fabric strips should remain securely attached. Check the underside of the mat before introducing it to your dog.
5. Using an unsuitable base.
Avoid brittle plastic, sharp edges, or grids that crack easily.
6. Hiding treats too deeply.
Your dog should be able to find the food without aggressively pulling or biting the fabric.
7. Leaving your dog unattended.
Snuffle mats are enrichment toys, not chew toys. Supervise your dog throughout every session.
8. Forgetting to clean the mat.
Food crumbs can become trapped between the fabric strips. Remove leftover food and wash the mat regularly.
How Often Should You Let Your Dog Use a Snuffle Mat?
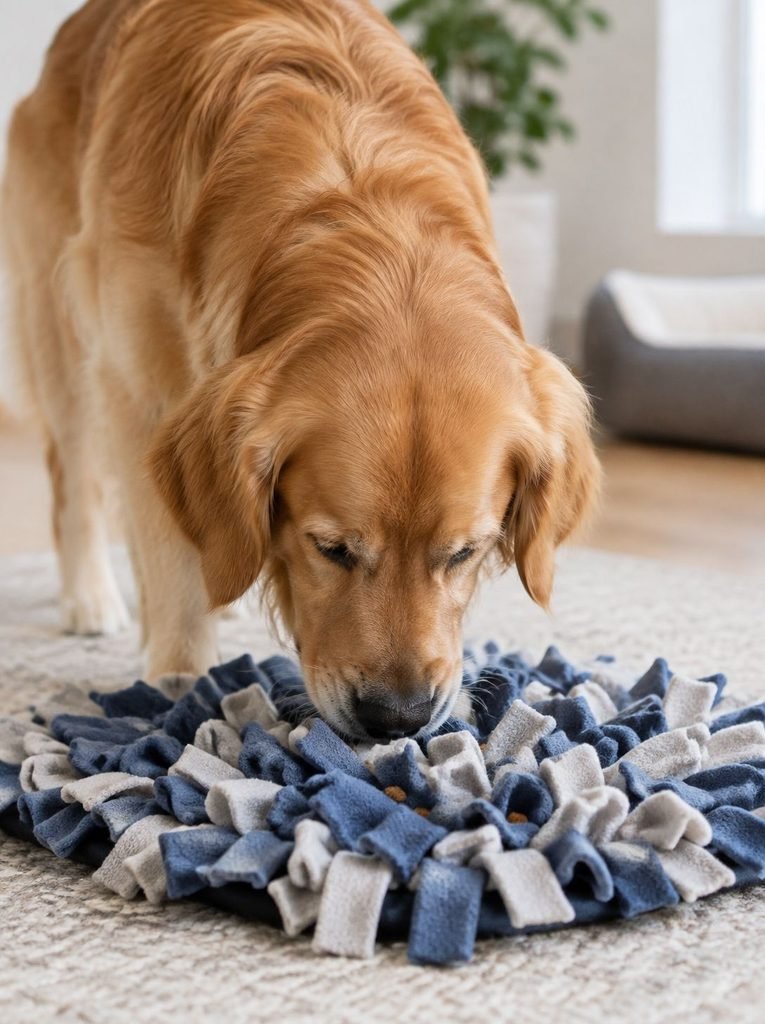
There is no single schedule that works for every dog.
Some dogs enjoy a short sniffing session every day, while others prefer using their snuffle mat a few times a week.
I recommend starting with short sessions and paying attention to your dog’s behavior.
You might use the mat:
- During a quiet afternoon indoors.
- On rainy days when outdoor activities are limited.
- As part of a supervised feeding routine.
- During short enrichment breaks.
- When introducing simple nose-work activities.
If your dog becomes frustrated, starts chewing the fabric, or loses interest, end the activity and try again another time.
Remember that a snuffle mat should be enjoyable rather than stressful.
More Homemade Dog Ideas
If you enjoy making affordable projects and activities for your dog, here are a few more ideas to explore:
- 7 Dog Crafts to Make and Sell
- 5 DIY No Sew Recycled Denim Dog Toys
- Brain Games for a Smarter, Happier Dog
- Homemade Dog Treats
- Easy 4 Ingredient Pumpkin Dog Biscuits
For more ideas on feeding your dog well, check out 7 Healthiest Homemade Dog Foods.
Frequently Asked Questions About DIY Snuffle Mats
1. What is the best material for a homemade snuffle mat?
Fleece is one of the best beginner-friendly choices because it is soft, flexible, and does not fray easily. Clean cotton fabric can also work if it is durable and does not shed loose threads.
2. Can I make a snuffle mat without a rubber sink mat?
Yes. You can use a suitable plastic grid with smooth edges and evenly spaced openings. Make sure it is sturdy, non-brittle, and safe for supervised use.
3. How many fabric strips do I need?
It depends on the size of your base and how densely you want to fill it. Prepare extra strips so you can cover empty areas without running out halfway through.
4. Can I use old T-shirts to make a snuffle mat?
Yes. Clean cotton T-shirts can be cut into strips and attached to the grid. Check the fabric carefully for loose threads and signs of wear.
5. Are snuffle mats good for puppies?
They can provide supervised sniffing activities, but puppies may be more likely to chew and swallow fabric. Use an age-appropriate design and ask your veterinarian if you are unsure whether it is suitable.
6. Can snuffle mats help dogs that eat too quickly?
They can make food searching take longer than eating directly from a regular bowl. However, they are not a guaranteed solution for fast eating. Use appropriately sized kibble and supervise your dog.
7. How long should a dog use a snuffle mat?
Start with approximately three to five minutes and adjust according to your dog’s interest and behavior. There is no need to make every session long.
8. Can I put wet food in a snuffle mat?
I recommend using dry kibble or suitable dry treats. Wet food can become trapped in the fabric, making the mat harder to clean and dry properly.
9. How do I know when to replace my snuffle mat?
Replace it when the fabric starts coming loose, the base cracks, the material becomes badly worn, or the mat develops persistent odors or mold.
10. Can I sell homemade snuffle mats?
Yes, you can explore making snuffle mats as a small pet craft business. However, you should consider material safety, durability testing, clear care instructions, and appropriate product labeling before selling them. You can also explore my guide to 7 Dog Crafts to Make and Sell.
A Final Note on Making a Snuffle Mat for Your Dog
Making a snuffle mat is a simple project, but it gives you an opportunity to create something useful for your dog’s daily routine.
I like that you can make one using inexpensive materials and customize it to suit your dog’s size and preferences. You can also experiment with different fabric colors and arrangements once you become comfortable with the basic knotting technique.
Start with a simple design, introduce the game gradually, and keep every session supervised. Check the fabric and base regularly, remove damaged materials, and never allow your dog to use the mat as a chew toy.
If your dog enjoys sniffing games, you might also like exploring more homemade enrichment activities and Brain Games for a Smarter, Happier Dog.