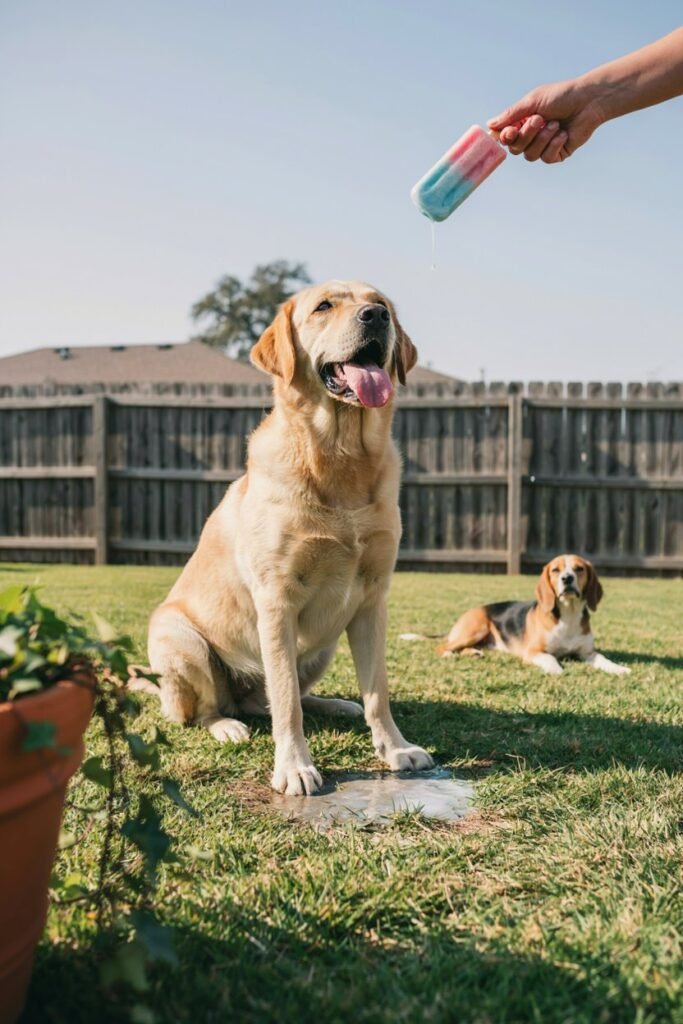
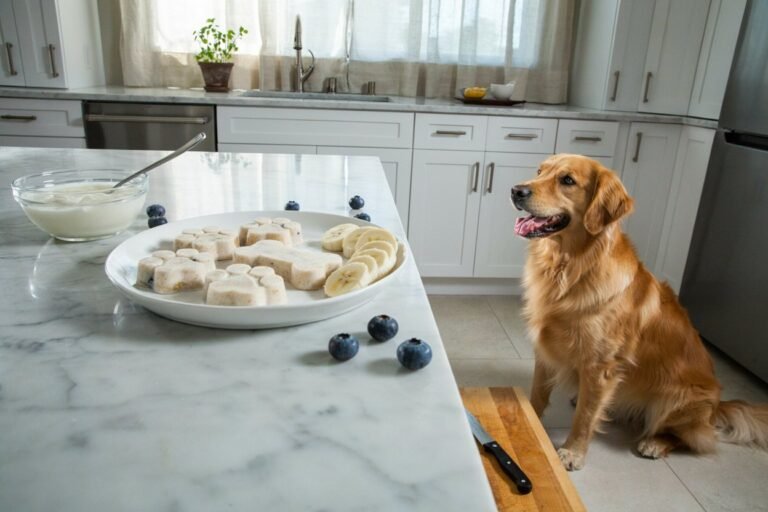
When summer temperatures rise, our dogs feel the heat right alongside us. Warm sidewalks, sunny afternoons, and thick coats can make outdoor time uncomfortable, especially after a walk or a playful afternoon in the yard.
While fresh water, shade, and a cool environment should always come first, I love having a few homemade frozen dog snacks ready in the freezer for those especially warm days.

What I enjoy most about making frozen treats at home is how simple they are. You can use familiar ingredients such as blueberries, strawberries, banana, pumpkin, watermelon, yogurt, and peanut butter to create small treats your dog will look forward to. You also have complete control over the ingredients and portion sizes.
In this guide, I’m sharing 12 easy frozen dog snacks, along with helpful tips for choosing ingredients, preparing treats safely, storing them properly, and serving appropriate portions.
Disclaimer: This post may contain affiliate links, which means I may earn a small commission at no extra cost to you. Frozen treats should be given in moderation as part of a balanced diet. Always use dog-safe ingredients and consult your veterinarian if your dog has allergies, sensitivities, or health conditions.
Amazon Shopping List You Need
- Silicone Dog Treat Molds (Bone & Paw Shapes)
- Silicone Ice Cube Tray Set (Small Portion Sizes)
- Dog-Safe Peanut Butter (Xylitol-Free)
- Plain Unsweetened Greek Yogurt
- Low-Sodium Chicken or Bone Broth (Dog Safe)
- Stainless Steel Mixing Bowl Set
- Airtight Freezer Storage Containers
Why Frozen Snacks Are Great for Dogs During Hot Weather

Frozen snacks do much more than simply cool your dog down.
They can also improve hydration, provide mental stimulation, and encourage healthy eating habits.
Helps Prevent Overheating
Dogs do not sweat like humans. They primarily regulate body temperature through panting and limited sweating through their paw pads.
During extreme heat, dogs can struggle to cool themselves efficiently. Frozen snacks help lower body temperature gently and safely.
Encourages Hydration
Many dogs do not drink enough water during hot weather.
Frozen treats made with water-rich fruits and vegetables can help increase fluid intake naturally.
Provides Mental Stimulation
Licking and chewing frozen snacks keeps dogs mentally engaged.
Frozen enrichment treats can reduce boredom and anxiety, especially for indoor dogs during hot afternoons.
Supports Healthy Digestion
Ingredients like yogurt, pumpkin, and bananas may support digestive health when served in moderation.
Great for Teething Puppies
Cold treats can soothe sore gums and provide relief for teething puppies.
Safe Ingredients for Frozen Dog Treats

Before making homemade dog snacks, it’s important to know which ingredients are safe.
Dog-Friendly Fruits
- Watermelon (seedless)
- Blueberries
- Strawberries
- Apples (without seeds)
- Bananas
- Mango
- Pineapple
Dog-Friendly Vegetables
- Carrots
- Cucumbers
- Pumpkin
- Sweet potatoes
Healthy Bases
- Plain unsweetened yogurt
- Unsalted peanut butter
- Coconut water
- Bone broth
- Oat milk (unsweetened)
- Goat milk
Ingredients to Avoid

Never use these harmful ingredients in dog treats:
- Chocolate
- Grapes
- Raisins
- Xylitol
- Onions
- Garlic
- Excess salt
- Artificial sweeteners
- Alcohol
- Macadamia nuts
Always check labels carefully before using packaged ingredients.
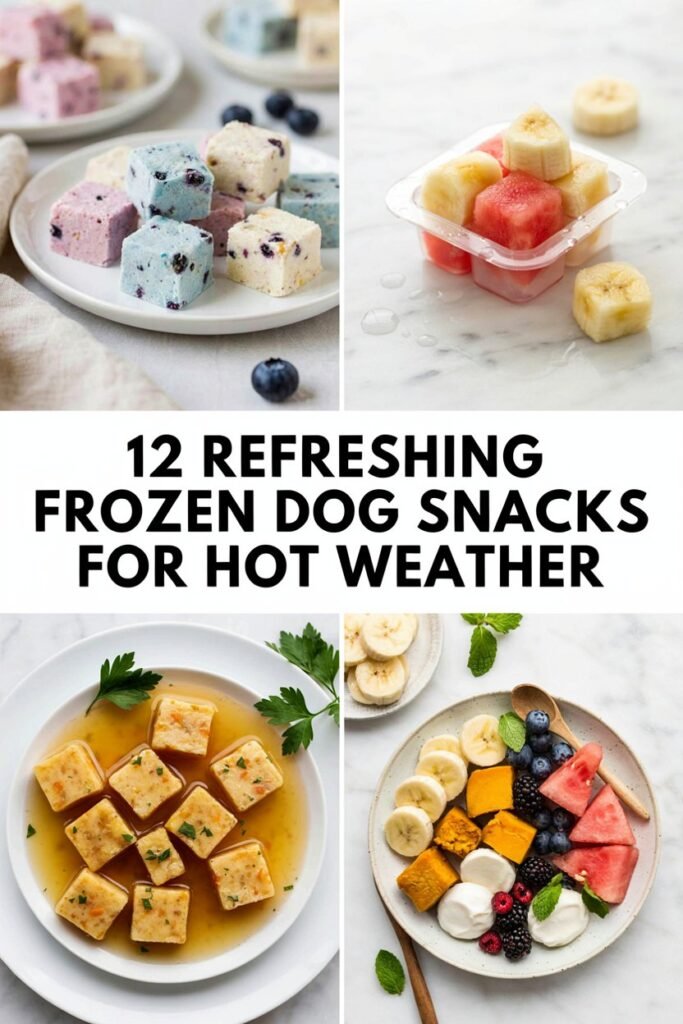
12 Refreshing Frozen Dog Snacks
When temperatures rise, your dog deserves a cool and tasty way to beat the heat too.
Frozen dog snacks are the perfect summer treat — refreshing, hydrating, and incredibly easy to make at home.
From fruity ice cubes to creamy yogurt bites, these homemade frozen treats will keep your furry friend happy, cool, and wagging all season long.
Here are 12 refreshing frozen dog snacks your pup will absolutely love during hot weather.
1. Peanut Butter Banana Frozen Bites

If your dog gets excited the moment you open a jar of peanut butter, these frozen banana bites are going to be a favorite. I love making them because they take only a few minutes to prepare, require no baking, and are easy to keep in the freezer for a quick homemade treat.
The combination of ripe banana, creamy Greek yogurt, and natural peanut butter creates a smooth, rich mixture that freezes beautifully. The banana adds natural sweetness, while the peanut butter gives the treats that familiar flavor dogs tend to love. I usually make a batch when I have a few ripe bananas sitting on the counter, then store the finished bites for later.
Ingredients
You only need three simple ingredients for this recipe, which is one of the reasons I make these treats so often.
1 ripe banana
Use a ripe banana with a few brown spots. It will be softer, easier to blend, and naturally sweeter. The banana also helps give the frozen bites a creamy texture without needing any added sugar.
1/2 cup plain unsweetened Greek yogurt
Greek yogurt creates a smooth, creamy base for the treats. Choose plain yogurt without added sugar, flavors, or artificial sweeteners. If your dog is sensitive to dairy, check with your veterinarian before adding yogurt to their diet.
2 tablespoons natural peanut butter
Choose a simple peanut butter made with dog safe ingredients. Always check the label carefully and make absolutely sure it contains no xylitol, which is highly toxic to dogs. Avoid chocolate flavored or heavily sweetened peanut butter.
How to Make Them
Peel the banana and break it into smaller pieces. Add the banana, Greek yogurt, and peanut butter to a blender or food processor.
Blend until the mixture is smooth and creamy. If the mixture is too thick to blend easily, add a very small splash of water and blend again.
Spoon the mixture into small silicone molds or an ice cube tray. I prefer smaller molds because they make portion control much easier.
Place the molds in the freezer and freeze for at least 3 to 4 hours, or until the bites are completely firm. For an easy make ahead option, you can leave them in the freezer overnight.
Once frozen, gently pop the bites out of the molds and transfer them to a freezer safe container with a tight fitting lid.
My Tips for the Best Frozen Bites
The riper the banana, the smoother and naturally sweeter the mixture will be. I usually wait until the banana has developed a few brown spots because those bananas work particularly well for homemade treats.
I also recommend using silicone molds rather than freezing the mixture in one large container. Individual bites are much easier to serve, especially when you are trying to keep portions appropriate for your dog’s size.
If the mixture is difficult to spoon into the molds, let it sit for a minute or two after blending. It should be thick and creamy but still easy to portion.
Peanut Butter Safety Matters
This is the part I would never skip. Always check the peanut butter label before making these treats.
Do not use peanut butter containing xylitol. Xylitol is extremely dangerous to dogs and can cause a serious, potentially life threatening reaction.
Look for peanut butter with a simple ingredient list. You do not need a sweetened or flavored variety to make these treats delicious.
How Much Can Your Dog Have?
These frozen bites are an occasional treat and should not replace your dog’s regular complete and balanced food.
The appropriate portion depends on your dog’s size, activity level, overall diet, and individual needs. A small dog may only need one small bite, while a larger dog may be able to have a slightly larger portion.
If your dog has never had one of these ingredients before, start with a small serving and watch for any digestive upset.
How I Store Them
After the bites are completely frozen, I transfer them into a freezer safe container. Keeping them sealed helps prevent freezer odors from affecting the flavor and keeps the treats organized.
I usually make a batch at once because it saves time during the week. Having homemade treats already prepared means I can simply open the freezer and take out one whenever my dog deserves a cool little snack.
These peanut butter banana frozen bites are proof that homemade dog treats do not need to be complicated. With three simple ingredients and a few hours in the freezer, you can make a creamy, refreshing snack that is easy to portion and convenient to have ready whenever your dog wants something special.
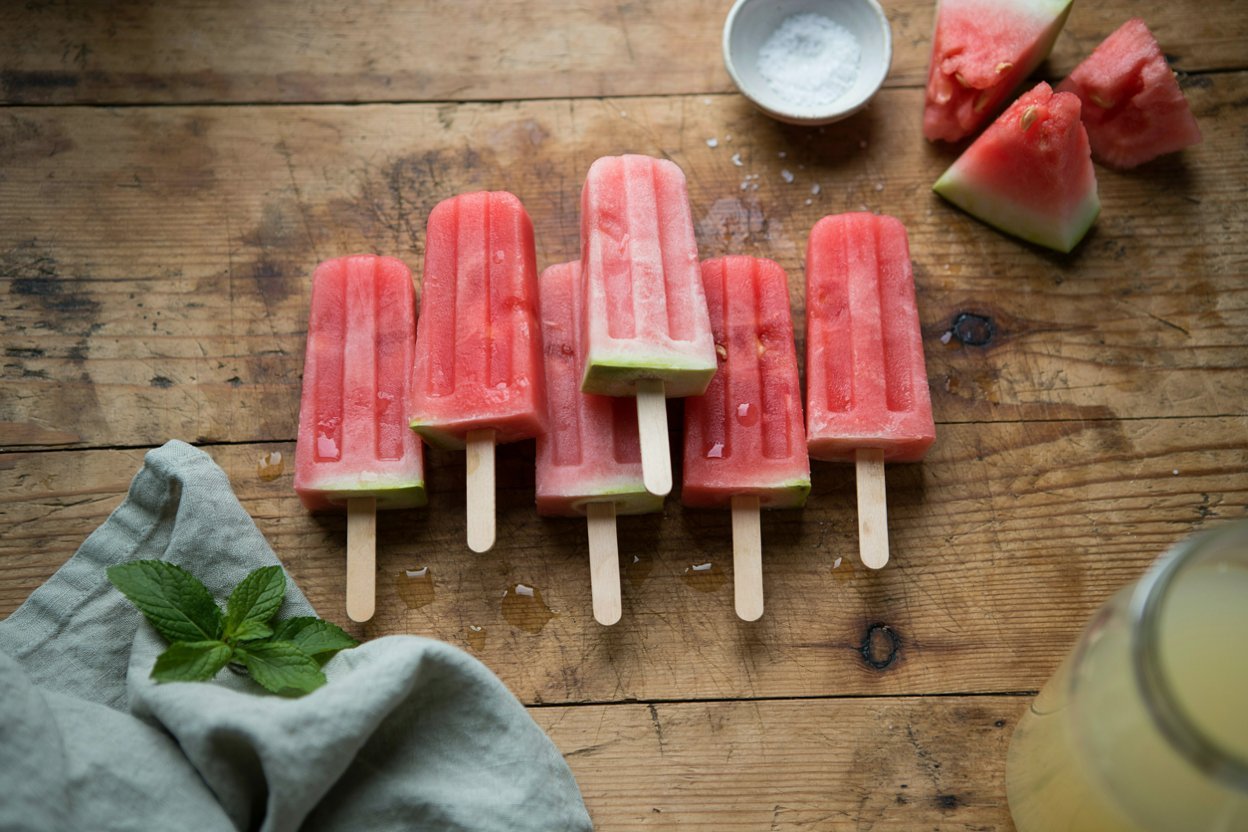
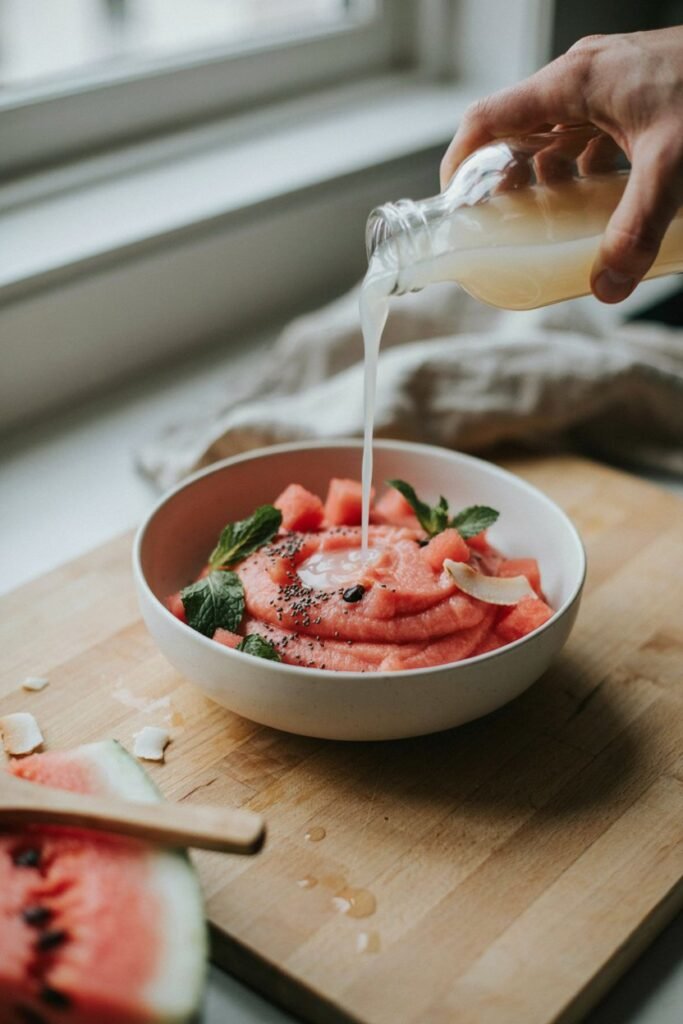
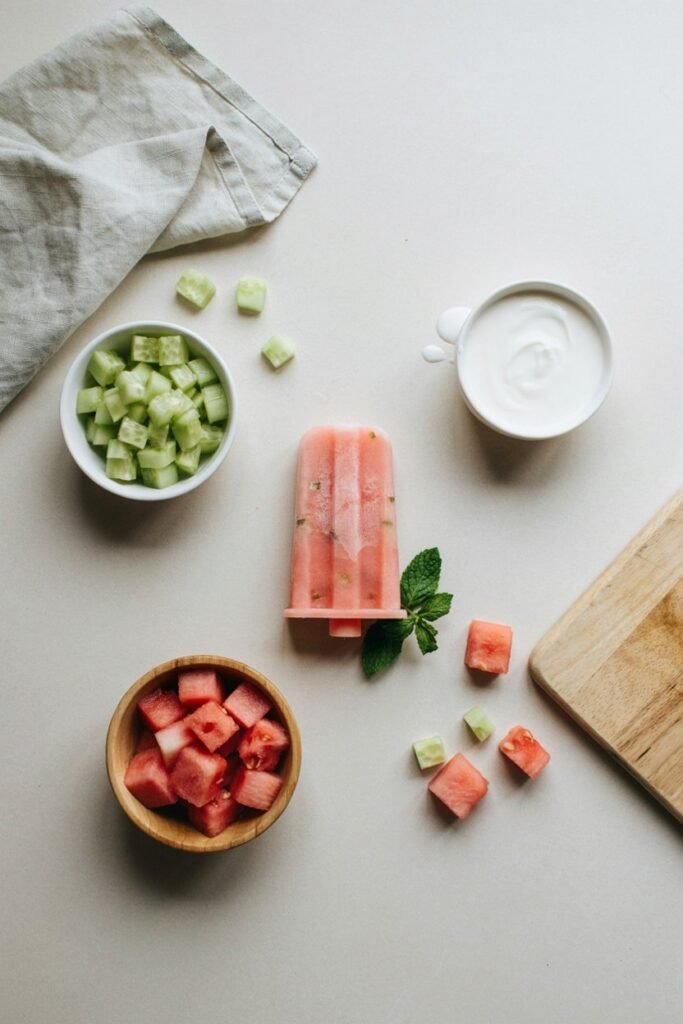
2. Watermelon Ice Cubes

When the temperature rises, I love having a batch of these simple watermelon ice cubes ready in the freezer. They are one of the easiest frozen treats to prepare because watermelon already contains plenty of moisture, so there is no complicated mixture to make.
These little cubes are light, refreshing, and naturally sweet, making them a nice occasional snack after a walk or time spent outside. I also like this recipe because it gives me an easy way to use leftover fresh watermelon instead of letting it sit in the refrigerator.
Ingredients
This recipe keeps things wonderfully simple with just one main ingredient.
1 cup seedless watermelon
Choose fresh, ripe watermelon with a naturally sweet flavor. Cut away the green and white rind and remove any seeds before preparing the cubes. Even when using seedless watermelon, I still check the pieces carefully for any remaining seeds.
There is no need to add sugar, syrup, juice, or other sweeteners. Fresh watermelon provides plenty of natural flavor and moisture on its own.
How to Make Watermelon Ice Cubes
Start by cutting the watermelon into manageable pieces. Remove the rind and carefully check each piece for seeds.
Add the watermelon flesh to a blender and blend until smooth. Because watermelon contains so much water naturally, you should not need to add any additional liquid.
Pour the watermelon puree into small silicone molds or an ice cube tray. Smaller molds are ideal because they create bite sized portions that are easier to manage.
Place the tray in the freezer and allow the cubes to freeze completely. This usually takes several hours, depending on the size of the molds. I often prepare them the night before so they are ready the following day.
Once frozen solid, gently remove the cubes from the molds and transfer them to a freezer safe container.
Preparing Watermelon Safely
The preparation matters just as much as the recipe itself. Always remove the rind and seeds before giving watermelon to your dog.
I prefer using the red flesh only and cutting it into small pieces before blending. This makes it easier to inspect the fruit and remove anything that should not be included.
Fresh watermelon is the best choice for these treats. Avoid watermelon products containing added sugar, syrups, or artificial sweeteners.
My Tips for Better Watermelon Cubes
Use a ripe watermelon that is naturally sweet and juicy. A flavorful melon means you do not need to add anything else to the recipe.
I also recommend using small molds rather than large ice cube trays. This gives you better control over portion sizes and makes the treats easier for smaller dogs to enjoy.
If your dog has never had watermelon before, start with a small piece or cube and see how they respond. Watermelon contains a lot of water, so giving too much at once may cause digestive upset.
How Much Can Your Dog Have?
Watermelon can be an occasional treat for many dogs, but portion size still matters. The appropriate amount depends on your dog’s size, diet, activity level, and individual tolerance.
A small dog may only need one small cube, while a larger dog may be able to enjoy a slightly larger serving. I prefer starting small, especially when introducing a new food.
These cubes should complement your dog’s normal balanced diet rather than replace it.
How I Store Them
Once the watermelon cubes are completely frozen, I transfer them into an airtight freezer safe container. Keeping them sealed helps prevent freezer burn and keeps the cubes from absorbing odors from other foods.
I like making a batch at once because they are ready whenever my dog needs a refreshing snack. There is no preparation involved beyond opening the freezer and taking out an appropriately sized cube.
These watermelon ice cubes are about as simple as homemade dog treats get. With fresh seedless watermelon and a few hours in the freezer, you can create a refreshing snack that is easy to prepare, easy to store, and perfect for adding a little variety to your dog’s treat routine.
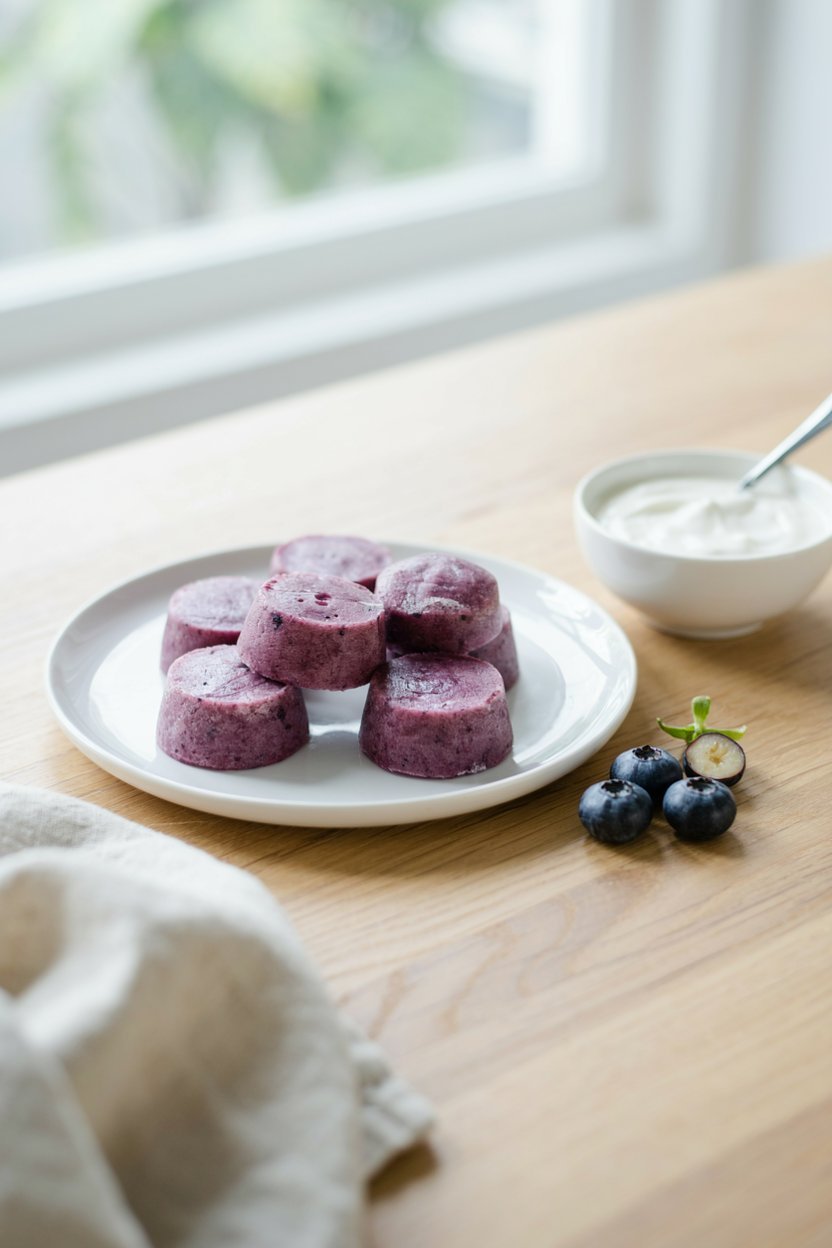
3. Frozen Blueberry Yogurt Drops

These frozen blueberry yogurt drops are one of those homemade dog treats I can prepare in just a few minutes and forget about until they are ready in the freezer. They are creamy, fruity, and refreshing, with a simple ingredient list that makes them easy to fit into an occasional treat routine.
I especially like this recipe when I have fresh blueberries that need to be used. Instead of preparing a complicated dessert, I can blend them with plain yogurt, portion the mixture into small drops, and freeze them. The result is a bite sized treat that my dog can enjoy straight from the freezer.
Ingredients
You only need two simple ingredients for these blueberry yogurt drops.
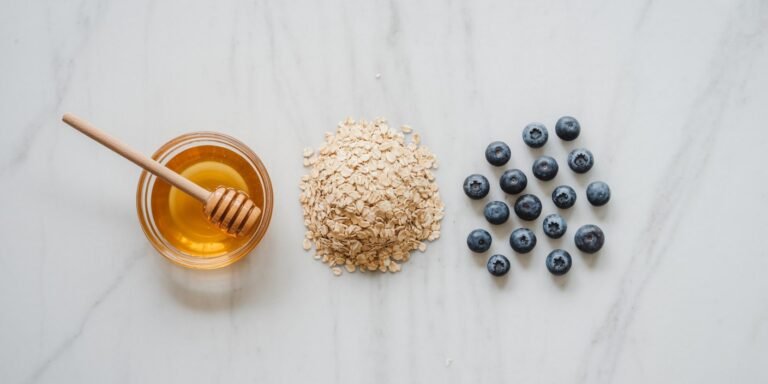
1/2 cup fresh blueberries
Choose ripe blueberries that are firm and free from mold or damaged areas. Wash them thoroughly before using. You can also use plain frozen blueberries without added sugar or syrup.
1/2 cup plain unsweetened Greek yogurt
Greek yogurt gives these drops their creamy consistency. Choose a plain variety without added sugar, flavors, or artificial sweeteners. Always check the ingredient label before using it for your dog.
How to Make Frozen Blueberry Yogurt Drops
Start by washing the blueberries thoroughly and removing any stems or damaged berries.
Add the blueberries and Greek yogurt to a blender or food processor. Blend until smooth and creamy. If you want a little more texture, you can blend the mixture briefly and leave a few tiny pieces of blueberry intact.
Line a small baking tray or plate with parchment paper. Using a small spoon or piping bag, place tiny drops of the mixture onto the surface.
You can make the drops as small or large as you like, but I prefer keeping them bite sized so they are easier to portion.
Place the tray in the freezer and freeze the drops until completely firm. This usually takes several hours.
Once frozen, gently remove the drops from the parchment paper and transfer them to an airtight freezer safe container.
Why I Like Using Small Drops
One of the biggest advantages of making these treats as small drops is portion control. It is much easier to give your dog one or two small bites than to estimate the appropriate amount from a large frozen treat.
Small drops are also convenient for dogs of different sizes. If you have a smaller dog, you can make tiny drops. For a larger dog, slightly bigger portions may be appropriate.
I also find that small treats freeze quickly and are easier to store in a container without taking up much freezer space.
My Tips for the Best Blueberry Drops
For the smoothest texture, use ripe blueberries and thick plain Greek yogurt. If your mixture seems too thin, chilling it briefly before portioning can make it easier to work with.
If you are using frozen blueberries, let them soften slightly before blending. Avoid blueberries packed with sugar, syrup, or other sweeteners.
I also recommend making the drops relatively small. Homemade treats should remain an occasional addition to your dog’s regular balanced diet.
Can Dogs Have Blueberries and Yogurt?
Many dogs can enjoy blueberries and plain yogurt in moderation, but every dog is different.
Blueberries can be a simple fruit option for homemade treats, while plain yogurt may work well for dogs that tolerate dairy. However, some dogs may experience digestive upset after eating dairy products.
If your dog has never eaten blueberries or yogurt before, start with a small amount and monitor how they respond.
For dogs with food allergies, sensitive digestion, dietary restrictions, or medical conditions, speak with your veterinarian before introducing new homemade treats.
How Much Should Your Dog Have?
The appropriate serving depends on your dog’s size, activity level, existing diet, and individual nutritional needs.
For a small dog, a couple of tiny drops may be enough. A larger dog may be able to enjoy a few more, but there is no need to overdo it.
I like treating these as little rewards rather than giving a large handful at once. This keeps the snack enjoyable without adding unnecessary calories to the daily diet.
How I Store Them
Once the drops are completely frozen, I transfer them into a freezer safe container with a tight fitting lid. If several drops stick together, gently separate them before storing.
Keeping the container sealed helps prevent freezer odors from affecting the yogurt and berries. It also makes it easy to grab a few pieces whenever my dog deserves a refreshing homemade snack.
These frozen blueberry yogurt drops are a simple combination of fresh fruit and creamy yogurt that takes very little preparation. With just two ingredients and some freezer time, you can have a batch of bite sized treats ready whenever your dog wants something cool and fruity.
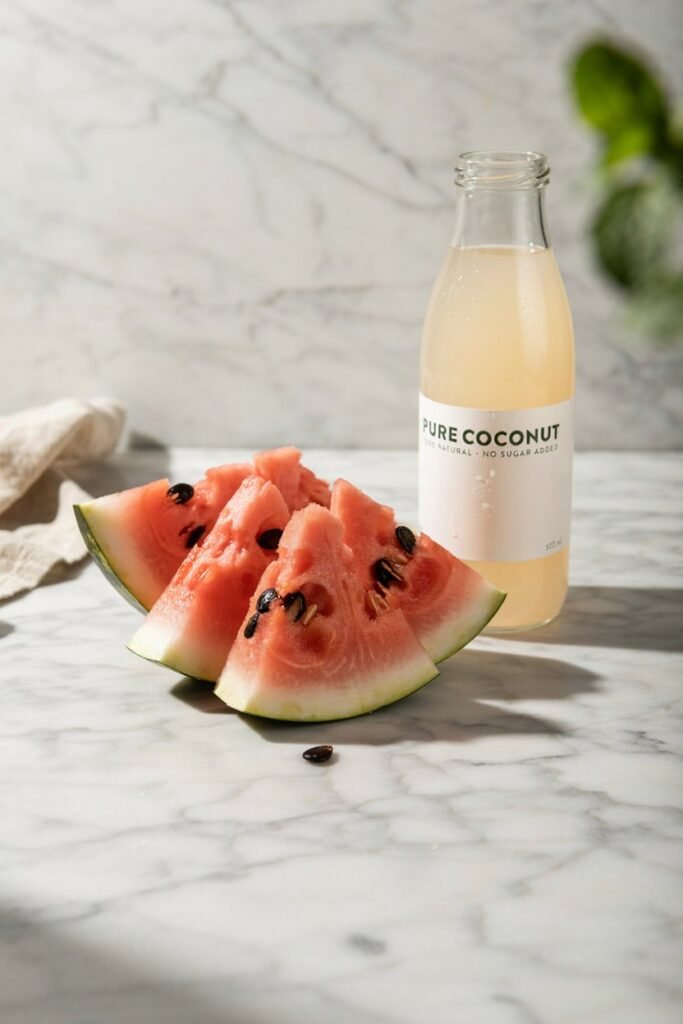
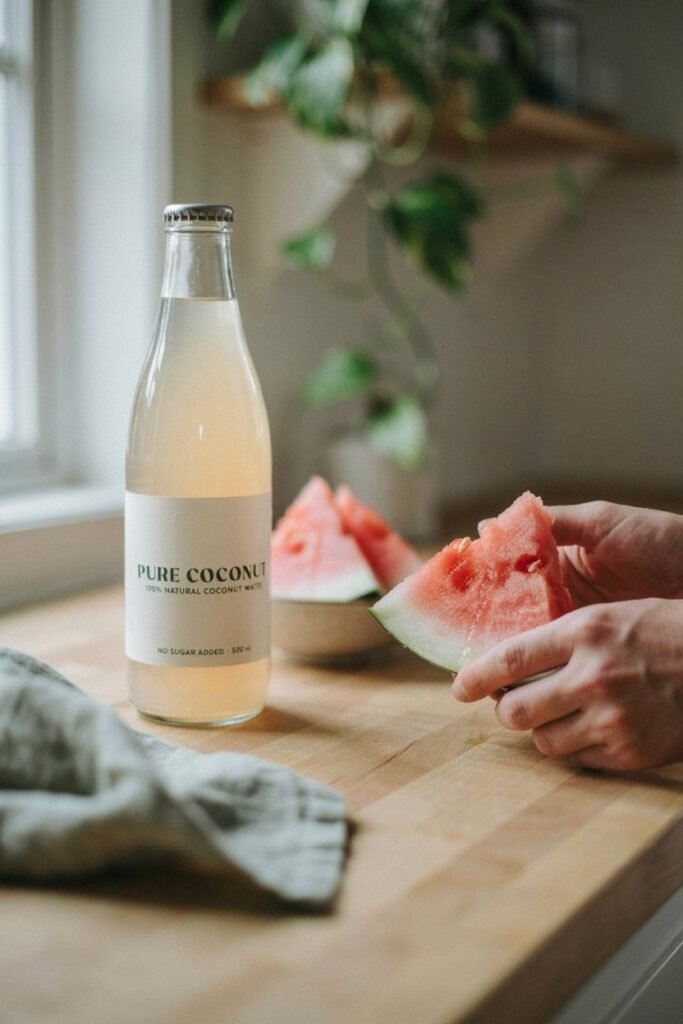
4. Coconut Water Puppy Pops

When I want to make a light and refreshing frozen treat for my dog, these coconut water puppy pops are a simple option that requires almost no preparation. They are especially nice on warm days when my dog has been outside and I want to offer a cool snack without making anything complicated.
I like this recipe because coconut water has a naturally mild flavor and freezes easily. When poured into small molds, it creates little frozen pops that are convenient to portion and store. You can also add a small amount of dog safe fruit for extra flavor if you want to make the treats more interesting.
Ingredients
The base recipe is intentionally simple.
1 cup plain coconut water
Choose unsweetened coconut water with no added sugar, flavors, syrups, or artificial sweeteners. Check the ingredient label carefully before using it.
Optional: 1/4 cup dog safe fruit
You can add a small amount of finely chopped or blended blueberries, strawberries, or watermelon for extra flavor. Make sure the fruit is properly prepared and free from seeds, stems, pits, or other parts that should not be given to dogs.
How to Make Coconut Water Puppy Pops
Pour the plain coconut water into a measuring cup or small bowl.
If you are adding fruit, blend the fruit separately until smooth or finely chop it into very small pieces. Stir it into the coconut water until evenly distributed.
Pour the mixture into small silicone molds or ice cube trays. I recommend using small molds because they make it easier to control the serving size.
Place the molds in the freezer and allow the pops to freeze completely. Depending on the size of the molds, this can take several hours.
Once frozen solid, gently remove the pops from the molds and transfer them to an airtight freezer safe container.
Choosing Coconut Water Carefully
This is one recipe where checking the label really matters. Coconut water products can vary significantly.
Look for a product that contains plain coconut water without added sugar or unnecessary flavorings. Avoid coconut drinks that are actually sweetened beverages or coconut flavored drinks.
You do not need a product marketed specifically for dogs. A simple, unsweetened coconut water can work as the base for these treats when offered appropriately.
My Tips for Making Puppy Pops
I prefer making these pops quite small because coconut water should not become a major part of your dog’s daily diet.
If you want to add fruit, keep the amount modest. Blueberries, strawberries, or properly prepared watermelon can add flavor without making the recipe complicated.
You can also freeze the coconut water by itself. There is no need to add fruit if you want the simplest possible version.
If your dog has never had coconut water before, start with a very small amount rather than offering a full frozen pop immediately.
Can Puppies Have Coconut Water?
This is where I would be a little more cautious. Puppies have different nutritional requirements than adult dogs, and introducing new foods should be done carefully.
The name “puppy pops” simply describes the size and style of the treat. It does not mean that every puppy should automatically have coconut water.
If you have a very young puppy or your puppy is following a specific diet, ask your veterinarian before introducing coconut water or homemade frozen treats.
For adult dogs, small occasional portions may be more appropriate, provided they tolerate the ingredients well.
How Much Should Your Dog Have?
These pops should be considered an occasional treat rather than a substitute for fresh drinking water or your dog’s normal diet.
Because coconut water contains naturally occurring sugars and electrolytes, moderation is still important. A small dog may only need a tiny pop, while a larger dog may tolerate a somewhat larger portion.
I prefer starting with a very small serving, especially when giving coconut water to a dog for the first time.
Always make sure your dog has access to fresh, clean drinking water throughout the day.
How I Store Them
Once frozen, I transfer the pops into a freezer safe container with a secure lid. This keeps them organized and helps prevent them from picking up odors from other foods in the freezer.
Making a batch ahead of time also means I can have a cool treat ready without preparing anything from scratch.
These coconut water puppy pops are a simple frozen snack that can add a little variety to your dog’s treat routine. With plain unsweetened coconut water and an optional touch of dog safe fruit, they are easy to prepare, portion, and keep ready in the freezer.
5. Pumpkin and Yogurt Frozen Treats

Pumpkin and yogurt make one of my favorite combinations when I want to prepare a simple homemade frozen treat for my dog. The pumpkin gives these bites a naturally creamy texture, while plain yogurt adds richness and helps create a smooth consistency once everything is frozen.
I especially like making these treats when I have leftover plain pumpkin puree in the refrigerator. Instead of letting it go to waste, I can turn it into a batch of small frozen bites that stay ready in the freezer for days when my dog deserves something extra.
The recipe takes only a few minutes to prepare, and there is no baking involved. That makes it an easy option when I want a homemade snack without spending much time in the kitchen.
Ingredients
You only need two main ingredients for these creamy frozen treats.
1/2 cup plain pumpkin puree
Use 100 percent pure pumpkin with no added sugar, salt, spices, or flavorings. Make sure you are using plain pumpkin puree rather than pumpkin pie filling, which can contain additional ingredients that are not appropriate for dogs.
1/2 cup plain unsweetened Greek yogurt
Greek yogurt gives the treats a smooth, creamy consistency. Choose a plain variety without added sugar, flavors, or artificial sweeteners. Always check the ingredient label before using it.
How to Make Pumpkin and Yogurt Frozen Treats
Add the plain pumpkin puree and Greek yogurt to a small mixing bowl.
Stir the ingredients together until they are completely combined and the mixture has an even, creamy consistency.
If you prefer an especially smooth texture, you can blend the ingredients in a food processor for a few seconds.
Spoon the mixture into small silicone molds or an ice cube tray. I recommend smaller molds because they make it easier to control portions and are convenient for dogs of different sizes.
Place the molds in the freezer and allow the treats to freeze completely. Depending on the size of your molds, this can take several hours. I often prepare them at night and leave them in the freezer until the following day.
Once frozen solid, gently remove the treats from the molds and transfer them into a freezer safe container.
Choosing the Right Pumpkin
The type of pumpkin you use is important.
Look for a can labeled 100 percent pumpkin puree with no additional ingredients. Pumpkin pie filling is different and often contains sugar, spices, and other ingredients that you do not need in a homemade dog treat.
If you are using leftover pumpkin from another recipe, check the ingredients first. If it has already been sweetened or seasoned, it is better not to use it for your dog’s treats.
Fresh pumpkin can also be used if it has been cooked until soft and prepared without added seasonings.
My Tips for the Best Frozen Treats
For the smoothest consistency, use thick Greek yogurt and plain pumpkin puree. If your pumpkin puree seems particularly watery, you can mix it thoroughly before measuring.
I also recommend using silicone molds rather than freezing the entire mixture in one large container. Individual portions are much easier to serve and store.
There is no need to add cinnamon, honey, sugar, maple syrup, or other sweeteners. The pumpkin already provides plenty of natural flavor.
If your dog has never eaten pumpkin or yogurt before, introduce the ingredients gradually and start with a small serving.
Can Dogs Eat Pumpkin and Yogurt?
Many dogs can enjoy plain pumpkin in moderation, and plain yogurt may also be suitable for dogs that tolerate dairy.
However, every dog has different nutritional needs and digestive tolerance. Some dogs may experience digestive upset after eating dairy products.
It is also important to distinguish plain pumpkin puree from pumpkin pie filling. They are not interchangeable when preparing food for dogs.
If your dog has food allergies, a sensitive stomach, dietary restrictions, or a medical condition requiring a specific diet, speak with your veterinarian before introducing homemade treats.
How Much Should Your Dog Have?
These pumpkin yogurt treats should remain an occasional snack rather than replacing your dog’s normal balanced meals.
The appropriate portion depends on your dog’s size, activity level, regular diet, and individual nutritional needs.
For smaller dogs, one small frozen bite may be enough. Larger dogs may be able to enjoy a slightly larger serving, but several treats at once are not necessary.
I like starting with one small piece when introducing a new recipe. It gives me a chance to see how my dog responds before offering more another time.
How I Store Them
Once completely frozen, transfer the pumpkin yogurt treats into an airtight freezer safe container. Keeping them covered helps protect their texture and prevents them from absorbing strong odors from other foods.
I like preparing a batch at once because it makes homemade treats much more convenient. Instead of mixing something together every time my dog wants a snack, I can simply take a small treat from the freezer.
These pumpkin and yogurt frozen treats are a great example of how simple homemade dog snacks can be. With just plain pumpkin and unsweetened Greek yogurt, you can make a creamy frozen bite that is easy to prepare, easy to portion, and convenient to keep on hand.
6. Strawberry Banana Ice Cream for Dogs

When my dog is looking for something cold and creamy on a warm day, this strawberry banana ice cream is one of the homemade treats I like making most. It has the creamy texture of ice cream without the added sugar and heavy ingredients found in many human desserts.
The recipe is surprisingly simple. Ripe banana provides natural sweetness and helps create a creamy texture, while fresh strawberries add a bright fruity flavor. A little plain unsweetened Greek yogurt brings everything together and gives the mixture that smooth consistency that makes it feel like a special frozen dessert.
I also love that I can prepare it ahead of time and keep it in the freezer. That makes it an easy treat to have ready after a walk, during a warm afternoon, or whenever I want to give my dog something homemade.
Ingredients
This recipe uses three simple ingredients that are easy to find.
1 ripe banana
Choose a banana with a few brown spots. A ripe banana is naturally sweeter, softer, and easier to blend, which makes it ideal for creating a smooth frozen texture.
1/2 cup fresh strawberries
Choose ripe strawberries and wash them thoroughly. Remove the green tops before adding them to the recipe. Fresh strawberries provide the fruity flavor without needing any added sweetener.
1/2 cup plain unsweetened Greek yogurt
Greek yogurt creates the creamy base for this homemade dog ice cream. Choose a plain variety without added sugar, artificial sweeteners, or flavorings.
How to Make Strawberry Banana Ice Cream
Start by washing the strawberries thoroughly. Remove the green tops and cut the berries into smaller pieces.
Peel the banana and break it into several pieces.
Add the banana, strawberries, and Greek yogurt to a blender or food processor. Blend until the mixture becomes completely smooth and creamy.
If you prefer a little texture, you can pulse the mixture instead and leave a few tiny pieces of strawberry throughout.
Pour the mixture into a freezer safe container or spoon it into small silicone molds if you prefer individual portions.
Freeze for at least 3 to 4 hours, or until the mixture is firm. If using a container, allow it to sit at room temperature for a few minutes before serving so it softens slightly and becomes easier to scoop.
My Tips for Creamier Dog Ice Cream
For the smoothest texture, use a very ripe banana and fresh strawberries.
You can also freeze the banana and strawberries before blending. Frozen fruit creates a thicker mixture that can resemble soft serve when blended, although you may need to let the fruit soften slightly before processing depending on the strength of your blender.
If the mixture is too thick, add a small spoonful of plain yogurt rather than adding sugar or other liquids.
I prefer making smaller portions because homemade dog ice cream is still a treat and does not need to be served in large scoops.
Can Dogs Eat Strawberry Banana Ice Cream?
Dogs can enjoy appropriately prepared strawberries and bananas in moderation, while plain yogurt may be suitable for dogs that tolerate dairy.
However, this homemade version is very different from traditional human ice cream. Do not use regular ice cream as a substitute because it can contain large amounts of sugar and other ingredients that dogs do not need.
If your dog has never eaten one of these ingredients before, introduce them gradually and start with a small portion.
Dogs with food allergies, sensitive digestion, dietary restrictions, or specific medical conditions may need to avoid certain ingredients. When in doubt, ask your veterinarian before introducing a new homemade treat.
How Much Should You Give Your Dog?
Think of this as an occasional dessert rather than something to add to your dog’s daily meals.
The appropriate amount depends on your dog’s size, activity level, regular diet, and individual calorie needs. A small dog may only need a teaspoon or two, while a larger dog may be able to have a slightly larger serving.
I like using small silicone molds because they make portion control simple. If I freeze the mixture in individual portions, I do not have to guess how much to scoop out later.
How I Store It
If you make the ice cream in one container, keep it tightly covered in the freezer. For individual portions, transfer the frozen pieces into a freezer safe container once they are firm.
Keeping the container sealed helps prevent freezer odors from affecting the fruit and yogurt.
If the ice cream becomes very hard, let a small portion sit at room temperature for a few minutes before serving. It should soften enough to scoop without becoming completely melted.
This strawberry banana ice cream for dogs is a simple way to turn a few everyday ingredients into a creamy homemade frozen dessert. With ripe banana, fresh strawberries, and plain Greek yogurt, you can give your dog a refreshing treat that feels special while keeping the recipe simple and easy to prepare.
7. Frozen Chicken Broth Cubes

When my dog needs a simple savory treat instead of another fruit based snack, these frozen chicken broth cubes are one of the easiest options to prepare. They are refreshing, simple, and can be made with a dog safe broth and a few basic ingredients.
I especially like keeping a batch in the freezer because they can be used as an occasional treat or added to your dog’s regular meal for extra moisture and flavor. They are also a practical way to use homemade chicken broth, provided the broth is prepared specifically without ingredients that are unsafe for dogs.
The biggest thing to remember with this recipe is that not all chicken broth is suitable for dogs. Many store bought broths contain onion, garlic, excessive salt, or other seasonings that should not be included in a dog treat.
Ingredients
1 cup dog safe chicken broth
Choose a low sodium broth that contains no onion, garlic, chives, or other ingredients that are unsafe for dogs. If possible, use homemade chicken broth made specifically without these ingredients.
1/4 cup shredded plain cooked chicken, optional
You can add a small amount of plain cooked chicken for extra texture and flavor. The chicken should be fully cooked, boneless, skinless, and completely free from seasoning.
How to Make Frozen Chicken Broth Cubes
If you are using homemade broth, allow it to cool completely before preparing the treats. If there is visible fat on the surface, you can remove it before using the broth.
Pour the dog safe chicken broth into a measuring cup.
If you are adding cooked chicken, shred it into very small pieces and stir it into the broth.
Pour the mixture into small silicone molds or an ice cube tray. I prefer smaller molds because they make it easier to control portions.
Place the tray in the freezer and allow the cubes to freeze completely. This usually takes several hours.
Once frozen solid, remove the cubes from the molds and transfer them to a freezer safe container with a secure lid.
Choosing a Dog Safe Chicken Broth
This is the most important part of the recipe.
Never assume that a regular carton of chicken broth is safe simply because it is made from chicken. Many commercial broths contain onion or garlic, both of which can be harmful to dogs.
Check the ingredient list carefully and avoid broths containing:
- Onion
- Garlic
- Onion powder
- Garlic powder
- Chives
- Excessive salt
- Heavy seasoning
- Artificial flavorings
A homemade broth can be a great option because you have complete control over the ingredients. Simply cook plain chicken with water and appropriate dog safe vegetables if desired, then strain the broth thoroughly.
My Tips for Better Broth Cubes
Keep the recipe simple. You do not need herbs, spices, butter, oil, or seasoning to make these cubes appealing to your dog.
If you add chicken, make sure it is completely plain and free from bones. Never add cooked chicken bones to the mixture.
Small silicone molds work particularly well because they create portions that are easy to serve.
You can also freeze the plain broth without adding chicken. This creates a simple cube that can be offered on its own or placed over your dog’s regular food.
How Much Should Your Dog Have?
These cubes should be treated as an occasional addition rather than a replacement for your dog’s normal meals.
The appropriate amount depends on your dog’s size, diet, activity level, and overall health. Start with a small cube and see how your dog responds, particularly if they have not had broth before.
If you are using the cubes as a food topper, remember that the additional calories and nutrients should still fit into your dog’s overall daily diet.
Dogs with kidney disease, heart conditions, dietary restrictions, or other health concerns may need to limit sodium or certain nutrients. If your dog has a medical condition or follows a therapeutic diet, check with your veterinarian before adding broth based treats.
How I Store Them
Once frozen, I transfer the cubes into an airtight freezer safe container. I recommend labeling the container with the date so you know when the batch was prepared.
Keeping the cubes sealed also prevents them from absorbing odors from other foods in the freezer.
When I want to give my dog a savory frozen snack, I can simply take out one appropriately sized cube. If I am using it as a meal topper, I can allow it to thaw slightly before placing it over their food.
These frozen chicken broth cubes are a simple savory alternative to fruit based dog treats. The recipe itself is easy, but choosing a truly dog safe broth is essential. Keep the ingredients plain, avoid onion and garlic, control the portions, and you will have a convenient homemade treat ready whenever your dog deserves something a little different.
8. Apple Peanut Butter Pops

If your dog loves the combination of fruity flavors and peanut butter, these apple peanut butter pops are a fun frozen treat to keep in the freezer. The fresh apple adds a crisp, naturally sweet flavor, while a small amount of peanut butter makes the pops creamy and more satisfying.
I like this recipe because it is simple enough to prepare when I have an extra apple sitting in the fruit bowl. There is no baking, complicated preparation, or long ingredient list. Just a few minutes of prep and some time in the freezer gives you a homemade treat that can be portioned according to your dog’s size.
Ingredients
The ingredient list is short, but each ingredient should be chosen carefully.
1 medium apple
Choose a fresh, ripe apple and wash it thoroughly before preparing it. Remove the stem, core, and all seeds. The apple flesh can then be chopped into small pieces for blending.
2 tablespoons natural peanut butter
Use plain peanut butter with a simple ingredient list. Most importantly, check the label carefully and make sure it contains no xylitol, which is highly toxic to dogs. Avoid chocolate flavored or heavily sweetened varieties.
1/2 cup plain unsweetened Greek yogurt
Greek yogurt gives these pops a creamy consistency and helps balance the apple and peanut butter. Choose a plain variety without added sugar, flavors, or artificial sweeteners.
How to Make Apple Peanut Butter Pops
Start by washing the apple thoroughly. Cut it into quarters and remove the stem, core, and seeds completely.
Cut the apple flesh into smaller pieces and place them into a blender or food processor.
Add the Greek yogurt and peanut butter. Blend everything until smooth and creamy.
If the mixture is too thick, add a small splash of water and blend again. You want a consistency that is thick enough to spoon into your molds but smooth enough to portion easily.
Spoon the mixture into small silicone molds or an ice cube tray.
Place the molds in the freezer and allow the pops to freeze completely. This generally takes several hours, depending on the size of the molds.
Once frozen, gently remove the pops and transfer them to an airtight freezer safe container.
Preparing the Apple Properly
The apple preparation is especially important for this recipe.
Always remove the stem, core, and seeds before blending the apple. I prefer cutting the apple into small pieces after coring it so I can check each piece before it goes into the blender.
There is no reason to add sugar, cinnamon, caramel, apple sauce, or other dessert ingredients. The fresh apple already provides plenty of natural flavor.
If you use prepared applesauce instead, choose an unsweetened variety with no added spices or other ingredients and check the label carefully.
Choosing Safe Peanut Butter
Peanut butter can be a perfectly useful ingredient in homemade dog treats, but the label matters.
Avoid any peanut butter that contains xylitol. Also skip chocolate peanut butter and varieties containing unnecessary sweeteners or flavorings.
A simple natural peanut butter is all you need. Because peanut butter is calorie dense, there is also no need to use a large amount.
My Tips for Better Apple Peanut Butter Pops
For a smoother consistency, use a ripe apple and thick Greek yogurt.
I prefer small silicone molds because they create manageable portions and make the frozen pops easy to remove.
If you are making these for a dog that has never eaten apple, peanut butter, or yogurt before, introduce unfamiliar ingredients separately when possible. This makes it easier to identify what your dog tolerates well.
You can also make the pops without yogurt by blending the apple with a small amount of water and peanut butter, although the yogurt gives the finished treat a creamier texture.
Can Dogs Eat Apples and Peanut Butter?
Many dogs can enjoy properly prepared apples and plain peanut butter in moderation. However, preparation and portion size matter.
Apple seeds, cores, and stems should not be included in the recipe. Peanut butter should always be checked for xylitol and other unsuitable ingredients.
Plain yogurt can also be tolerated by some dogs but may cause digestive upset in dogs that are sensitive to dairy.
If your dog has food allergies, digestive sensitivities, dietary restrictions, or a medical condition, speak with your veterinarian before introducing a new homemade treat.
How Much Should Your Dog Have?
These apple peanut butter pops should be an occasional treat rather than a replacement for your dog’s regular balanced food.
The appropriate serving depends on your dog’s size, activity level, daily diet, and individual nutritional needs. A small dog may only need one small pop, while a larger dog may be able to have a slightly larger portion.
Because peanut butter adds calories, keeping the pops small is a simple way to make portion control easier.
How I Store Them
Once the pops are completely frozen, I transfer them into a freezer safe container with a tight fitting lid.
Keeping them sealed helps protect the treats from freezer odors and makes it easier to keep several varieties organized if you are preparing multiple homemade frozen treats.
I like making a batch ahead because there is something convenient about opening the freezer and having a homemade snack ready whenever my dog deserves a little treat.
These apple peanut butter pops combine fresh fruit, creamy yogurt, and a small amount of dog safe peanut butter into an easy frozen snack. With careful ingredient selection and sensible portions, they are a simple way to add some variety to your dog’s homemade treat routine.
9. Frozen Carrot Crunch Treats

If you are looking for a frozen dog treat that is a little different from the usual fruit and yogurt combinations, these frozen carrot crunch treats are worth trying. Carrots have a naturally mild sweetness and a satisfying texture, and freezing them creates a refreshing snack that is especially enjoyable on warm days.
I like making these because carrots are inexpensive, easy to keep in the refrigerator, and simple to prepare. You can also make the recipe as straightforward as you like. For a crunchy version, small carrot pieces can be frozen on their own. For a softer treat, they can be combined with plain yogurt and blended into small frozen bites.
Ingredients
This recipe uses simple ingredients that are easy to prepare at home.
1 medium fresh carrot
Choose a firm, fresh carrot and wash it thoroughly. Peel it if the skin is particularly rough, then cut away the ends. Carrots can be grated, finely chopped, or cut into very small pieces depending on the texture you want.
1/2 cup plain unsweetened Greek yogurt
Greek yogurt creates a creamy base if you want softer frozen bites. Choose a plain variety without added sugar, flavors, or artificial sweeteners.
1 tablespoon water, optional
A small amount of water can help loosen the mixture if you are blending the carrot and yogurt together. You may not need it at all.
How to Make Frozen Carrot Crunch Treats
Start by washing the carrot thoroughly and removing the ends.
For a crunchy treat, cut the carrot into small, manageable pieces. Avoid making the pieces so large that they become difficult for your dog to chew.
If you prefer a creamy frozen bite, chop the carrot into smaller pieces and add it to a blender or food processor with the Greek yogurt.
Blend until the mixture is mostly smooth. Add a small splash of water only if necessary.
Spoon the mixture into small silicone molds and place them in the freezer.
Freeze for several hours until completely firm. Once frozen, remove the treats from the molds and transfer them to a freezer safe container.
Choosing the Right Carrots
Fresh carrots are the simplest choice for this recipe. Look for firm carrots without mold, soft spots, or signs of spoilage.
Wash them thoroughly before preparing them. If you are using baby carrots, still rinse them before serving.
There is no need to add butter, salt, seasoning, honey, or other ingredients. Plain carrots already provide plenty of natural flavor.
My Tips for the Best Carrot Treats
The size and texture of the carrot pieces should match your dog’s size and chewing ability.
For smaller dogs, I prefer finely grated or very small pieces. Larger dogs may be able to handle slightly larger pieces, but you should still supervise your dog while they are eating frozen treats.
If your dog prefers softer treats, blending the carrot with yogurt creates a much easier texture.
You can also lightly steam the carrot first, allow it to cool completely, and then blend it with yogurt. This creates a softer mixture while still keeping the recipe simple.
Can Dogs Eat Carrots?
Plain carrots are commonly used as a dog friendly food and can be offered in moderation. However, individual dogs may tolerate foods differently.
Raw carrots can be crunchy, so supervision is particularly important when giving larger pieces. If your dog tends to swallow food quickly or has difficulty chewing, a softer blended version may be more appropriate.
If you are introducing carrots for the first time, start with a small amount and see how your dog responds.
How Much Should Your Dog Have?
These treats should remain an occasional snack rather than replacing your dog’s normal complete and balanced diet.
The appropriate portion depends on your dog’s size, activity level, regular food intake, and individual needs.
I like using small molds because they make portion control much easier. You can give your dog one small frozen bite rather than trying to estimate an appropriate amount from a large frozen piece.
How I Store Them
Once completely frozen, transfer the treats into an airtight freezer safe container.
If you are making several varieties of homemade treats, labeling the containers can make it easier to keep track of what you have prepared.
Keeping the treats covered also helps prevent them from absorbing odors from other foods in the freezer.
These frozen carrot crunch treats are a simple alternative when you want to give your dog something refreshing without relying entirely on fruit. Whether you serve small frozen carrot pieces or blend them with plain yogurt for a creamier bite, the recipe is easy to customize and convenient to prepare ahead.
10. Sweet Potato Frozen Chews

Sweet potatoes are one of those ingredients I always like having available when I am making homemade treats for my dog. They have a naturally sweet flavor, a soft texture when cooked, and work beautifully in simple frozen recipes.
These sweet potato frozen chews are especially useful when you want something more substantial than a watery ice cube. The cooked sweet potato gives the treats a creamy texture, while freezing them creates a cool snack that takes longer to eat than a soft treat.
I like preparing a batch when I already have a cooked sweet potato available. Once the mixture is frozen into small portions, I can keep them in the freezer and have an easy homemade treat ready whenever my dog deserves something special.
Ingredients
You only need a few simple ingredients to make these frozen sweet potato chews.
1 medium sweet potato
Choose a fresh sweet potato and cook it until completely tender. Remove the skin before using it in the recipe. The sweet potato should be completely plain, without butter, salt, sugar, cinnamon, or other seasonings.
1/2 cup plain unsweetened Greek yogurt
Greek yogurt helps create a creamy texture and makes the sweet potato easier to blend into a smooth mixture. Choose plain yogurt without added sugar, flavors, or artificial sweeteners.
2 tablespoons water, optional
A little water can help loosen the mixture if your cooked sweet potato is particularly thick. Add it gradually so you do not make the mixture too watery.
How to Make Sweet Potato Frozen Chews
Start by cooking the sweet potato until it is completely soft. You can bake, steam, or boil it, but avoid adding any seasoning, oil, butter, or salt.
Allow the cooked sweet potato to cool completely.
Remove the skin and place the cooked flesh into a blender or food processor. Add the Greek yogurt and blend until smooth.
If the mixture is too thick, add a tablespoon of water and blend again. Add the remaining water only if needed.
Spoon the mixture into small silicone molds. Slightly larger molds can work well for bigger dogs, while small molds are better for smaller dogs.
Place the molds in the freezer and allow the treats to freeze completely. This generally takes several hours, although leaving them overnight is an easy option.
Once frozen solid, gently remove the chews from the molds and transfer them to an airtight freezer safe container.
Preparing Sweet Potato Safely
The sweet potato should always be cooked before making these frozen treats.
Raw sweet potato can be difficult for dogs to digest and is much harder to process into a smooth frozen mixture. Cooking it until tender makes it easier to mash and blend.
I also recommend keeping the preparation completely plain. Human sweet potato dishes often contain butter, sugar, salt, marshmallows, cinnamon, or other ingredients that are unnecessary for dogs.
If you are using leftover sweet potato, make sure it was cooked without those additions before using it for this recipe.
My Tips for Better Frozen Chews
For the smoothest consistency, cook the sweet potato until it is very soft. A fork should slide through it easily.
Let the sweet potato cool before blending it with the yogurt. Adding very hot ingredients to yogurt is not ideal for the texture of the mixture.
I prefer silicone molds because they make it easy to create individual portions. You can also use an ice cube tray if you want smaller treats.
If your dog tends to eat frozen treats quickly, choose a slightly larger but still manageable shape and supervise them while eating. The goal is to give your dog a treat they can safely manage, not an excessively hard piece that could be difficult to chew.
Can Dogs Eat Sweet Potatoes?
Plain, cooked sweet potato can be enjoyed by many dogs in moderation. It is important, however, to keep it simple and avoid the heavily seasoned versions commonly prepared for people.
The skin should be removed for this recipe, and the sweet potato should be cooked thoroughly.
If your dog has never eaten sweet potato before, start with a small amount and monitor their response.
Dogs with allergies, sensitive digestion, dietary restrictions, or medical conditions may have different nutritional needs. Check with your veterinarian before introducing new homemade treats if you are unsure whether the ingredients are appropriate.
How Much Should Your Dog Have?
These frozen chews should be considered an occasional treat rather than a replacement for your dog’s regular complete and balanced diet.
Portion size depends on your dog’s size, activity level, normal diet, and individual nutritional needs.
Small molds are particularly useful because they allow you to give a modest portion without having to break apart a larger frozen treat.
Because sweet potatoes contain carbohydrates and the yogurt adds additional calories, there is no need to give several treats at once.
How I Store Them
Once the chews are completely frozen, transfer them into a freezer safe container with a secure lid.
I like keeping several portions together so they are easy to grab when needed. Keeping the container sealed also helps protect the treats from freezer odors.
If the chews are extremely firm, allow the appropriate portion to sit for a short time before serving. Always supervise your dog with frozen treats, particularly if they tend to gulp their food.
These sweet potato frozen chews are a comforting alternative to fruit based frozen treats. With plain cooked sweet potato and unsweetened yogurt, you can make a creamy homemade snack that is easy to prepare, portion, and store. It is a simple recipe to keep in your freezer when you want to give your dog something homemade and refreshing.
11. Frozen Tuna Treat Cubes

When I want to give my dog a savory frozen treat instead of another fruit based snack, these frozen tuna treat cubes are an easy option to prepare. The strong natural aroma of tuna can make them especially appealing to dogs, while freezing the mixture creates a refreshing little bite that is convenient to keep in the freezer.
I like making these when I have plain tuna available and want to turn a small amount into several portions. They are also useful as an occasional meal topper, although I prefer keeping the cubes small because tuna should be offered as an occasional treat rather than becoming a regular part of your dog’s diet.
Ingredients
The ingredient list is intentionally simple, but choosing the right tuna is important.
1 can tuna packed in water
Choose plain tuna packed in water rather than tuna packed in oil, sauces, or seasoned preparations. Drain it thoroughly before using. Look for a product without added salt or unnecessary seasonings whenever possible.
1/2 cup plain unsweetened Greek yogurt
Greek yogurt creates a creamy texture and helps bind the tuna into a mixture that freezes well. Choose plain yogurt without added sugar, flavors, or artificial sweeteners.
1 tablespoon water, optional
A small amount of water can help loosen the mixture if it is too thick to blend. Add it gradually rather than adding the full amount immediately.
How to Make Frozen Tuna Treat Cubes
Start by opening the tuna and draining it thoroughly. I like pressing the tuna gently with a fork to remove as much excess liquid as possible.
Add the tuna and Greek yogurt to a food processor or blender.
Blend until the mixture becomes smooth and creamy. If it is too thick, add a small amount of water and blend again.
Spoon the mixture into small silicone molds or an ice cube tray.
Place the tray in the freezer and allow the cubes to freeze completely. Depending on the size of the molds, this can take several hours.
Once frozen solid, gently remove the cubes and transfer them into an airtight freezer safe container.
Choosing Tuna for Your Dog
Not every tuna product is suitable for homemade dog treats. I recommend keeping the recipe as plain as possible.
Choose tuna packed in water rather than oil, and avoid varieties containing sauces, spices, onion, garlic, or other seasonings.
It is also important to remember that tuna can contain mercury. For that reason, I would not use tuna as an everyday protein source or give large quantities to your dog.
A small amount used occasionally is a much more sensible approach.
My Tips for Better Tuna Cubes
The smell of tuna can be quite strong, so I recommend preparing these treats when you can clean your equipment afterward easily.
Use small molds to keep the portions modest. This is particularly important because these treats are intended as an occasional snack.
If you do not want to use yogurt, you can make a simpler version by blending the tuna with a small amount of water and freezing the mixture. However, yogurt gives the cubes a softer, creamier consistency.
I also recommend washing the blender, food processor, and utensils thoroughly after preparation because the tuna smell can linger.
Can Dogs Eat Tuna?
Dogs can eat some types of tuna in moderation, but it is not something I would make a frequent part of a dog’s diet.
Tuna can contain higher levels of mercury than some other fish, so portion size and frequency matter. For homemade treats, keeping the amount small and offering them occasionally is a better approach.
If your dog regularly eats fish based food or supplements, consider the total amount of fish they are consuming rather than looking at this treat in isolation.
For puppies, pregnant or nursing dogs, dogs with medical conditions, or dogs following a specific diet, speak with your veterinarian before adding tuna based treats.
How Much Should Your Dog Have?
These cubes are best treated as an occasional snack or small food topper.
The appropriate portion depends on your dog’s size, overall diet, activity level, and individual nutritional needs. A small dog may only need one tiny cube, while a larger dog may tolerate a slightly larger serving.
Because tuna should not be a frequent treat, I would keep portions modest and vary the types of homemade treats you offer.
How I Store Them
Once the cubes are completely frozen, transfer them into a freezer safe container with a tight fitting lid.
I recommend labeling the container with the preparation date so you can keep track of how long the treats have been stored.
Because tuna has a strong smell, keeping the container tightly sealed is especially important. It helps prevent the freezer from smelling like fish and protects the treats from absorbing other odors.
These frozen tuna treat cubes are a simple savory alternative to fruit based dog snacks. With plain tuna, unsweetened yogurt, and careful portion control, you can prepare a small batch of refreshing treats that adds some variety to your dog’s occasional snack routine.
12. Frozen Mixed Fruit Dog Smoothie Cubes

When I have a few different dog safe fruits that need to be used, these frozen mixed fruit smoothie cubes are one of my favorite ways to turn them into a simple homemade treat. Instead of making a separate recipe for every fruit, I can combine a few ingredients, blend them together, and freeze the mixture into small portions.
The result is a colorful, naturally fruity snack that is refreshing on warm days and easy to keep ready in the freezer. I especially like this recipe because it is flexible. You can use a combination of blueberries, strawberries, bananas, watermelon, or other appropriate fruits depending on what you already have available.
The key is to keep the recipe simple and make sure every ingredient is appropriate for dogs.
Ingredients
The beauty of these smoothie cubes is that you can adjust the fruit combination based on what you have available.
1/2 cup blueberries
Use fresh blueberries that have been washed thoroughly, or plain frozen blueberries without added sugar. Remove any spoiled berries before blending.
1/2 cup strawberries
Wash the strawberries thoroughly and remove the green tops. Choose ripe fruit without mold or damaged areas.
1/2 ripe banana
A ripe banana adds natural sweetness and gives the smoothie a thicker, creamier consistency.
1/2 cup plain unsweetened Greek yogurt
Greek yogurt helps bind the fruit together and gives the finished cubes a creamy texture. Choose plain yogurt without added sugar, flavors, or artificial sweeteners.
1 to 2 tablespoons water, optional
Add a small amount of water only if the mixture is too thick to blend easily.
How to Make Frozen Mixed Fruit Smoothie Cubes
Wash the fresh fruit thoroughly before preparing it.
Remove the strawberry tops and peel the banana. If you are using watermelon or another fruit with seeds, remove all seeds and any inedible parts before adding it to the blender.
Add the blueberries, strawberries, banana, and Greek yogurt to a blender.
Blend until smooth and creamy. If the mixture is too thick, add a tablespoon of water and blend again. Add the second tablespoon only if necessary.
Pour the smoothie mixture into small silicone molds or an ice cube tray.
Place the tray in the freezer and freeze for several hours, or until the cubes are completely solid.
Once frozen, gently remove the cubes from the molds and transfer them into an airtight freezer safe container.
Choosing Fruit for Your Smoothie
This is where I like to get creative, but I still keep a few basic rules in mind.
Good options for this type of recipe can include properly prepared:
- Blueberries
- Strawberries
- Bananas
- Watermelon
- Raspberries
- Blackberries
- Mango
- Pear
- Apple with the core and seeds removed
Always research an unfamiliar fruit before giving it to your dog. Some fruits that are perfectly fine for people can be dangerous for dogs.
I also avoid canned fruit packed in syrup because there is no need to add that much extra sugar to a homemade dog treat.
My Tips for Better Smoothie Cubes
Use ripe fruit for the best natural flavor. You do not need honey, sugar, syrup, or fruit juice to make these treats appealing.
If you want a smoother consistency, blend everything thoroughly. For a little texture, pulse the mixture briefly and leave a few tiny pieces of fruit throughout.
I recommend using small molds because they make portion control much easier. They also allow you to make a batch suitable for dogs of different sizes.
If you are introducing a new fruit to your dog, consider trying that fruit separately before combining several new ingredients in one recipe.
Can Dogs Have Mixed Fruit?
Many common fruits can be enjoyed by dogs in moderation, but not every fruit is safe.
For this reason, I recommend sticking to fruits that are well established as dog appropriate and preparing them correctly. Remove seeds, pits, cores, stems, leaves, and tough skins when necessary.
Avoid grapes and raisins completely, as they can be toxic to dogs.
If your dog has food allergies, digestive sensitivities, dietary restrictions, or a health condition, talk with your veterinarian before adding new fruits or homemade treats to their diet.
How Much Should Your Dog Have?
These smoothie cubes should be considered occasional treats rather than a replacement for your dog’s normal balanced food.
Fruit contains natural sugars, and yogurt can contribute additional calories, so portion size matters.
A small dog may only need one tiny cube, while a larger dog may be able to enjoy a slightly larger serving. I prefer starting with a small portion, particularly when introducing a new combination.
How I Store Them
Once the cubes are completely frozen, transfer them into a freezer safe container with a secure lid.
If you make several different frozen treats, I recommend labeling each container so you know exactly what ingredients are inside.
Keeping the cubes sealed also helps prevent them from absorbing odors from other foods in the freezer.
These frozen mixed fruit dog smoothie cubes are a simple way to turn a few fresh ingredients into a refreshing homemade snack. With ripe fruit, plain yogurt, and a little freezer time, you can prepare a colorful batch that is easy to portion and convenient to have ready whenever your dog deserves a cool treat.
Tips for Serving Frozen Dog Treats Safely

Homemade frozen treats can be a fun addition to your dog’s routine, especially during warm weather, but I always keep safety and portion size in mind before handing one over. A frozen snack may look small, yet the ingredients and serving size still matter.
After making several different recipes, I have found that a few simple habits make homemade treats much easier to serve responsibly. The goal is not to give your dog as many treats as possible, but to offer a small, enjoyable snack that fits comfortably into their overall diet.
Start With a Small Portion
When introducing a new frozen treat, start with a small serving.
This is particularly important when the recipe contains an ingredient your dog has never eaten before. A small portion makes it easier to see how your dog responds before offering more.
For smaller dogs, tiny silicone molds are especially useful because they naturally create manageable portions.
Consider Your Dog’s Size
A frozen treat that is reasonable for a large dog may be too much for a small dog.
Consider your dog’s:
- Size
- Age
- Activity level
- Normal daily diet
- Individual calorie needs
- Tolerance for the ingredients
I prefer making different sized treats depending on the dog rather than using one large mold for everything.
Check Every Ingredient
Never assume an ingredient is safe simply because it is commonly used in human food.
Before preparing a recipe, check every ingredient carefully. This is particularly important with products such as peanut butter, yogurt, broth, and coconut water because commercial versions can contain added ingredients.
Avoid ingredients that are unsafe for dogs, including:
- Chocolate
- Grapes and raisins
- Xylitol
- Onions
- Garlic
- Macadamia nuts
- Alcohol
- Caffeinated ingredients
When using packaged foods, read the ingredient label instead of relying only on the product name.
Be Careful With Frozen Texture
Frozen treats can be quite hard, especially when they have been stored overnight.
If your dog tends to gulp food or swallow treats without chewing, choose smaller portions or allow the treat to soften slightly before serving.
I also avoid making extremely large or rock hard pieces because they can be difficult for some dogs to manage.
Always supervise your dog while they are enjoying a frozen treat.
Do Not Replace Regular Meals
Frozen treats should complement your dog’s normal diet rather than replace it.
Even when you are using nutritious ingredients such as fruit, pumpkin, yogurt, or sweet potato, these foods do not necessarily provide everything your dog needs from a complete and balanced diet.
Think of homemade frozen treats as occasional rewards.
Keep Treats Within a Reasonable Daily Amount
Treats can add calories surprisingly quickly, particularly when recipes contain ingredients such as peanut butter, yogurt, banana, or other calorie dense foods.
Keep the total amount of treats in mind throughout the day rather than looking at each treat separately.
If your dog has already had several treats, you may want to offer a smaller frozen snack or skip it that day.
Introduce New Foods Gradually
If a recipe contains several ingredients your dog has never tried, I would not introduce everything at once.
Start with small amounts of unfamiliar foods whenever possible. This can make it easier to identify which ingredient your dog tolerates well.
It is also helpful to keep recipes simple when you are first experimenting with homemade treats.
Watch for Digestive Changes
Every dog is different. Even ingredients that are generally suitable for dogs may not agree with every individual dog.
After introducing a new treat, pay attention to changes such as:
- Loose stool
- Vomiting
- Excessive gas
- Itching
- Reduced appetite
- Other unusual reactions
If your dog has a significant or persistent reaction, stop giving the treat and contact your veterinarian.
Store Frozen Treats Properly
Once your treats are completely frozen, transfer them into clean, airtight freezer safe containers.
I like labeling each container with the recipe name and preparation date. This is especially helpful when you have several varieties in the freezer.
Keeping treats sealed also helps prevent freezer odors from affecting their flavor.
Do not refreeze treats that have been completely thawed and left sitting out for an extended period.
Be Extra Careful With Puppies and Dogs With Special Diets
Puppies have different nutritional requirements from adult dogs, while senior dogs and dogs with certain health conditions may have additional dietary restrictions.
A homemade treat that works well for one dog may not be appropriate for another.
If your dog has allergies, digestive problems, a medical condition, or is following a veterinarian prescribed diet, talk with your veterinarian before adding homemade frozen treats.
Always Keep Fresh Water Available
Frozen treats can be refreshing, but they should never replace your dog’s regular access to clean drinking water.
Make sure your dog has fresh water available throughout the day, particularly during warm weather and after exercise.
I think of frozen treats as a fun extra rather than a substitute for proper hydration.
Make Safety Part of the Recipe
The easiest way to enjoy homemade frozen dog treats is to keep the recipes simple, use appropriate ingredients, make sensible portions, and supervise your dog while eating.
A little preparation goes a long way. When I make a batch, I always check the labels, use small molds, and store everything properly so the treats are ready when I need them.
Homemade frozen treats can be a wonderful occasional addition to your dog’s snack routine. With the right ingredients and thoughtful portion sizes, you can keep the experience enjoyable while still putting your dog’s overall diet and safety first.
Signs Your Dog May Be Overheated

Frozen snacks help cool dogs down, but they are not a replacement for proper heat safety.
Watch for these warning signs:
- Excessive panting
- Drooling
- Lethargy
- Bright red gums
- Vomiting
- Weakness
- Difficulty walking
If you notice severe symptoms, contact a veterinarian immediately.
Best Tools for Making Frozen Dog Snacks

These kitchen tools make preparation easier:
- Silicone molds
- Ice cube trays
- Mini popsicle molds
- Blender or food processor
- Reusable freezer containers
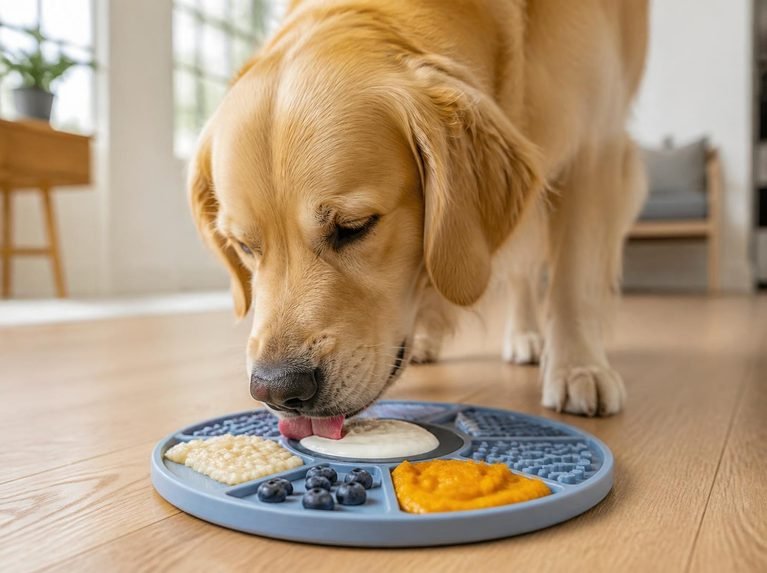
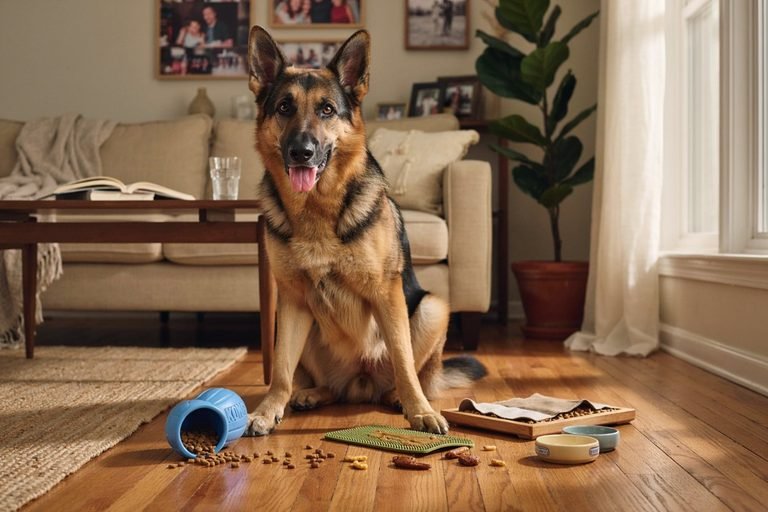
- Lick mats
Lick mats are especially useful because they slow down eating and provide mental stimulation.
How to Store Homemade Frozen Dog Treats

Homemade frozen treats should be stored properly to maintain freshness.
Storage Tips
- Store in airtight containers
- Label with preparation dates
- Keep frozen for up to 2 months
- Avoid freezer burn by sealing tightly
Can Puppies Eat Frozen Treats?

Yes, puppies can enjoy frozen treats in moderation. Cold snacks can soothe teething discomfort. However:
- Keep portions small
- Avoid too much dairy
- Use soft textures
- Consult your vet for very young puppies
Benefits of Homemade Dog Treats Over Store-Bought Snacks

Making homemade dog treats has become one of my favorite ways to add variety to my dog’s snack routine. Store bought treats can certainly be convenient, but preparing treats at home gives me much more control over the ingredients, portions, and flavors I offer.
That does not mean every homemade treat is automatically healthier than a commercial product. A well formulated commercial treat can be perfectly appropriate for dogs. The real advantage of homemade treats is that you know exactly what you are putting into the recipe and can adjust it to suit your dog’s individual preferences.
Here are some of the biggest reasons I enjoy making homemade treats at home.
1. You Control the Ingredients
One of the biggest advantages is knowing exactly what goes into the treat.
When I make frozen yogurt bites, fruit pops, or savory broth cubes, I can choose each ingredient myself. There is no need to add unnecessary sweeteners, heavy sauces, artificial flavors, or ingredients my dog does not need.
This also makes simple recipes easier to customize.
2. You Can Avoid Unnecessary Additives
Some commercial snacks contain preservatives, artificial colors, flavorings, or other ingredients that you may prefer to limit.
Homemade recipes allow you to keep things simple. A frozen treat might contain nothing more than plain yogurt and blueberries, while another might use pumpkin and banana.
The shorter ingredient list makes it much easier to understand what your dog is actually eating.
3. Portion Control Is Easier
Portion size is something I pay close attention to when making treats.
Store bought snacks come in predetermined sizes, which may not always be ideal for every dog. When making treats at home, you can use small silicone molds to create portions appropriate for your dog’s size.
This is particularly helpful for smaller dogs that may only need a very small snack.
4. You Can Customize Recipes
Every dog has different preferences.
Some dogs go crazy for peanut butter, while others would choose strawberries, pumpkin, blueberries, or chicken every time. Homemade treats make it easy to experiment with flavors your dog already enjoys.
You can also adjust the texture. Blend ingredients completely for a smooth treat or leave tiny pieces of fruit for a little texture.
5. Homemade Treats Can Help Use Leftover Ingredients
This is one of the practical benefits I appreciate most.
If I have half a banana, some leftover pumpkin puree, a few strawberries, or a little plain yogurt that needs to be used, I can turn those ingredients into frozen treats rather than throwing them away.
It is a simple way to make the most of food already in the kitchen.
6. You Know What Your Dog Is Eating
Reading a long ingredient label on a packaged treat can sometimes feel overwhelming.
With a homemade recipe, the ingredient list is right in front of you.
You know whether you used fresh strawberries, plain yogurt, pumpkin puree, or natural peanut butter. This can be particularly useful when you are trying to keep your dog’s treats simple.
7. They Can Be Adapted for Individual Needs
Homemade treats can sometimes be adjusted more easily than packaged snacks.
For example, you can make smaller portions for a small dog or leave out an ingredient your dog does not tolerate.
However, dogs with allergies, medical conditions, food sensitivities, or veterinarian prescribed diets may need more specific nutritional guidance. Homemade treats should not be modified casually in those situations.
8. They Can Add Variety to Your Dog’s Routine
Dogs can enjoy variety just like people do.
Instead of giving the same commercial biscuit every day, you can rotate between a few simple homemade options.
One week you might prepare blueberry yogurt drops, while another batch could be pumpkin bites or watermelon cubes.
I find this especially useful during warmer months when frozen treats naturally feel more appealing.
9. They Can Be More Budget Friendly
Depending on the ingredients you choose, homemade treats can also be economical.
You do not need specialty ingredients or expensive equipment. A blender, silicone molds, and a few basic foods from the grocery store are enough for many recipes.
Making a larger batch can also mean fewer individual treat purchases throughout the week.
10. Making Them Can Become Part of Your Routine
There is also something enjoyable about preparing a batch of treats specifically for your dog.
I like knowing that a few minutes in the kitchen can give me several days of homemade snacks. Once they are frozen and stored, there is very little work involved.
It also makes it easier to keep portions consistent instead of reaching into a large bag of treats and guessing how much you have given.
Homemade Does Not Always Mean Healthier
This is an important point worth remembering.
Peanut butter, banana, yogurt, and other wholesome ingredients can still contribute calories. Homemade treats can become excessive if they are offered too frequently or in large portions.
The goal is not to make unlimited treats simply because the ingredients are natural. The goal is to make thoughtful snacks that fit into your dog’s overall diet.
Your dog’s main food should still provide the complete and balanced nutrition they need.
When Store Bought Treats May Be the Better Choice
There is nothing wrong with using commercial dog treats when they are appropriate for your dog.
They can be convenient, easy to portion, and useful when you are traveling or simply do not have time to prepare something at home. Some commercially produced treats are also formulated with specific nutritional considerations.
For me, homemade and store bought treats do not have to be an either or decision. I like having both options available.
Homemade treats give me control and variety, while commercial treats provide convenience when I need it.
The Bottom Line
The biggest benefit of homemade dog treats is control. You can choose the ingredients, adjust the portions, experiment with flavors, and prepare snacks around what your dog enjoys.
When you keep the recipes simple and treats moderate, homemade frozen snacks can be a fun addition to your dog’s routine. Just remember that natural ingredients are not automatically appropriate in unlimited amounts, and every dog has individual nutritional needs.
A little planning can turn everyday ingredients into simple homemade treats that both you and your dog can enjoy.
Fun Ways to Serve Frozen Dog Snacks

Make treat time more exciting with creative serving ideas.
Stuff Into Toys
Freeze treats inside rubber enrichment toys for longer-lasting entertainment.
Make Frozen Lick Bowls
Spread yogurt mixtures inside bowls and freeze them.
Create Doggy Popsicles
Use pet-safe popsicle molds with edible sticks like carrot sticks.
Frozen Treasure Hunt
Hide frozen cubes around the yard for enrichment play.
Frequently Asked Questions
How often can dogs eat frozen treats?
Most dogs can safely enjoy small frozen treats several times a week in moderation.
Is yogurt safe for dogs?
Plain unsweetened yogurt is generally safe for many dogs, but avoid flavored yogurts with added sugar or xylitol.
Can frozen treats replace water?
No. Dogs still need constant access to fresh clean drinking water.
Are ice cubes safe for dogs?
Yes, for most dogs. However, very large ice chunks may pose risks for aggressive chewers.
Final Thoughts
Hot weather can be uncomfortable and even dangerous for dogs, but homemade frozen snacks offer a fun, affordable, and healthy way to help your furry companion stay cool and happy.
From fruity watermelon cubes to creamy peanut butter banana bites, these frozen treats are easy to make and packed with dog-friendly nutrition.
They also provide hydration, mental stimulation, and enrichment that many dogs truly enjoy.
The best part is that you can customize recipes based on your dog’s preferences and dietary needs.
Whether your dog loves fruity flavors, savory broth cubes, or creamy yogurt snacks, there’s a refreshing frozen treat here for every pup.
As temperatures rise, keeping your dog cool becomes essential.
Along with plenty of fresh water, shade, and safe outdoor habits, these frozen snacks can become a healthy part of your summer routine.
Your dog will definitely thank you with plenty of happy tail wags.